
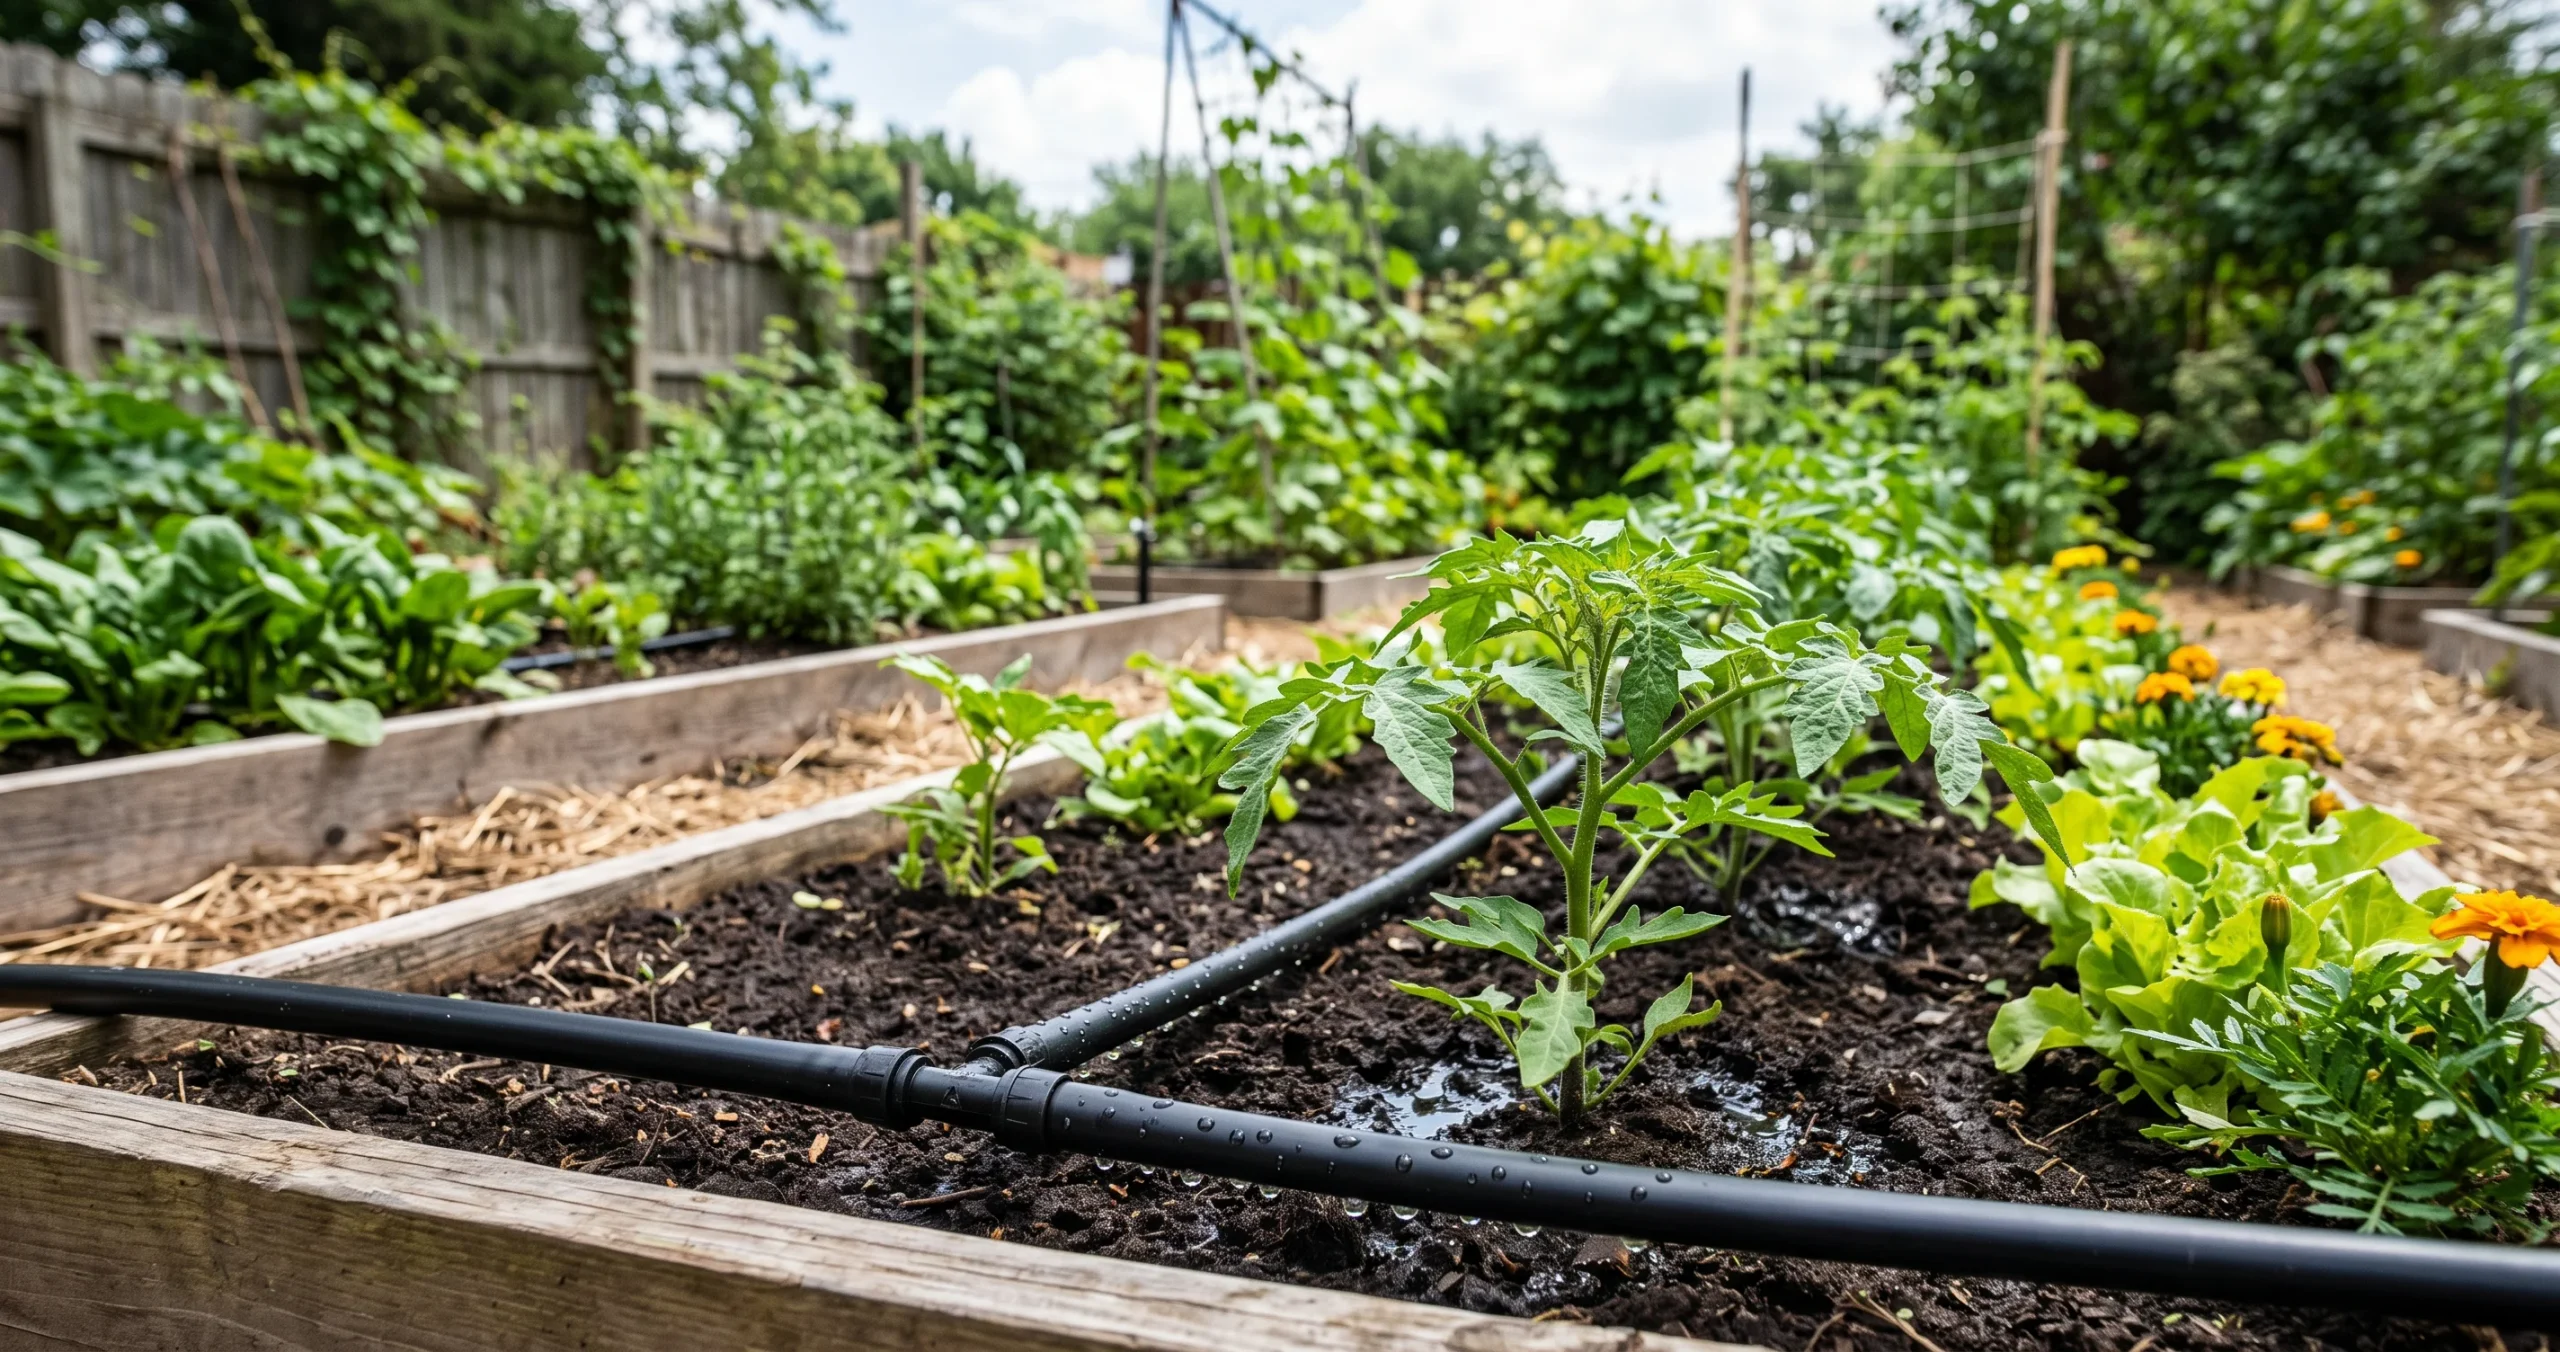
A simple drip irrigation system can turn daily hand-watering into a mostly automatic routine without requiring professional plumbing. Instead of spraying an entire bed, drip irrigation moves water slowly through tubing and releases it close to plant roots, where vegetables can actually use it.
For a beginner, the biggest advantage is simplicity. Start with one vegetable bed, connect tubing to an outdoor faucet, add the appropriate pressure and filtration components, position emitters or dripline, and let a timer handle the schedule. The system still needs monitoring, but you no longer have to stand there holding a hose every morning.
Table of Contents
- What Is Drip Irrigation?
- What You Need to Get Started
- Choosing the Right Type of Drip System
- Simple Drip Irrigation System: Step-by-Step Setup
- Drip Layout by Vegetable Type
- How Long Should Drip Irrigation Run?
- Does Drip Irrigation Really Save Water?
- Common Drip Irrigation Problems and Their Fixes
- Seasonal Maintenance
- Common Drip Irrigation Myths
- How Much Does a Beginner System Cost?
- Frequently Asked Questions
- Conclusion
What Is Drip Irrigation?
Drip irrigation uses tubing and small water-delivery devices to apply water slowly at or near the soil surface. Colorado State University Extension describes drip irrigation as a low-flow, low-pressure system that can be readily adapted to home vegetable and flower gardens.
Unlike a sprinkler, which throws water through the air over a large area, drip irrigation targets relatively small areas of soil. Unlike hand-watering, it can operate automatically on a timer.
A soaker hose is similar in concept but releases water through porous material or openings along much of its length. A true drip system can offer more control through individual emitters or manufactured dripline with emitters spaced at predictable intervals.
The basic pathway looks like this:
OUTDOOR SPIGOT
↓
BACKFLOW PREVENTER — if required
↓
TIMER
↓
FILTER
↓
PRESSURE REGULATOR
↓
MAIN TUBING
↓
DRIPLINE / EMITTERS
↓
PLANT ROOT ZONE
The exact order of faucet-side components can vary among products. Follow the instructions supplied with your timer, filter, regulator, backflow device, and irrigation kit rather than assuming every system must be assembled identically.
What You Need to Get Started
You do not need to buy every irrigation accessory on the shelf.
For a basic faucet-fed system, you will typically need main polyethylene tubing, dripline or individual emitters, compatible fittings, stakes, end closures, and tools for cutting or punching the tubing.
A timer automatically starts and stops irrigation. A filter catches particles that could clog tiny water passages, while a pressure regulator reduces water pressure to the range specified by your drip components.
Backflow prevention protects the potable water supply from reverse flow. Requirements differ by water source and local plumbing regulations, so check with your water provider or local authority rather than assuming one universal configuration.
Filtration deserves special attention. Small emitters are vulnerable to sediment, algae, and other particles, especially when irrigation water does not come from a clean municipal supply.
Choosing the Right Type of Drip System
Three approaches are particularly useful in vegetable gardens.
Dripline with built-in emitters has outlets installed at regular intervals. It works well for vegetable rows and closely spaced crops because one line can distribute water along the planting.
Individual button emitters attach to main tubing or smaller distribution tubing. They provide greater flexibility around widely spaced plants such as tomatoes, peppers, squash, and individual herbs.
Soaker-style tubing or hose releases water along its length. It can be simple to install, but water delivery may be less precisely metered than with manufactured emitters.
Colorado State University Extension recommends designing emitter placement around plant needs and soil conditions rather than assuming the same arrangement works everywhere.
Simple Drip Irrigation System: Step-by-Step Setup
Step 1 — Map the Garden
Draw a basic plan before buying tubing.
Mark the faucet, beds, rows, containers, pathways, and major plants. Decide where the main tubing can run without becoming a constant trip hazard.
Step 2 — Identify the Water Source
For many small gardens, the easiest source is an outdoor hose bib.
Check that the fittings you plan to buy are compatible with your water source. Systems supplied by wells, ponds, rainwater, or other non-potable sources may need different filtration or design considerations.
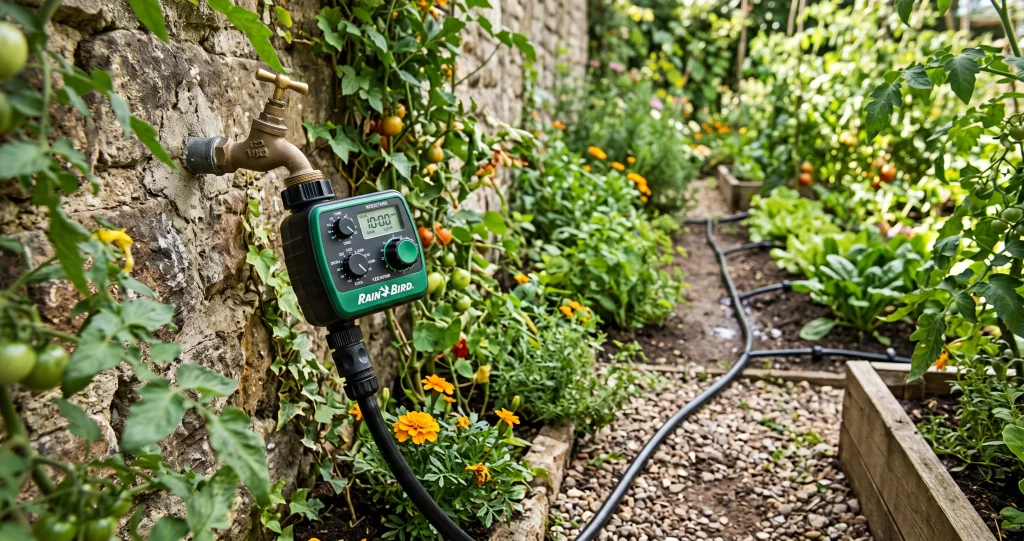
Step 3 — Connect the Faucet Components
Install the required head components according to manufacturer directions.
Depending on the system, these may include a timer, backflow prevention, filter, and pressure regulator. Drip equipment operates at relatively low pressure, so attaching low-pressure components directly to unsuitable high pressure can cause poor performance or failed connections.
Step 4 — Lay the Main Tubing
Run the main tubing toward or through the vegetable bed.
Avoid sharp kinks. Allow enough flexibility to route the line naturally around corners and obstacles.
Step 5 — Add Dripline or Individual Emitters
For a row of lettuce or beans, running dripline beside the row may be easiest.
For tomatoes or widely spaced peppers, you can branch smaller tubing from the mainline and position emitters near individual root zones.
The objective is not to wet the stem itself continuously. You are trying to create an appropriately moist volume of soil where active roots can absorb water.
Step 6 — Secure the Tubing
Use irrigation stakes to keep tubing where you want it.
Lines can often be covered with mulch once the system has been tested. This keeps the installation tidier and reduces movement, but leave connections accessible enough to inspect and repair.
Step 7 — Flush the System
Before sealing every line end, turn on the water.
Allow water to flush out particles that entered during cutting and installation. Then close the line ends according to the system design.
Step 8 — Test Every Watering Zone
Turn the system on again and walk the entire bed.
Look for leaking fittings, disconnected tubing, blocked emitters, and places receiving too much or too little water.
Step 9 — Add the Timer
A timer removes the repetitive task of opening and closing the faucet.
It does not decide how much water your vegetables actually need. Think of it as an automation device rather than an intelligent watering system.
Step 10 — Adjust Watering Based on the Soil
Run the system, wait for water to move through the soil, and inspect moisture several inches below the surface.
Your goal is moisture reaching the active root zone without prolonged puddling, runoff, or saturated soil.
Drip Layout by Vegetable Type
| Vegetable | Practical Starting Layout |
|---|---|
| Tomatoes | Targeted emitters around the active root zone |
| Peppers | Individual emitters or appropriately spaced dripline |
| Cucumbers | Dripline following the planting row |
| Squash | Targeted watering around the rooted base, not the sprawling vines |
| Lettuce | Closer-spaced dripline for more even soil moisture |
| Beans | Dripline following the row |
| Herbs | Individual emitters for widely spaced plants; dripline for dense rows |
These are starting patterns, not universal formulas. Emitter flow rate, spacing, soil texture, root development, and crop water demand all affect the final design.
For example, water tends to move differently through coarse sandy soil than through fine-textured clay soil. Your wetting pattern should therefore guide adjustments.
How Long Should Drip Irrigation Run?
There is no scientifically useful universal answer such as “run drip irrigation for 20 minutes.”
Runtime depends on emitter flow, spacing, number of emitters, soil texture, temperature, rainfall, plant size, crop growth stage, and mulch.
Sandy soil drains quickly and often produces a narrower wetting pattern. Clay-rich soil generally absorbs and redistributes water differently and may require slower application or scheduling adjustments to prevent ponding and runoff.
Vegetable water demand changes through the season too. University of Minnesota Extension notes that crop water needs and acceptable soil-water deficits vary with growth stage, and excessive irrigation can also cause problems such as nutrient leaching.
The simplest home-garden test is physical.
After watering, inspect the soil below the surface. If only the top layer is damp while the root zone remains dry, the watering pattern needs adjustment. If soil stays saturated or water pools, reduce application or change scheduling.
Recheck during hot weather, after significant rainfall, and as plants become larger.
A timer saves labor. It does not eliminate observation.
Does Drip Irrigation Really Save Water?
A well-designed simple drip irrigation system can reduce unnecessary water loss because it applies water close to plants instead of routinely spraying paths, fences, and other areas where no crop is growing.
Slow application can also reduce runoff, wind drift, and some evaporation losses compared with poorly managed overhead irrigation. Colorado State University Extension identifies these as important advantages of drip irrigation.
Avoid promising that every gardener will save an exact percentage.
Actual savings depend on what irrigation method the drip system replaces, how accurately it is designed, the watering schedule, soil, climate, maintenance, and whether leaks or overwatering occur.
Keeping foliage dry can provide another benefit for certain disease-management programs. University of Minnesota Extension recommends drip irrigation as one way to reduce leaf wetness when managing some garden diseases, but drip irrigation certainly does not make plants disease-proof.
7 Common Drip Irrigation Problems and Their Fixes
1. One Emitter Stops Dripping
A small passage may be clogged.
Inspect and clean or replace the emitter, flush the line, and check whether filtration is adequate.
2. Plants Near the Faucet Get Water but Distant Plants Do Not
The system may have excessive line length, too much total flow demand, unsuitable pressure, or an inefficient layout.
Check system specifications before simply adding more emitters.
3. Connections Keep Popping Apart
Excessive pressure or incompatible fittings may be responsible.
Confirm that the regulator and fittings match the tubing manufacturer’s requirements.
4. Water Pools Around One Plant
Reduce the emitter flow, change its position, shorten runtime, or split the watering into suitable cycles.
Persistent pooling can indicate poor drainage as well as an irrigation problem.
5. Some Plants Stay Dry
Check whether the emitter is actually operating and whether its wetting pattern reaches the roots.
Move or add emitters when plant growth and soil conditions justify it.
6. Emitters Clog Repeatedly
Repeated clogging points toward filtration or water-quality problems.
Clean the filter and periodically flush the system. Water from ponds and wells may require greater filtration than clean municipal water.
7. Plants Become Overwatered
Drip irrigation can absolutely overwater a garden.
If a timer runs too frequently or too long, the system will faithfully deliver too much water. Colorado State University Extension specifically warns that overwatering can occur even with drip.
Seasonal Maintenance
A drip system is low-maintenance, not maintenance-free.
Regularly walk the lines while they are operating. Inspect emitters, repair punctured tubing, clean filters, and flush line ends periodically.
Move emitters when necessary as root systems expand. Change timer schedules as temperatures rise or fall and account for meaningful rainfall rather than blindly following the same program all season.
In freezing climates, follow the manufacturer’s winterization procedure. Faucet-mounted timers, regulators, filters, and other vulnerable components may need to be drained and stored, while some systems require lines to be drained or blown out.
Common Drip Irrigation Myths
Myth: Drip Irrigation Is Only for Professional Farms
Home drip equipment is widely available and can be installed by DIY gardeners. Starting with one bed makes the project especially manageable.
Myth: Every Plant Needs Exactly One Emitter
No. The required wetting area and flow depend on plant size, soil, emitter output, and root distribution.
Myth: The Timer Never Needs Changing
Weather and plant water use change throughout the growing season.
Your schedule should change too.
Myth: Drip Irrigation Cannot Overwater Plants
It can.
A perfectly functioning automated system can still deliver far too much water if programmed incorrectly.
Myth: More Emitters Always Mean Healthier Plants
Extra emitters increase water delivery and system flow demand.
Install what is needed to wet the appropriate root zone rather than maximizing the number of outlets.
Myth: Drip Irrigation Prevents Plant Disease
Keeping foliage drier can help reduce conditions favorable to certain diseases, but pathogens can spread in many other ways.
Drip irrigation is one management tool, not disease immunity.
Start With One Bed, Not the Entire Garden
You do not need to automate every vegetable bed on day one.
A practical beginner setup can be as simple as:
Faucet connection + timer + appropriate backflow/filtration/pressure control + main tubing + dripline or emitters.
Install it on one bed and learn how water moves through your soil.
Cost varies too much to promise one meaningful fixed price. Garden size, timer quality, tubing length, number and type of emitters, filtration needs, fittings, and equipment you already own all affect the total.
Once the first zone works reliably, expanding becomes much easier.
If tomatoes are your main crop, you can also pair this approach with the site’s guide to growing tomatoes in a 5-gallon bucket.
Frequently Asked Questions
Is drip irrigation difficult to install?
A small faucet-fed system is generally approachable for DIY gardeners.
The key is planning one zone first and using compatible tubing, emitters, fittings, filtration, and pressure control.
Does drip irrigation need a pressure regulator?
Many drip components are designed for lower operating pressures than a household water supply provides.
Follow the pressure specifications for your particular products rather than choosing a regulator by guesswork.
How long should I run drip irrigation?
There is no universal runtime.
Calculate what your emitters deliver, consider crop and weather conditions, and check actual soil moisture at root depth.
How many emitters does a tomato plant need?
There is no fixed number that suits every tomato.
Soil texture, emitter flow, plant size, container or bed dimensions, and the resulting wetting pattern determine whether one or multiple emitters are appropriate.
Can drip irrigation connect to an outdoor faucet?
Yes. Many small home systems are specifically designed to connect to a hose bib.
Use the required backflow, filtration, pressure-control, and connection components specified for your setup.
Can drip tubing go underneath mulch?
Often, yes.
Colorado State University Extension recommends positioning mainline above weed fabric and under mulch in suitable installations, which can hide and protect the tubing.
How often should drip lines be flushed?
There is no useful universal calendar for every water source.
Flush during initial installation, after repairs or contamination, and as part of routine maintenance. Systems using water with more sediment may need more frequent attention.
Can I leave the system outdoors during winter?
Some tubing can remain outdoors, but freezing climates require appropriate winterization.
Drain the system and handle timers, filters, regulators, valves, and other components according to their manufacturer’s instructions.
Is drip irrigation better than a soaker hose?
It depends on the garden.
A soaker hose can be convenient for simple beds, while drip emitters and manufactured dripline generally provide greater control over outlet placement and known flow rates.
Conclusion
Building a simple drip irrigation system does not have to mean designing an elaborate underground network for the entire property.
Start with one vegetable bed. Connect the correct faucet components, lay a mainline, position dripline or emitters where roots actually need moisture, flush and test everything, then add a timer.
After that, observe the soil.
Adjust the system as plants grow, temperatures change, and rainfall varies. Automation should remove repetitive work without removing the gardener from the decision-making process.
The most useful principle is simple: the goal is not merely to automate watering. The goal is to deliver the right amount of water to the active root zone with as little waste as practical.
External Sources:
- Colorado State University Extension — Drip Irrigation for Home Gardens
Colorado State University Extension guide
Covers drip components, pressure regulation, filters, backflow prevention, emitter placement, soil differences, maintenance, and winterization. - Colorado State University Extension — Irrigating the Vegetable Garden
Colorado State University vegetable irrigation guide
Covers vegetable-garden watering, in-line drip tubing, individual drippers, soaker systems, and changing crop water requirements. - University of Minnesota Extension — Irrigation Strategies for Vegetables
University of Minnesota Extension irrigation guide
Provides research-based guidance on irrigation scheduling, crop growth stages, soil-water management, and avoiding excessive irrigation.