
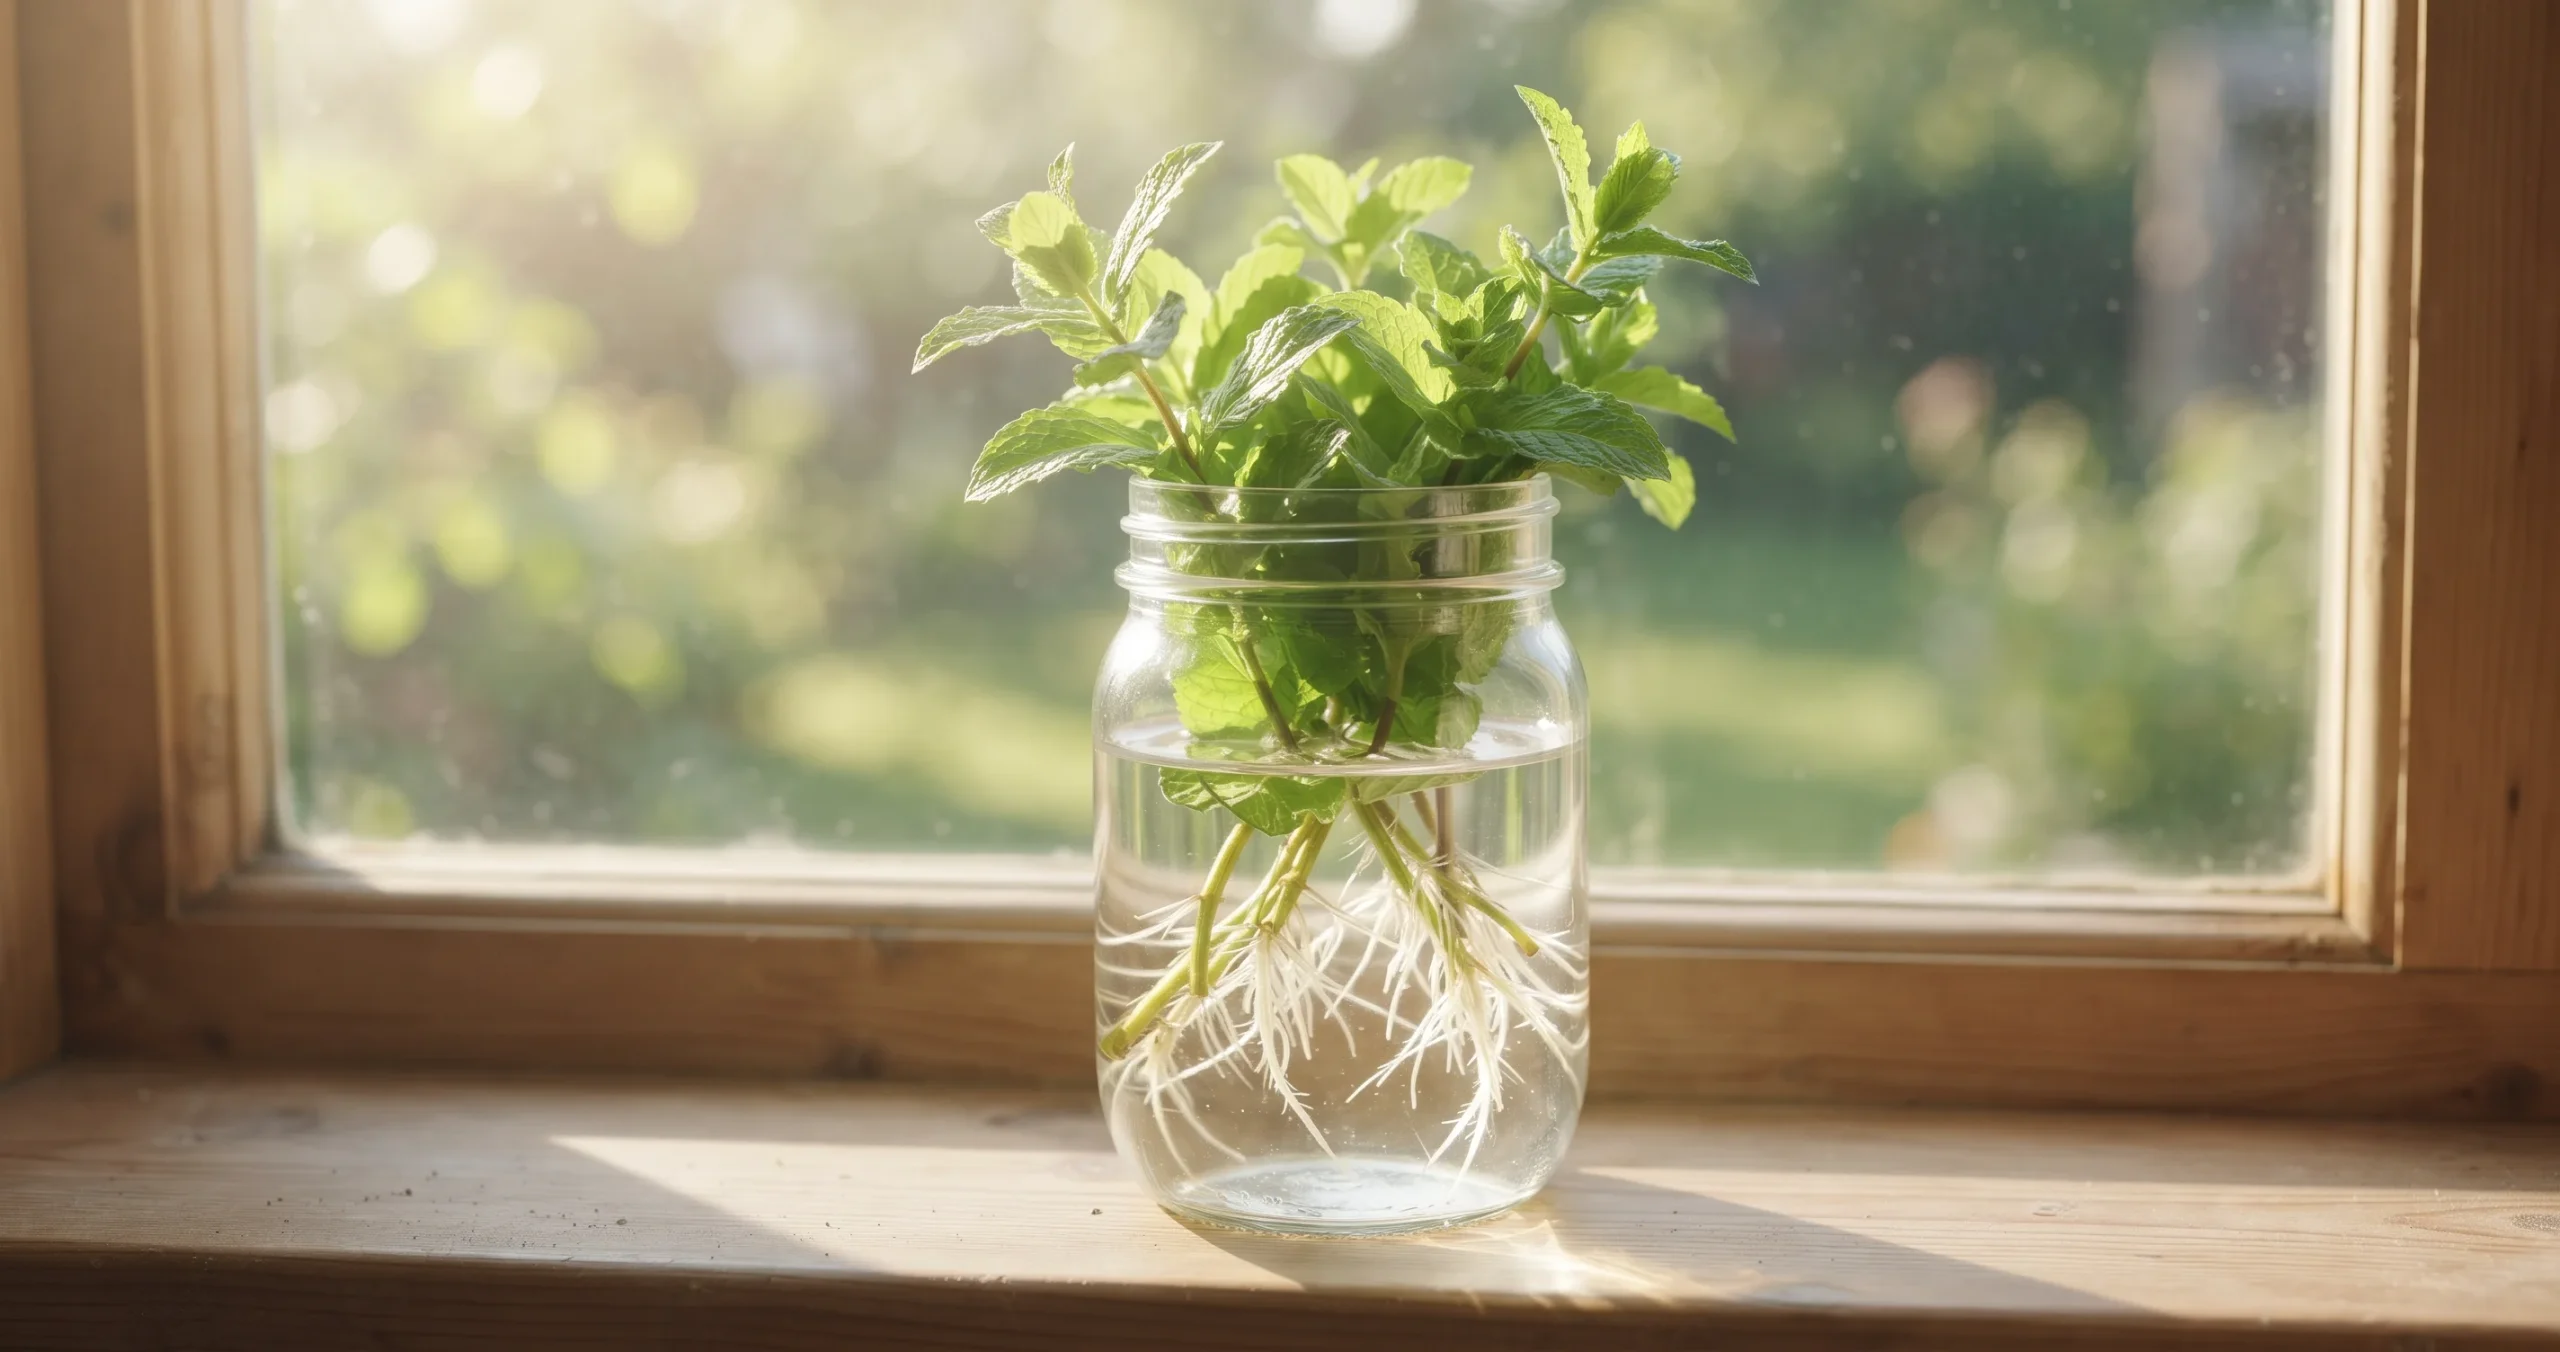
A single sprig of mint can become a whole new plant without seeds, special equipment, or complicated gardening techniques. With a clean glass, fresh water, and a healthy stem, you can watch tiny roots develop right before your eyes.
Learning how to root mint in water is one of the simplest ways to multiply your favorite herbs. Mint naturally produces roots from stem nodes, making it particularly suitable for beginners who want to experiment with plant propagation.
Whether you’re growing peppermint for tea, spearmint for cooking, or another mint variety for its fragrance, water propagation offers an inexpensive way to expand your collection.
The process usually takes about one to two weeks for initial roots to appear, although temperature, light, and cutting health can influence the timing. Once the roots develop sufficiently, the young plant can be transferred to soil for long-term growth.
Table of Contents
- Why Mint Roots So Easily in Water
- What You Need to Root Mint in Water
- How to Root Mint in Water: Step-by-Step
- How Long Does Mint Take to Root?
- When and How to Transfer Mint to Soil
- Choosing the Best Soil and Container
- Why Mint Is Better Grown in Pots
- How to Keep Mint Bushy and Productive
- Growing Mint on a Winter Windowsill
- Other Herbs That Root in Water
- Common Mint Propagation Problems
- Frequently Asked Questions
Why Mint Roots So Easily in Water
Mint belongs to the genus Mentha, a group of aromatic perennial herbs known for vigorous growth and spreading stems.
Many commonly cultivated mint varieties reproduce readily through vegetative propagation. Instead of relying on seeds, gardeners can create new plants from healthy pieces of existing stems.
Stem nodes are the secret
Look closely at a mint stem and you’ll notice places where pairs of leaves emerge.
These points are called nodes.
Under suitable conditions, mint can produce adventitious roots from stem tissues, particularly around submerged nodes.
Adventitious roots are roots that develop from parts of a plant other than its original root system.
When a healthy cutting is placed in water, the stem can begin forming new roots while its remaining leaves continue supporting the plant through photosynthesis.
Why cuttings preserve the parent plant
Seed-grown mint can vary genetically, especially when plants cross-pollinate.
Stem cuttings, however, are vegetative clones of the parent plant.
This means a cutting generally retains the same genetic characteristics as the original mint, including its characteristic aroma and growth habit.
For gardeners growing a particular peppermint or spearmint variety, cuttings are a practical way to preserve those traits.
Why water propagation is convenient
Water makes it easy to observe root development.
You can see whether the cutting is producing roots, whether the water remains clear, and whether the submerged stem appears healthy.
The method also requires very little space.
A small jar on a bright windowsill is often enough to begin.
What You Need to Root Mint in Water
You do not need an expensive propagation kit.
Most of the necessary supplies are already available in an ordinary kitchen or garden.
Basic supplies
- A healthy, established mint plant
- Clean, sharp scissors or pruning snips
- A small glass or jar
- Fresh, room-temperature water
- A bright location with indirect sunlight
- A small pot with drainage holes for transplanting
- Quality potting mix
A transparent jar is particularly useful because it allows you to monitor root development without disturbing the cutting.
However, a clean opaque container can work too.
Choosing the healthiest stems
Select fresh, vigorous growth with firm stems and healthy green leaves.
Avoid cuttings with obvious disease symptoms, extensive insect damage, or soft, rotting tissue.
Nonflowering shoots are usually preferable because they can direct more resources toward root and shoot development rather than reproduction.
If your mint is flowering, choose a healthy vegetative shoot when possible.
How to Root Mint in Water: Step-by-Step
The following method works well for many common culinary mint varieties.
The key is to use a healthy cutting, keep the lower nodes submerged, and provide suitable light without excessive heat.
Step 1: Cut a healthy mint stem
Choose a stem approximately 4–6 inches long, or about 10–15 centimeters.
Use clean scissors to make a cut just below a leaf node.
A clean cut reduces unnecessary tissue damage and makes the cutting easier to prepare.
Take cuttings during active growth when the parent plant is healthy and well hydrated.
Step 2: Remove the lower leaves
Strip the leaves from the lower portion of the stem.
Leave several healthy leaves near the top so the cutting can continue photosynthesis.
Any leaves that would sit below the waterline should be removed.
Submerged leaves tend to decay, which can cloud the water and encourage microbial growth.
Step 3: Fill a clean jar with water
Choose a glass or jar large enough to support the cutting upright.
Add fresh, room-temperature water.
You do not need fertilizer or rooting hormone for most healthy mint cuttings.
Plain water is usually sufficient to initiate root formation.
Step 4: Submerge the bare nodes
Place the cutting in the jar so that one or more bare nodes remain underwater.
Keep the upper leaves above the waterline.
If the cutting is too short or unstable, use a narrower container to help support it.
Avoid crowding too many stems into a small jar because crowded cuttings are harder to monitor and may restrict airflow around the foliage.
Step 5: Place the jar in bright, indirect light
Position the container near a bright window.
Mint cuttings benefit from sufficient light to maintain healthy leaves, but strong direct sunlight can overheat the water.
An east-facing window or a location with bright, filtered light often works well.
Keep the jar away from hot radiators, heating vents, and cold drafts.
Step 6: Change the water regularly
Replace the water every two to three days, or sooner if it becomes cloudy.
Rinse the container when necessary to remove buildup.
Handle the cutting gently, especially once delicate roots begin developing.
Regular water changes help maintain cleaner growing conditions.
Step 7: Watch for new roots
Small white roots may begin appearing after several days under favorable conditions.
For many mint cuttings, noticeable rooting occurs within approximately one to two weeks.
The exact schedule varies.
Cool temperatures, low light, and weak parent plants can delay the process.
Step 8: Prepare for transplanting
Allow the roots to develop enough to support the cutting during transfer.
Several healthy roots roughly 1–2 inches long provide a practical transplanting guide, although exact root length is not a strict requirement.
Once the root system looks reasonably developed, move the cutting into moist potting mix.
Long-term water culture is possible with appropriate hydroponic care, but ordinary water propagation is generally intended as a temporary rooting method.
How Long Does Mint Take to Root?
One of the main reasons gardeners enjoy this method is its relatively quick progress.
Healthy mint cuttings often develop visible roots in about one to two weeks under suitable indoor conditions.
Temperature affects rooting
Warm but not excessively hot conditions generally support active root development.
Very cold windowsills can slow metabolic activity and delay new growth.
Excessive heat can also stress cuttings and encourage water quality problems.
An ordinary comfortable indoor temperature is usually suitable.
Light supports healthy growth
Cuttings need enough light to maintain their leaves and support new tissue development.
Insufficient light may cause weak or elongated growth.
Intense direct sunlight can cause wilting or heat the container.
Bright, indirect light offers a useful balance during rooting.
Different mint varieties may vary
Peppermint, spearmint, apple mint, and other cultivated mints can differ in vigor and rooting speed.
The condition of the parent plant also matters.
A cutting from a healthy, actively growing plant will generally perform better than one taken from a stressed or declining stem.
When and How to Transfer Mint to Soil
Water roots are delicate, and the transition to potting mix should be handled carefully.
A rooted cutting needs consistent moisture while it adapts to growing in soil.
Prepare the pot first
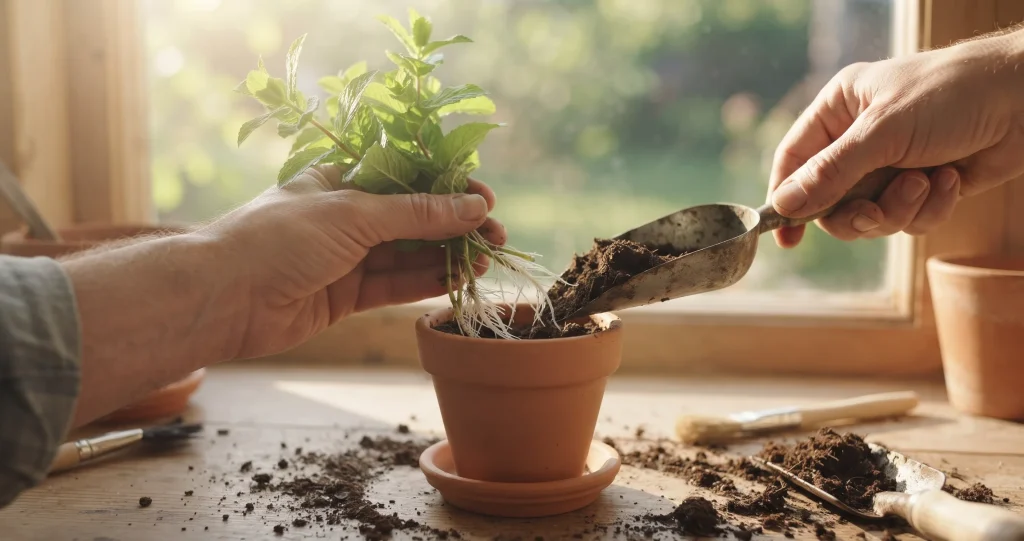
Fill a small container with lightly moistened potting mix.
Create a planting hole large enough to accommodate the roots without bending them sharply.
Lower the cutting into the hole and gently settle the mix around its base.
Avoid pressing the soil too firmly.
Water after transplanting
Water thoroughly after planting, allowing excess moisture to drain.
Keep the potting mix evenly moist during the initial adjustment period.
The cutting may briefly wilt after transplanting because water-grown roots are adapting to a different environment.
Provide bright, indirect light until the plant resumes steady growth.
Watch for new leaves
Fresh leaf development is a useful sign that the cutting is establishing itself.
Once the plant is actively growing, gradually introduce it to brighter conditions appropriate for mint.
Avoid harvesting heavily immediately after transplanting.
Allow the new root system time to support additional growth.
Choosing the Best Soil and Container
Mint grows best when its roots have access to moisture, oxygen, and nutrients.
A container with adequate drainage is important because constantly saturated potting mix can damage roots.
Use a well-draining potting mix
A quality all-purpose container mix is usually suitable.
It should retain some moisture without becoming dense or waterlogged.
Garden soil alone is generally not ideal for pots because it can compact and drain poorly.
Start with a manageable pot
A newly rooted cutting does not require an enormous container.
A small pot approximately 4–6 inches across can provide a suitable starting point.
As the mint grows, move it into a larger container if roots become crowded.
Choose a pot with drainage holes and empty any standing water from the saucer after watering.
Keep moisture consistent
Mint generally prefers soil that remains moderately moist.
However, wet soil should not be confused with constantly saturated soil.
Check the upper layer of potting mix before watering.
Container size, temperature, sunlight, and plant growth all affect how quickly moisture is used.
Why Mint Is Better Grown in Pots
Mint is famous for spreading aggressively.
Many varieties produce underground stems called rhizomes, which can generate new shoots away from the original plant.
Garden beds can become crowded
When mint grows directly in favorable garden soil, it may expand beyond its intended space.
Its spreading habit can make it difficult to keep within a small herb bed.
In some locations, escaped mint may compete with other vegetation.
Container growing helps limit that expansion.
Pots make management easier
A pot allows you to control the growing area, watering, and harvesting.
It also makes it easier to move the plant to a protected location during extreme weather.
If you place a mint pot directly on garden soil, roots may eventually escape through drainage holes.
Set the pot on a suitable surface and check it periodically.
Containers do not eliminate maintenance
Mint can become rootbound and crowded even in a pot.
Divide or repot established plants when growth declines or the root system fills the container.
Regular harvesting also helps maintain a compact shape.
How to Keep Mint Bushy and Productive
Without regular trimming, mint can develop long stems with relatively sparse foliage.
Pruning encourages branching and helps create a fuller plant.
Pinch growing tips
Once the plant is established and actively growing, remove the tender tip just above a pair of leaves.
This reduces the dominance of the main growing tip and encourages side shoots to develop.
Repeat as needed while leaving enough foliage for continued growth.
Harvest above a node
When collecting mint for cooking or tea, cut stems just above a healthy leaf node.
Avoid stripping the entire plant of leaves.
Regular, moderate harvesting is usually more sustainable than removing most of the foliage at once.
Remove flower shoots when appropriate
Flowering is a natural part of mint’s life cycle.
However, gardeners focused on producing tender leaves may prefer to pinch off developing flower stems.
This can help direct growth toward foliage, although flowering mint also provides resources for visiting insects.
The best approach depends on whether your priority is culinary harvesting or supporting pollinators.
Growing Mint on a Winter Windowsill
Mint can continue growing indoors during winter when light, temperature, and moisture are suitable.
However, growth is usually slower when days are short.
Choose the brightest suitable window
Place the pot near a bright window that receives adequate daylight.
A south-facing window may be useful in many Northern Hemisphere homes, provided the plant does not overheat.
If natural light is insufficient, a suitable grow light can support healthier growth.
Rotate the pot occasionally to encourage balanced development.
Avoid cold glass and hot radiators
Winter windowsills can experience significant temperature fluctuations.
Leaves touching very cold glass may become damaged.
Heating vents and radiators can dry potting mix and foliage more quickly.
Position the plant where temperatures remain relatively stable.
Water according to growth
Indoor mint generally uses less water during periods of slow winter growth.
Check the potting mix rather than following a rigid daily schedule.
Water when the upper layer begins to dry, then allow excess water to drain.
Avoid leaving the pot in standing water.
Harvest lightly during winter
A small indoor mint plant may produce fewer leaves than it would during summer.
Harvest modest amounts and allow the plant to recover between cuttings.
With improving spring light, growth often becomes more vigorous.
Other Herbs That Root in Water
Mint is not the only culinary herb that can develop roots from stem cuttings.
Several other herbs can be propagated in water, although their rooting requirements and success rates vary.
Basil
Basil often roots readily from healthy, nonflowering stem cuttings.
Remove the lower leaves and keep the bare nodes submerged.
Warm conditions and bright, indirect light generally encourage rooting.
Oregano
Some oregano varieties can root from soft, healthy cuttings.
Rooting speed depends on the plant’s condition and growing environment.
Keep the water clean and transplant once a suitable root system develops.
Lemon balm
Lemon balm, another member of the mint family, can often be propagated through stem cuttings.
Its growth habit and rooting ability make it a useful herb for gardeners experimenting with vegetative propagation.
Rosemary
Rosemary can be propagated from cuttings, but it generally roots more slowly and less reliably in plain water than mint or basil.
A well-drained propagation medium is often preferred.
Choose young, healthy growth and expect rooting to require more patience.
Common Mint Propagation Problems
Even easy-to-root herbs can encounter difficulties.
Most problems involve water quality, unsuitable light, temperature stress, or weak cuttings.
The stem turns brown or mushy
A soft, darkened stem may indicate decay.
Discard badly affected cuttings and start again with healthy material.
Clean the container thoroughly and remove all leaves that would sit below the waterline.
Leaves wilt before roots appear
A cutting without roots can lose water through its leaves faster than it can replace it.
Move it away from intense sunlight and excessive heat.
Make sure the lower stem remains submerged and that the cutting is not crowded.
Roots are not appearing
Check the cutting’s condition, water level, light, and temperature.
Some cuttings take longer than the usual one-to-two-week window.
If the stem remains firm and the leaves are healthy, additional time may be sufficient.
The water develops an unpleasant smell
Cloudy or foul-smelling water suggests unwanted microbial activity or decaying plant material.
Replace the water, wash the container, and inspect the cutting.
Remove any submerged leaves or damaged tissue.
Clean conditions improve the chances of successful rooting.
Frequently Asked Questions
Can you root mint in water without rooting hormone?
Yes. Healthy mint stem cuttings commonly produce roots in plain water without added rooting hormone. Keeping bare nodes submerged, providing suitable light, and changing the water regularly are usually enough.
How long should mint roots be before planting?
A practical guideline is to transplant when several healthy roots have developed, often around 1–2 inches long. The exact length is less important than having a sufficiently developed root system to support the cutting.
Can mint stay in water permanently?
Mint can be grown in water using appropriate hydroponic methods, but plain water alone does not provide all the nutrients needed for indefinite healthy growth. For most home gardeners, transferring rooted cuttings into potting mix is the simpler long-term option.
Conclusion
Learning to root mint in water is an easy and rewarding way to grow more herbs from plants you already have.
A healthy cutting, clean water, and bright indirect light are usually enough to begin the process. Within approximately one to two weeks, small white roots may appear, signaling the start of a new plant.
Once those roots are established, transferring the cutting into a well-draining pot gives it room to develop.
With regular harvesting, sensible watering, and enough light, your new mint plant can provide fresh leaves for cooking, tea, and everyday use.
External Sources
Growing mint, herb propagation, harvesting, and ongoing plant care. University of Minnesota Extension.