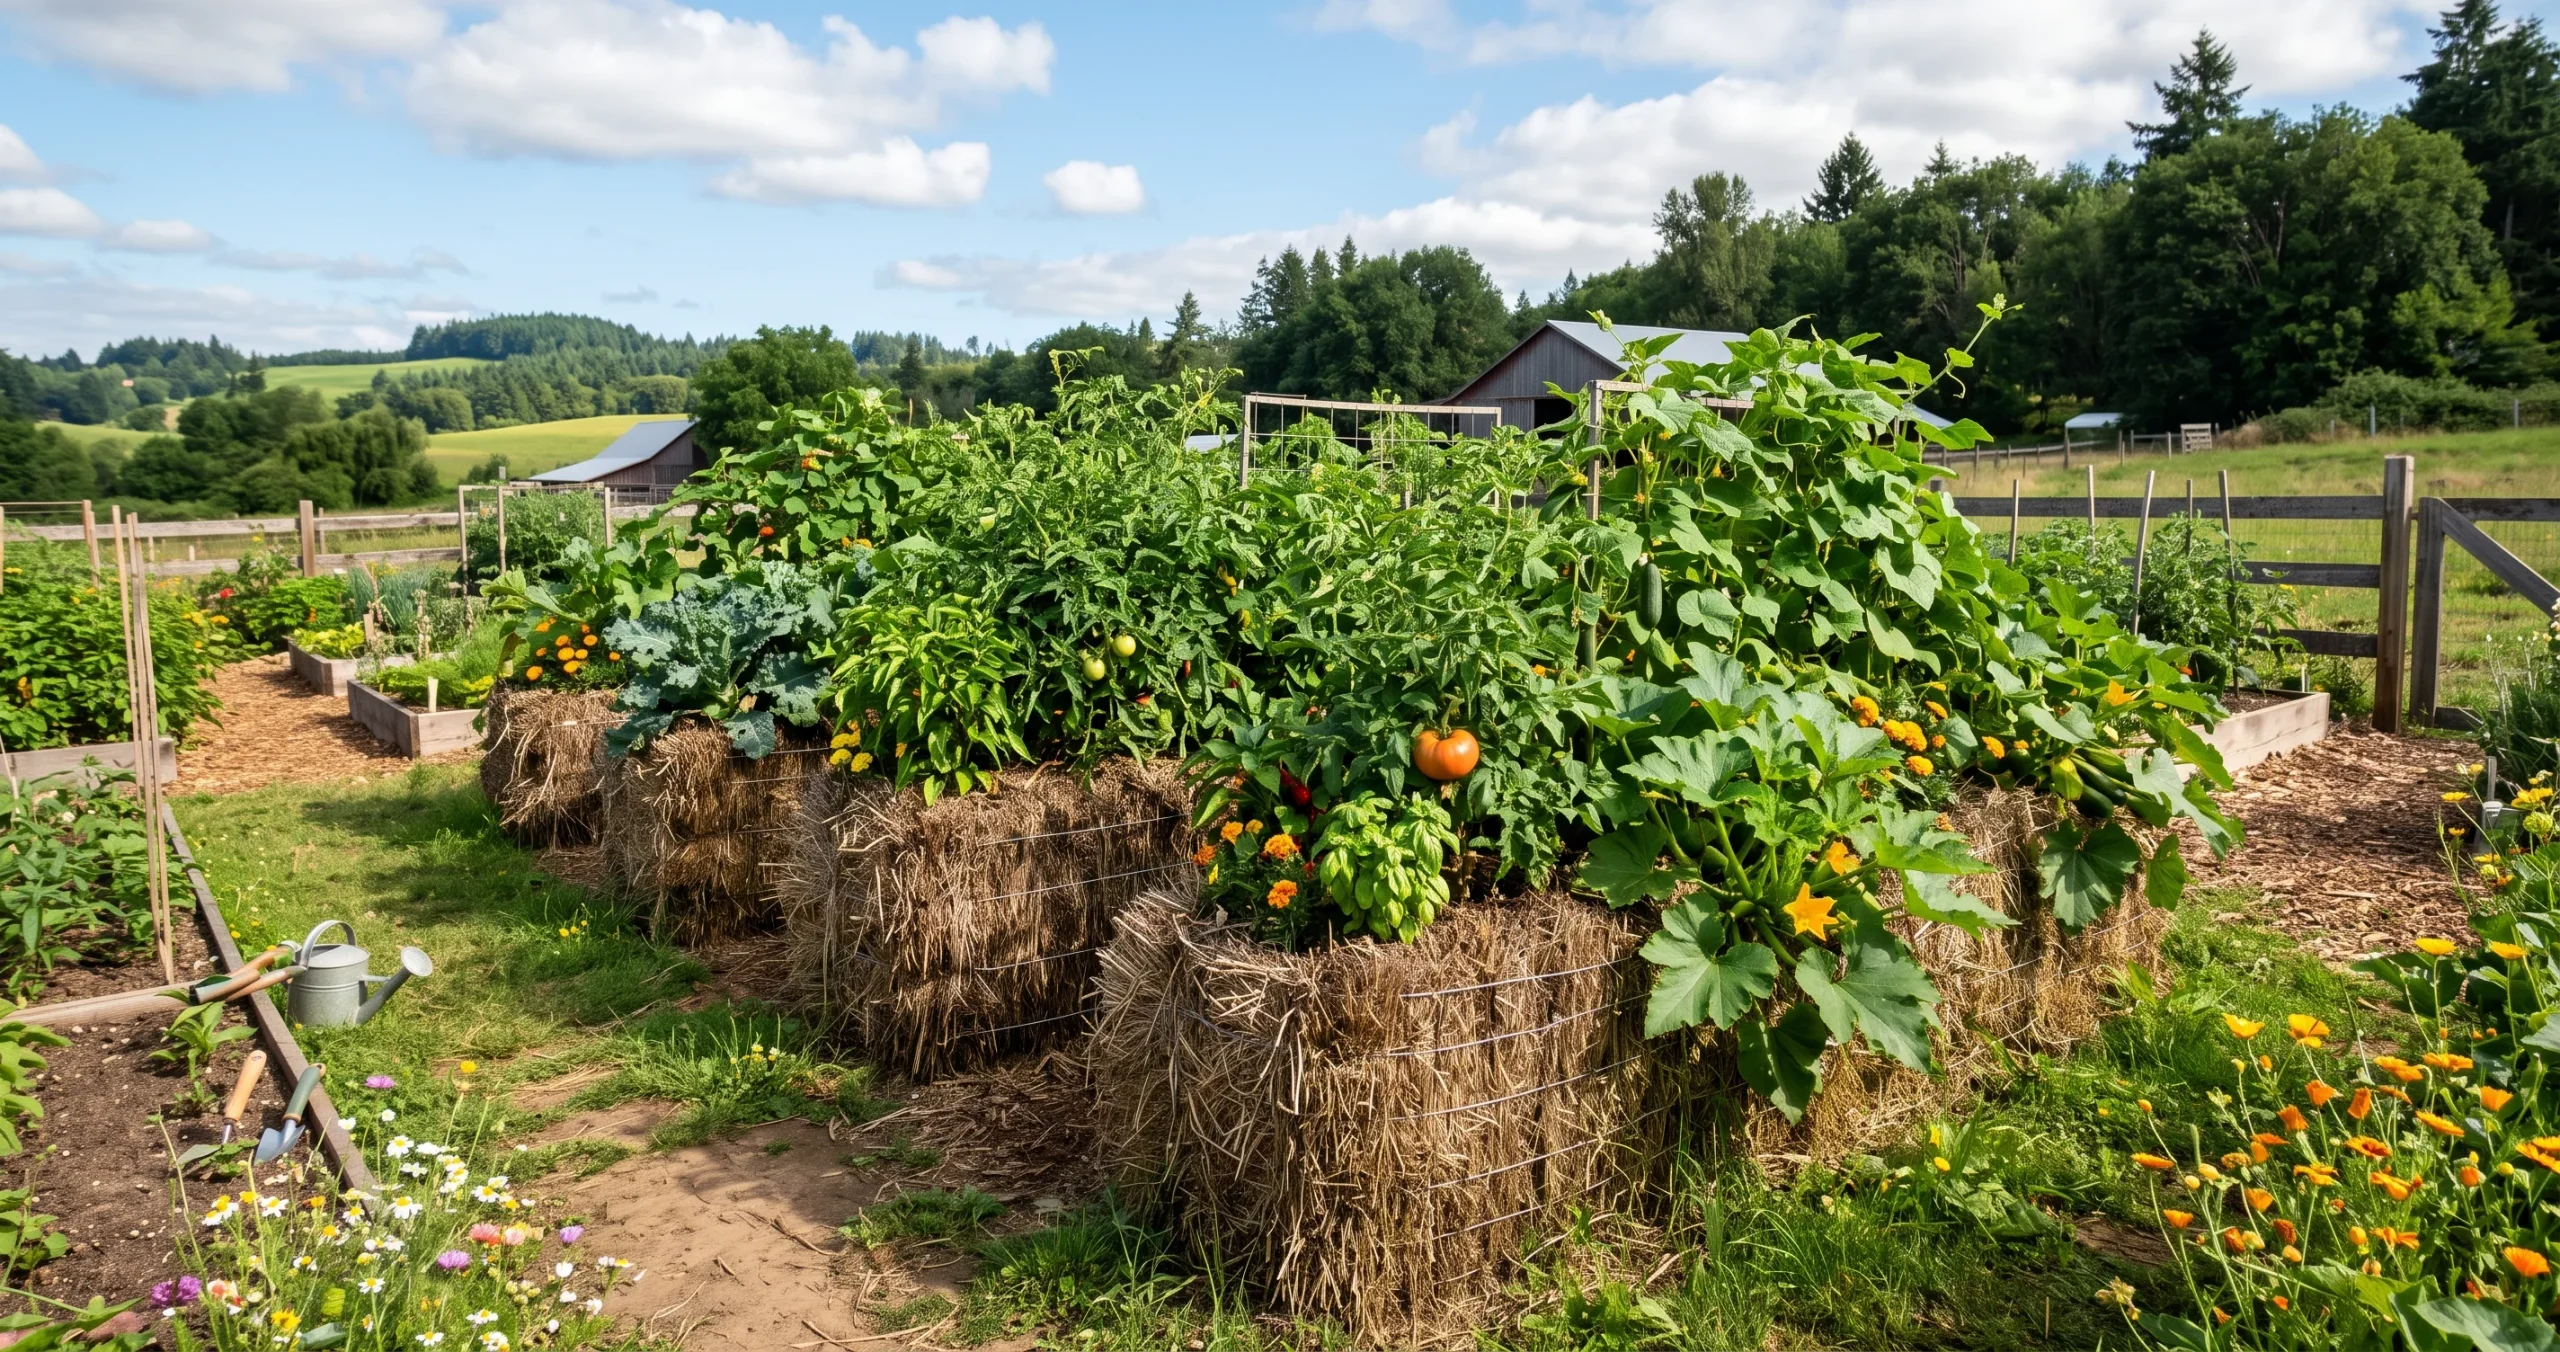
You do not need rich garden soil, a permanent raised bed, or even a traditional backyard plot to grow vegetables successfully. Straw bale gardening turns an ordinary bale of straw into a temporary, elevated growing medium where tomatoes, peppers, cucumbers, greens, herbs, and other crops can develop strong root systems.
The secret is not simply putting plants into dry straw. Before planting, the bale must go through a conditioning period in which water, nitrogen, and microbial activity begin breaking down its interior. The result functions somewhat like a slowly decomposing, compost-rich growing environment.
This approach can be especially useful for gardeners dealing with poor native soil, compacted ground, limited space, or a location where permanent garden beds are impractical.
Table of Contents
- What Is Straw Bale Gardening?
- Why Growing in Straw Bales Works
- Choosing and Positioning the Right Bales
- How to Condition Straw Bales Step by Step
- How to Know When a Bale Is Ready
- Planting Seeds and Transplants
- Best Vegetables for Straw Bale Gardening
- Watering a Straw Bale Garden
- Fertilizing Throughout the Season
- Common Problems and Mistakes
- Straw Bale Gardening Myths
- What to Do With the Bale After Harvest
- Frequently Asked Questions
- Conclusion
What Is Straw Bale Gardening?
Straw bale gardening uses a compressed bale of cereal straw as both the structure and much of the rooting environment for plants.
Instead of filling a wooden raised bed with purchased soil, the gardener conditions the straw until decomposition begins. Plants are then placed directly into openings in the bale or into a shallow layer of growing medium spread across its surface.
As the season progresses, the interior continues breaking down. This creates an increasingly soft, organic environment through which roots can spread.
The Oregon State University Extension Service describes straw bales as a flexible alternative for gardeners who lack yard space or have compacted soil. Extension specialists also note that the elevated height can make gardening more accessible.
Why Straw Bale Gardening Works
A properly conditioned bale behaves a little like a compost pile that plants can grow inside.
Straw contains a large amount of carbon. Adding nitrogen and moisture encourages microorganisms to begin decomposing that carbon-rich material. The microbial activity generates heat and gradually changes the hard, dry interior into a softer growing environment.
This is why conditioning is essential. A fresh, dry bale is not automatically a suitable planting medium.
An Option for Poor Soil
One of the strongest reasons to try straw bale gardening is that the condition of the soil underneath matters far less than it would in a conventional vegetable garden.
Heavy clay, compacted ground, rocky soil, or otherwise difficult sites do not necessarily prevent you from growing vegetables above them. Illinois Extension specifically identifies poor soil and limited gardening space as situations where bale gardening can be useful.
Bales can even be positioned on some paved or temporary spaces, provided drainage, sunlight, stability, and water access are appropriate.
This makes the technique useful for renters or gardeners who do not want to invest immediately in permanent raised beds.
For another approach to growing vegetables without an in-ground plot, see our guide to growing tomatoes in a 5-gallon bucket.
Choosing and Positioning the Right Bales
Start with straw rather than hay whenever possible.
Straw is primarily the dried stalk left after cereal grains are harvested. Hay contains grasses and other plants harvested as animal feed and is more likely to contain viable seeds that can germinate throughout your garden.
Choose tightly compressed bales that are still securely bound.
Place them in their permanent location before conditioning. Once thoroughly saturated, a bale becomes surprisingly heavy and difficult to move.
Most fruiting vegetables need plenty of direct sunlight. Convenient access to a hose is equally important because bale gardens can require frequent watering.
Position the bale so its binding remains around the sides and is not likely to slip off as decomposition progresses. Stakes or rebar around the bale can provide additional stability.
Straw Bale Gardening: How to Condition a Bale Step by Step
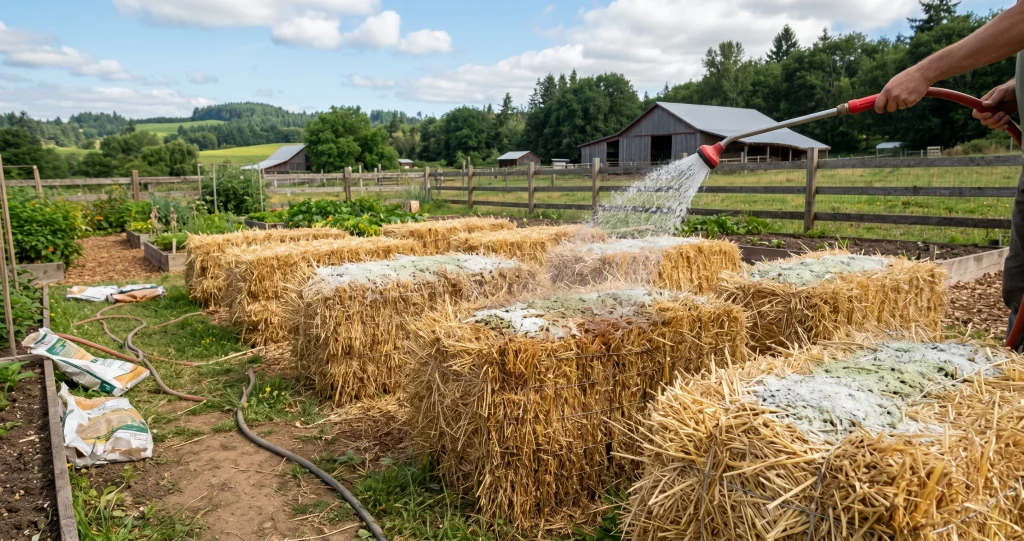
Conditioning starts the biological decomposition that makes the bale suitable for roots.
University Extension recommendations vary somewhat in the exact fertilizer schedule, but generally call for roughly 10–14 days of moisture, nitrogen, microbial activity, heating, and eventual cooling before planting.
Here is a practical framework.
Days 1–3: Saturate the Bale
Water the bale thoroughly.
You want moisture to penetrate the interior rather than simply wetting the outer layer. Water slowly enough that it can soak through the tightly packed straw.
Keep the bale moist during these first few days.
Days 4–6: Introduce Nitrogen
Apply a nitrogen-rich fertilizer across the top according to the product label and the conditioning method you are following, then water it into the bale.
Nitrogen supports the microorganisms responsible for decomposing the carbon-rich straw.
Illinois Extension describes a conditioning approach using nitrogen fertilizer on days 4–6, followed by reduced amounts during days 7–9. Organic nitrogen sources can also be used, although decomposition may proceed differently or take longer.
Days 7–9: Continue at a Reduced Rate
Continue keeping the bale moist while reducing the nitrogen input according to your chosen Extension-supported conditioning schedule.
At this stage, the interior should be biologically active.
You may notice warmth when reaching into the straw. Darkening straw, fungal activity, or occasional mushrooms can also accompany decomposition.
Days 10–14: Stop Feeding and Monitor
Stop the heavy nitrogen additions and maintain adequate moisture.
Now watch the bale temperature.
Freshly conditioned bales can become too hot for young roots. Do not plant simply because a certain number of days has passed.
The important signal is that the bale has heated and then cooled back toward ambient temperature. Oklahoma State University similarly advises monitoring the temperature several inches into the bale and planting once the temperature remains fairly constant.
How to Know When the Bale Is Ready
Push your hand several inches into the bale or use a compost or soil thermometer.
The interior should no longer feel actively hot.
If it is still noticeably warmer than the surrounding environment, give decomposition more time. Planting seedlings into a hot bale can damage tender roots.
Oregon State University recommends waiting until the conditioned bale has cooled before planting. Its Extension guidance describes conditioning as typically taking about 10–14 days.
Think of the calendar as a guide rather than an absolute rule. Temperature tells you more than the date does.
Planting Seeds and Transplants
Once conditioned, the bale can accept either seedlings or seeds.
For transplants, gently separate the straw to create a planting pocket. Add some quality compost or growing medium around the root ball, place the transplant inside, and gently firm the material around it.
Seeds need a finer surface.
Spread roughly 2–3 inches of suitable compost or soil-based growing medium over the bale and sow seeds at the depth recommended on the seed packet. Oklahoma State Extension describes both a planting-pocket method and a flat-bed method using a layer of compost or similar growing material.
Keep newly planted areas consistently moist while roots establish.
Best Vegetables for Straw Bale Gardening
Many vegetables can grow successfully in conditioned straw.
Good beginner choices include:
- Tomatoes, especially compact or determinate varieties
- Peppers
- Eggplants
- Cucumbers
- Bush beans and supported pole beans
- Lettuce
- Spinach and other leafy greens
- Smaller squash varieties
- Annual culinary herbs
- Strawberries
Oregon State Extension specifically recommends crops including cucumbers, beans, smaller squash or melons, herbs, lettuce, peppers, eggplants, determinate tomatoes, greens, and strawberries.
Vining cucumbers can be particularly efficient because a trellis directs growth vertically rather than allowing vines to cover neighboring bales.
Tall or top-heavy crops require more caution. Corn, for example, can become unstable because the decomposing bale does not provide the same anchorage as deep ground soil.
Root vegetables can also be less straightforward. Carrots, beets, and potatoes may require deeper or specially arranged bales to perform well.
Watering a Straw Bale Garden
Water management is one of the biggest differences between straw bale gardening and traditional in-ground gardening.
Bales have good drainage but can lose moisture rapidly during hot, dry weather. Oregon State Extension recommends checking moisture daily and notes that daily watering may be necessary during dry summer conditions.
Do not interpret this as a rule that every bale must be watered every day.
Weather, crop size, rainfall, bale decomposition, and local humidity all influence water demand. Check the interior rather than judging moisture solely by the dry-looking surface.
A drip line or soaker hose is particularly useful. It provides slow, regular moisture while reducing the labor involved in hand watering.
Avoid keeping the bale permanently waterlogged. Plant roots still need oxygen.
Fertilizing Straw Bale Vegetables
A conditioned straw bale is not equivalent to fertile garden soil.
Microorganisms breaking down straw require nutrients themselves, and frequent watering can leach soluble nutrients from the bale. This means plants may require more supplemental feeding than they would in naturally fertile ground.
Oklahoma State University notes that nitrogen deficiency is particularly common in bale-grown crops. Yellowing older leaves can be one warning sign, although yellow leaves can have several possible causes.
After plants establish, use an appropriate complete vegetable fertilizer according to its label and crop requirements.
Illinois Extension recommends continued feeding because the straw does not supply nutrients in the same way garden soil does.
More fertilizer is not automatically better. Excess nitrogen can produce lush leaves while reducing flowering and fruiting in some vegetables.
Common Problems and Mistakes
The most serious mistake happens before planting: skipping conditioning.
Dry straw is not ready-made soil. Without moisture and nitrogen to initiate decomposition, seedlings may struggle.
Another common mistake is planting while the bale is still hot. Wait for the temperature to decline.
Watering inconsistently can also cause trouble. Because bale-grown vegetables have limited access to surrounding soil, severe drying can stress them quickly.
Poor fertility is another frequent issue. If established plants become pale or growth stalls, investigate moisture, root health, and nutrient availability rather than automatically assuming disease.
Finally, avoid overcrowding. Dense foliage reduces airflow and can increase disease pressure.
Common Straw Bale Gardening Myths
Myth: Straw Bales Never Need Fertilizer
False.
Decomposing straw is not a complete fertilizer. Bale-grown vegetables still require adequate nitrogen, phosphorus, potassium, and other essential nutrients.
Myth: You Can Plant Into a Fresh Bale Immediately
Fresh bales should normally be conditioned first.
Microbial decomposition produces heat, and that heating phase can injure newly planted roots.
Myth: Hay and Straw Are the Same
They are not.
Hay is harvested primarily as animal feed and generally contains more seeds. Straw is the stalk material remaining from harvested cereal crops and is usually preferable for bale gardens because of its lower seed content.
Myth: A Straw Bale Garden Lasts for Years
Do not expect a bale to remain structurally intact like a wooden raised bed.
Decomposition is the entire point. Oklahoma State Extension generally recommends replacing the bales after the growing season because watering, microbes, roots, and heat progressively break them apart.
What Happens to the Bale After Harvest?
A decomposing bale does not have to become waste.
By the end of the growing season, much of it may be dark, soft, and partially broken down. Add the material to a compost pile, use appropriate material as organic mulch, or incorporate it into garden soil where conditions permit.
Oklahoma State Extension recommends several end-of-season options, including using spent bale material for soil improvement, mulch, or compost.
For more information on how different organic materials influence moisture and soil biology, read our guide to choosing the best mulch for garden soil.
In that sense, straw bale gardening can serve two purposes: growing vegetables during the season and producing decomposed organic material afterward.
Frequently Asked Questions
How long does it take to condition a straw bale?
Allow roughly 10–14 days as a general guideline. More important than counting days is confirming that the bale has gone through its heating phase and cooled sufficiently before planting.
Can I plant tomatoes in straw bales?
Yes. Tomatoes can grow well in conditioned bales, particularly manageable or determinate varieties.
Install support early. As the bale decomposes, it becomes softer and may not securely anchor a heavy tomato cage later in the season.
How many plants can I put in one bale?
It depends on the mature size of the crop.
Avoid packing plants tightly simply because the bale initially appears spacious. Mature tomatoes, cucumbers, squash, and peppers require adequate light and airflow.
Can I grow from seed?
Yes.
Cover the top of the conditioned bale with a shallow layer of suitable growing medium, sow at the recommended depth, and maintain consistent moisture until germination.
Does straw bale gardening eliminate weeds?
It can greatly reduce weed pressure compared with planting directly into weedy ground, but it does not guarantee a completely weed-free garden.
Occasional grain seedlings or windblown weeds may still appear.
Does straw bale gardening require soil?
Not conventional garden soil underneath the plants.
However, a small quantity of compost or other suitable growing medium is commonly added to planting pockets or across the top, especially when starting seeds.
Can I reuse the same bale next year?
Usually, you should not depend on it as an intact second-season raised bed.
A successful bale is actively decomposing throughout the first growing season. By the end, its structure may be substantially weakened, making the remaining organic matter more useful for composting, mulching, or soil improvement.
Conclusion
Straw bale gardening is a practical alternative to conventional beds when poor soil, limited space, temporary living arrangements, or the cost of building raised beds makes traditional gardening difficult.
Its success depends on understanding that the bale is not simply a container. It is an actively decomposing growing environment. Proper conditioning, adequate nitrogen, consistent moisture, appropriate fertilization, and waiting for the initial heat to subside are the foundations of the method.
Start with one or two bales and relatively forgiving crops such as peppers, cucumbers, leafy greens, herbs, or a compact tomato. That small experiment will quickly show how moisture and decomposition behave in your particular climate.
At the end of the season, the collapsing bale becomes useful organic material rather than a permanent structure that needs storage or repair. For gardeners looking for a flexible way to produce vegetables without digging a conventional bed, that combination of simplicity and adaptability makes straw bales worth considering.
External Sources:
- Oregon State University Extension Service — Straw bales offer flexible, accessible way to grow vegetables and herbs
Detailed guidance on choosing bales, conditioning, crop selection, watering, and fertilizing. - Oklahoma State University Extension — Straw Bale Bed: A Way to Garden While Building Soil
Extension fact sheet covering decomposition, planting methods, nutrients, crop establishment, and end-of-season bale management. - University of Illinois Extension — Special Vegetable Edition: Straw Bale Gardening
Practical conditioning schedule plus planting, watering, fertilizing, and crop-selection guidance.