
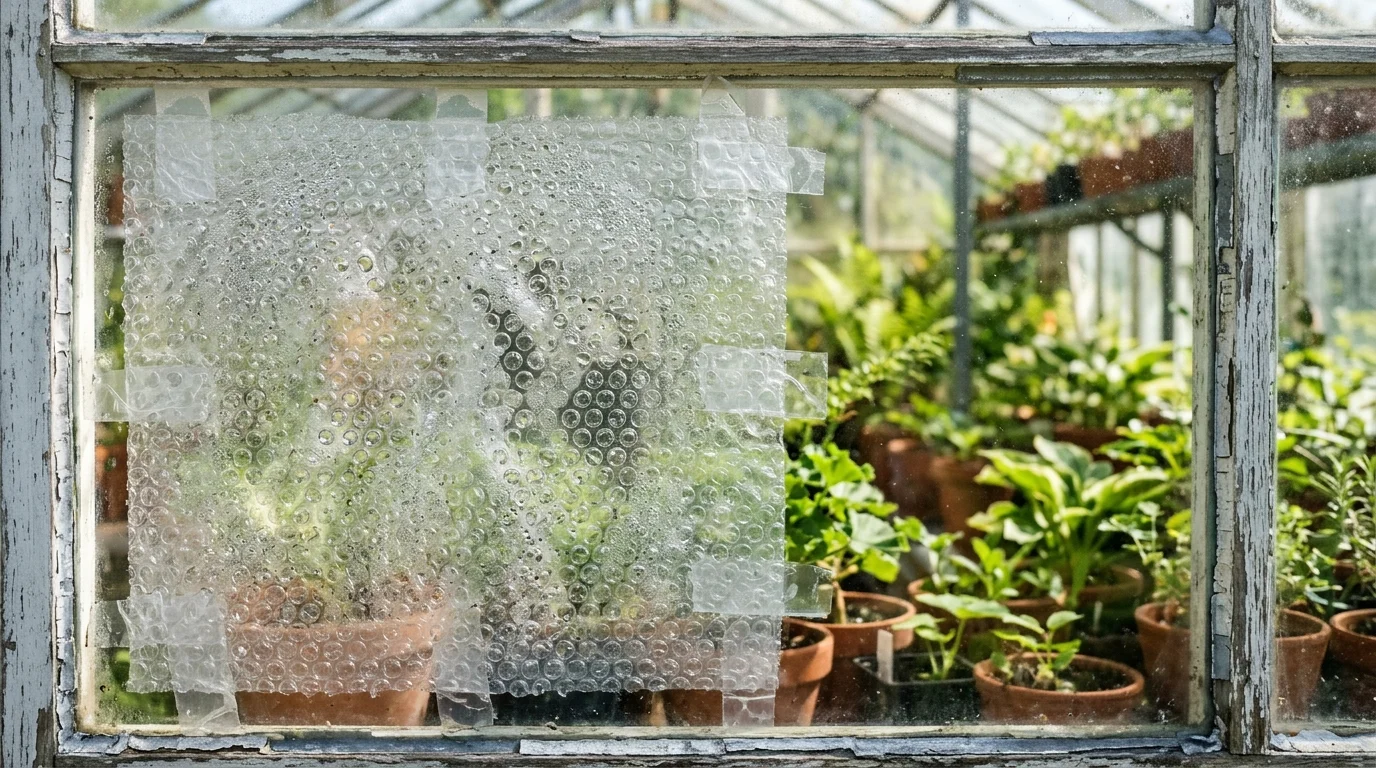
A greenhouse can feel surprisingly warm on a sunny winter afternoon, even when the garden outside is covered with frost. But just a few hours after sunset, that comfortable warmth can disappear.
The glass or plastic panels that trap sunlight during the day can also allow valuable heat to escape at night.
One surprisingly simple solution is bubble wrap greenhouse insulation. The same basic idea used to protect fragile packages can help reduce heat loss inside a greenhouse.
The secret lies in the tiny pockets of trapped air.
When installed correctly, suitable horticultural bubble wrap adds an insulating layer between the greenhouse interior and the colder outdoor environment. It can help moderate temperature changes and reduce heating demand in some situations.
However, bubble wrap is not a substitute for a heater when temperatures fall below what your plants can tolerate. It also reduces light transmission, making installation timing and ventilation important.
Here’s how this inexpensive winter gardening technique works, when to install it, and how to avoid the mistakes that can make it less effective.
Table of Contents
- What Is Bubble Wrap Greenhouse Insulation?
- Bubble Wrap Greenhouse Insulation: How and Why It Works
- When Should You Install Bubble Wrap in a Greenhouse?
- What Type of Bubble Wrap Is Best for Greenhouses?
- How to Install Bubble Wrap Greenhouse Insulation
- Where Should Bubble Wrap Go: Inside or Outside?
- Does Bubble Wrap Cause Condensation Problems?
- Common Mistakes When Insulating a Greenhouse
- Is Bubble Wrap Better Than Other Greenhouse Insulation?
- In Your Own Yard: A Practical Winter Greenhouse Plan
- Frequently Asked Questions
What Is Bubble Wrap Greenhouse Insulation?
Bubble wrap greenhouse insulation involves attaching transparent, air-filled plastic sheeting to the inside of greenhouse glazing.
The material creates an additional barrier between the greenhouse interior and the outside air.
Although ordinary packaging bubble wrap may provide some insulation, horticultural bubble wrap is generally better suited to seasonal greenhouse use.
Why Gardeners Use Bubble Wrap
Greenhouses lose heat through several pathways, including conduction through glazing, air leakage, and thermal radiation.
Adding bubble wrap can reduce some heat transfer through the greenhouse covering.
This can be especially useful in small hobby greenhouses where heating costs are a concern.
The benefits depend on greenhouse construction, material quality, installation, and weather conditions.
Horticultural Bubble Wrap vs. Packaging Wrap
Not all bubble wrap is designed for the same purpose.
Horticultural products are often manufactured with larger bubbles and may include ultraviolet-resistant additives.
UV resistance matters because greenhouse sunlight can degrade ordinary plastic over time.
Packaging bubble wrap may become brittle, cloudy, or damaged after prolonged exposure.
For seasonal installations, choose a product specifically intended for greenhouse insulation whenever practical.
Does Bubble Size Matter?
Larger bubbles create thicker air pockets, which can influence insulating performance.
However, bubble size alone does not determine effectiveness.
Plastic thickness, air sealing, bubble integrity, and installation quality also matter.
A product with intact bubbles and good light transmission is generally preferable to old material with flattened or punctured pockets.
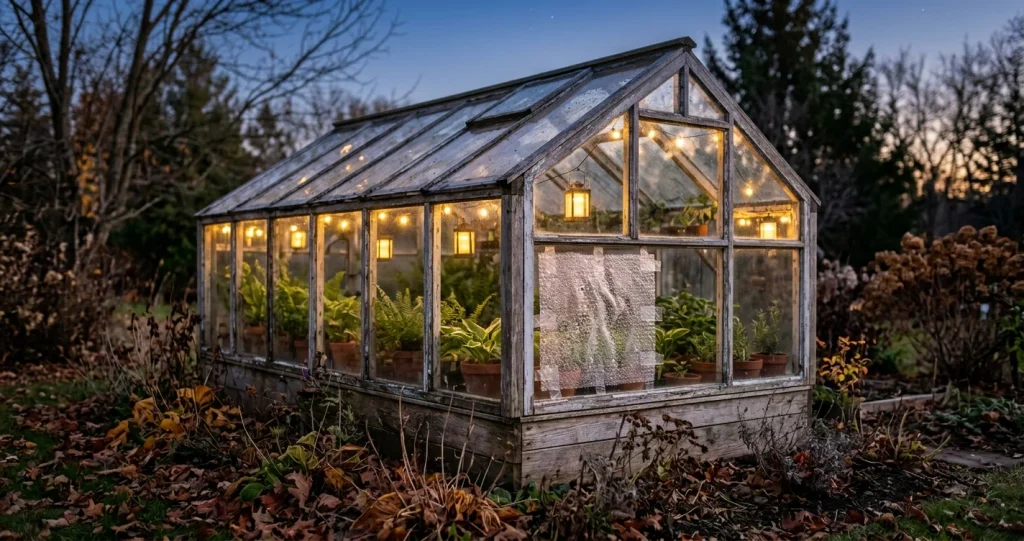
Bubble Wrap Greenhouse Insulation: How and Why It Works
The insulating effect comes primarily from air trapped inside the bubbles and the additional layers of material separating warm and cold environments.
Understanding the physics helps explain both the benefits and limitations.
Trapped Air Slows Heat Transfer
Air is a relatively poor conductor of heat when it is confined in small spaces.
The sealed pockets inside bubble wrap restrict large-scale air movement.
This helps reduce heat transfer through the insulating layer.
The effect is similar in principle to other insulation materials that rely on trapped air.
However, bubble wrap is much thinner than typical building insulation, so its insulating ability is limited.
An Extra Layer Reduces Heat Loss
A greenhouse covering separates indoor air from outdoor conditions.
Single-pane glass, thin plastic, and some other glazing materials allow heat to pass through relatively easily.
Adding bubble wrap introduces another layer of thermal resistance.
The result can be slower heat loss during cold periods.
However, the amount of improvement varies considerably between greenhouse designs.
Why Insulation Matters Most at Night
During daylight hours, sunlight entering a greenhouse warms plants, soil, benches, and other surfaces.
After sunset, that solar energy input disappears.
The greenhouse then loses stored heat to the colder surroundings.
Bubble wrap can slow some of this heat loss.
But it cannot generate heat.
During prolonged cold weather, an unheated greenhouse may still approach outdoor temperatures.
Why Bubble Wrap Cannot Prevent Every Frost
Insulation reduces the rate of heat transfer; it does not create a guaranteed minimum temperature.
If outdoor temperatures remain very low for long enough, the greenhouse interior can become dangerously cold for frost-sensitive plants.
A heated greenhouse may benefit from reduced heating demand.
An unheated greenhouse may experience more gradual cooling, but plants still need protection appropriate to their cold tolerance.
The Trade-Off: Less Heat Loss, Less Light
Bubble wrap scatters and absorbs some incoming sunlight.
This reduces the amount of light reaching plants.
The effect depends on material clarity, bubble structure, aging, and the amount of glazing covered.
During winter, when daylight is already limited, reduced light can influence plant growth.
For that reason, insulation should balance heat conservation with the light requirements of the plants inside.
When Should You Install Bubble Wrap in a Greenhouse?
The best installation date depends on climate, greenhouse construction, and the plants being grown.
There is no single calendar date that works throughout the United States.
Early Fall: Prepare Your Materials
Early fall is a good time to inspect greenhouse glazing, seals, vents, and structural supports.
Measure the areas you plan to insulate.
Check for damaged panels and gaps that allow unwanted drafts.
Ordering materials before the first cold spell can make installation easier.
Mid-to-Late Fall: Watch Nighttime Temperatures
Many gardeners install insulation as nighttime temperatures begin approaching the lower limits tolerated by their plants.
In colder northern regions, this may happen relatively early in fall.
In milder climates, insulation may not be necessary until later.
Use local forecasts and actual greenhouse temperature readings rather than relying only on the calendar.
Before the First Hard Freeze
For greenhouses containing tender plants, it is sensible to complete winter preparations before severe freezing weather arrives.
However, bubble wrap alone may not provide sufficient protection.
A reliable thermometer and an appropriate backup heating strategy can be important for sensitive collections.
When Should You Remove It?
Remove or reduce insulation when cold-weather protection is no longer needed and increasing sunlight becomes more valuable.
In many areas, this occurs during spring.
However, removal timing depends on frost risk and the plants inside.
If bubble wrap is reusable, clean and store it carefully for the following season.
What Type of Bubble Wrap Is Best for Greenhouses?
Choosing the right material can improve durability and simplify installation.
Large-Bubble Horticultural Film
Large-bubble horticultural insulation is commonly marketed for greenhouse applications.
Its air pockets provide an insulating layer while allowing some sunlight to pass through.
Look for products with documented UV resistance and suitable light transmission.
UV-Stabilized Plastic
Greenhouses receive prolonged sunlight exposure.
UV-stabilized materials are designed to resist degradation better than ordinary packaging plastics.
This can improve service life, although durability varies by product.
Clear Rather Than Opaque Material
Transparent bubble wrap is generally preferable when plants need natural light.
Opaque or heavily tinted materials can reduce illumination substantially.
Even clear bubble wrap reduces some light, so avoid covering more glazing than necessary.
Check Compatibility With Your Greenhouse
Greenhouse frames may be made from aluminum, steel, wood, or other materials.
Glazing may consist of glass, polycarbonate, or flexible plastic film.
The appropriate attachment method depends on these materials.
Avoid adhesives or fasteners that could damage glazing, protective coatings, or structural components.
How to Install Bubble Wrap Greenhouse Insulation
A careful installation can improve performance and reduce problems with condensation, loose plastic, and blocked ventilation.
Step 1: Clean the Greenhouse Interior
Begin by removing dirt, algae, and debris from glazing and accessible frame surfaces.
Clean panels allow more light to enter.
This is especially useful before adding a material that already reduces some light transmission.
Allow surfaces to dry before attaching insulation.
Step 2: Measure the Glazing Panels
Measure the interior areas you plan to cover.
Include walls and roof sections where insulation is practical and safe.
Leave access to vents, doors, handles, and maintenance points.
Avoid covering electrical equipment or heat sources.
Step 3: Cut the Bubble Wrap
Cut the material into manageable sections using clean scissors or a suitable cutting tool.
Larger sheets may reduce gaps, but they can be more difficult to position.
Try to avoid unnecessary seams.
Do not stretch the plastic so tightly that the bubbles become damaged.
Step 4: Attach It to the Frame
Use greenhouse-compatible clips, glazing fittings, or other attachment systems recommended for your structure.
Some greenhouses have frame channels designed to accept specialized insulation clips.
Secure the material so it does not sag onto plants or obstruct access.
Avoid puncturing glazing or weakening structural components.
Step 5: Cover the Main Heat-Loss Areas
Walls and roof glazing are common areas for insulation.
However, covering every surface may not always be necessary.
If winter light is limited, consider whether selective insulation could provide a better balance.
The best arrangement depends on greenhouse orientation, plant requirements, and heating strategy.
Step 6: Keep Vents Functional
Never permanently seal essential greenhouse ventilation openings.
Even during winter, ventilation may be needed to control humidity and temperature.
Automatic vent openers and manual vents must remain operable.
Check that insulation does not interfere with moving parts.
Step 7: Inspect the Installation
Look for loose edges, gaps, damaged bubbles, and areas where condensation may collect.
Confirm that doors close properly.
Make sure the material remains clear of heaters, lamps, and other equipment that could become hot.
Follow all manufacturer clearance and fire-safety instructions.
Where Should Bubble Wrap Go: Inside or Outside?
For many hobby greenhouses, installing bubble wrap on the interior is the more practical approach.
Benefits of Interior Installation
Inside the greenhouse, bubble wrap is sheltered from wind, rain, and snow.
This can reduce mechanical damage.
It is also often easier to secure to the internal frame.
Interior installation may make seasonal removal and storage simpler.
Why Exterior Installation Is Less Common
Bubble wrap installed outside is exposed directly to weather.
Strong winds can loosen attachments.
Rain, ice, and UV exposure may shorten the material’s useful life.
Exterior installation may also complicate cleaning and maintenance.
Consider the Greenhouse Structure
Not every greenhouse is designed to support additional interior sheeting.
Some structures have narrow frames or limited attachment points.
Always follow the greenhouse manufacturer’s recommendations.
Does Bubble Wrap Cause Condensation Problems?
Condensation is common in greenhouses, particularly when warm, humid air contacts cold surfaces.
Adding insulation changes surface temperatures and airflow patterns.
This can influence where moisture collects.
Why Condensation Forms
Warm air can contain more water vapor than cold air.
When humid air cools against a sufficiently cold surface, water vapor may condense into droplets.
Greenhouses often have high humidity because of plant transpiration and moist growing media.
Moisture Can Collect Behind Insulation
Poorly installed plastic may create spaces where condensation accumulates.
Persistent moisture can encourage algae or mold growth on suitable surfaces.
It may also make cleaning more difficult.
Maintain Air Circulation
Ventilate when conditions allow.
Avoid unnecessary overwatering during periods of slow plant growth.
Space plants appropriately and monitor humidity.
Small circulation fans may help distribute air, provided they are installed safely and do not create damaging drafts.
Common Mistakes When Insulating a Greenhouse
Bubble wrap is simple to use, but several mistakes can reduce its effectiveness.
Using Damaged Packaging Bubble Wrap
Old packaging material may have flattened bubbles, tears, or poor UV resistance.
Its insulating performance and durability may be limited.
Blocking Ventilation
A tightly sealed greenhouse can accumulate excessive humidity and overheat during sunny periods.
Insulation should not prevent necessary ventilation.
Covering Heat Sources
Bubble wrap is a plastic material and may present a fire or melting hazard near heaters and hot equipment.
Keep it away from heat sources and follow equipment safety requirements.
Ignoring Plant Light Requirements
Winter sunlight is limited in many regions.
Too much insulation can reduce the light available for healthy growth.
Plants may become weak or elongated if illumination is inadequate.
Expecting Bubble Wrap to Replace Heating
Bubble wrap can reduce heat loss, but it cannot guarantee frost-free conditions.
Tender plants may still require supplemental heating or relocation during severe cold.
Is Bubble Wrap Better Than Other Greenhouse Insulation?
Bubble wrap is one option among several winter greenhouse strategies.
| Insulation method | Main advantage | Main limitation |
|---|---|---|
| Horticultural bubble wrap | Relatively inexpensive and easy to install | Reduces light and provides limited insulation |
| Twin-wall polycarbonate | Built-in insulating air spaces | Higher initial cost |
| Thermal greenhouse screens | Can be opened or closed as needed | Requires suitable mounting |
| Horticultural fleece | Provides localized plant protection | Not a substitute for greenhouse insulation |
| Draft sealing | Reduces unwanted air leakage | Does not significantly improve glazing insulation alone |
The most suitable approach depends on climate, budget, greenhouse construction, and the plants being protected.
In some situations, combining draft reduction with selective insulation is more practical than covering every panel.
In Your Own Yard: A Practical Winter Greenhouse Plan
A successful winter greenhouse setup begins with observation rather than simply adding more insulation.
Monitor Temperatures First
Place a minimum-maximum thermometer inside the greenhouse.
Record nighttime lows and daytime highs.
Compare readings with outdoor conditions.
This helps you understand how quickly your greenhouse cools and whether additional protection is necessary.
Group Plants by Temperature Needs
Not every plant requires the same winter conditions.
Cold-tolerant crops may thrive in conditions that would damage tropical ornamentals.
Grouping plants by their temperature requirements makes heating and insulation decisions easier.
Protect the Most Sensitive Plants
Instead of heating an entire greenhouse to accommodate a few tender plants, consider moving those plants indoors or creating a smaller protected growing area.
Any enclosed inner structure still needs suitable ventilation and safe heating arrangements.
Water Carefully
Plants often use less water during cooler, darker periods, although requirements vary.
Check the growing medium before watering.
Avoid keeping containers unnecessarily saturated.
Use Thermal Mass Where Practical
Water containers and other materials with substantial heat capacity can absorb warmth during the day and release some of it as temperatures decline.
However, their benefit depends on available sunlight, container volume, and greenhouse conditions.
They should not be relied upon as guaranteed frost protection.
Check the Greenhouse After Storms
Inspect insulation after strong winds, heavy snow, or other severe weather.
Look for loose attachments and blocked vents.
Check the greenhouse structure for damage before entering if conditions appear unsafe.
Plan for Spring Removal
As days become longer and temperatures rise, insulation may become less useful.
Removing it can improve light transmission and simplify ventilation.
Clean reusable materials and store them away from sharp objects and excessive heat.
Frequently Asked Questions
1. Does bubble wrap really keep a greenhouse warmer in winter?
Bubble wrap can reduce heat loss by adding a layer of trapped air to greenhouse glazing.
This may help maintain warmer conditions for longer, particularly in a heated greenhouse.
However, the actual temperature benefit varies with weather, greenhouse construction, and installation quality.
An unheated greenhouse can still become cold enough to damage frost-sensitive plants.
2. Should greenhouse bubble wrap be installed with the bubbles facing inward or outward?
For many horticultural bubble-wrap products, either orientation may provide a similar basic insulating effect because the trapped air remains inside the bubbles.
However, manufacturers may recommend a particular orientation for attachment, drainage, or durability.
Follow the instructions supplied with your specific product.
3. Can I leave bubble wrap on my greenhouse all year?
It is possible in some situations, but year-round installation is not always desirable.
Bubble wrap reduces light transmission and may complicate ventilation during warmer months.
Removing it when insulation is no longer needed often improves growing conditions.
The appropriate timing depends on climate, plant requirements, and greenhouse design.
Conclusion
A greenhouse may capture impressive amounts of warmth on a sunny winter day, yet lose much of that heat after sunset.
That is where bubble wrap greenhouse insulation can help.
By adding a layer of trapped air against the glazing, suitable horticultural bubble wrap can slow heat transfer and improve winter heat retention.
The best results come from choosing durable materials, installing them carefully, maintaining ventilation, and protecting plants according to their actual temperature requirements.
Bubble wrap is not a miracle solution, and it cannot replace heating during severe cold.
But when used as part of a thoughtful winter greenhouse plan, those tiny pockets of air can make a useful difference.
Sometimes, one of the simplest gardening improvements begins with a material better known for protecting packages.
External Sources
1. How to Heat a Greenhouse Efficiently
Explain how bubble wrap reduces greenhouse heat loss, why it can lower heating costs, and the trade-off between insulation and sunlight. Royal Horticultural Society (RHS)
2. How to Insulate a Greenhouse
Support your installation instructions, including measuring greenhouse panels, selecting UV-stabilized bubble wrap, attaching insulation to the frame, and keeping vents operational. BBC Gardeners’ World Magazine
3. Greenhouse Energy Conservation Strategies
Explain the science of greenhouse heat loss through conduction, convection, and radiation, including how bubble wrap can improve insulation on greenhouse walls. Michigan State University Extension