
Primary Keyword: potato hilling
Growing potatoes is one of the most rewarding gardening projects, but many gardeners overlook a simple technique that can significantly improve yields: potato hilling. This traditional practice involves gradually mounding soil around growing potato plants throughout the season. While it may seem like extra work, hilling helps protect developing tubers, encourages additional growth, and can lead to a larger harvest.
Understanding when and how to hill potatoes can make the difference between a modest crop and a basket full of healthy, homegrown tubers.
What Is Potato Hilling?
Potato hilling is the process of pulling loose soil, compost, straw, or mulch around the base of potato plants as they grow. The goal is to cover portions of the stem while leaving the upper leaves exposed.
As the plant continues growing, new underground stems called stolons develop from the buried sections. These stolons can produce additional potatoes, increasing overall yield.
This technique has been used for generations by both home gardeners and commercial growers because it supports healthier plant development and protects the crop beneath the soil.
Why Potatoes Benefit From Hilling
Potato plants naturally produce tubers along underground stems. When these tubers become exposed to sunlight, they begin producing chlorophyll and a toxic compound called solanine.
Hilling helps prevent this problem while providing several additional benefits.
Protection From Sunlight
Potatoes exposed to light turn green and develop bitter flavors. Green potatoes should not be eaten because elevated solanine levels may cause illness.
A properly maintained soil mound keeps developing tubers completely covered.
Increased Tuber Production
When more of the stem is buried, the plant can produce additional stolons. More stolons often mean more potatoes at harvest time.
While the exact increase depends on variety and growing conditions, many gardeners report noticeably larger harvests after consistent hilling.
Improved Weed Control
The added soil layer helps smother small weeds before they become established. This reduces competition for nutrients and water.
Better Moisture Retention
Mounded soil and organic mulch help reduce evaporation during hot weather, keeping roots cooler and maintaining more consistent soil moisture.
Understanding the Potato Growth Stages
Knowing the different stages of potato development helps determine the best time to hill.
Stage 1: Planting and Early Growth
Seed potatoes are planted several inches below the soil surface. During the first few weeks, shoots emerge and develop into small seedlings.
At this stage, no hilling is required.
Stage 2: First Hilling
Once plants reach approximately 8 to 10 inches (20 to 25 cm) tall, the first hilling should begin.
Pull soil around the stems until roughly half of the plant remains visible above ground.
This creates the first protective mound while encouraging additional underground growth.
Stage 3: Second Hilling
Two to three weeks later, plants will have grown significantly taller.
Add more soil around the base, increasing mound height while keeping the top foliage exposed to sunlight.
At this stage, new stolons are actively forming, and small tubers may already be developing underground.
Stage 4: Final Growth and Harvest Preparation
When flowering begins, most potato varieties have entered peak tuber development.
The final mound should be fully established. Additional hilling is generally unnecessary once flowering is underway.
The plant will now focus its energy on enlarging the potatoes beneath the soil.
How to Hill Potatoes Correctly
Proper potato hilling is simple and requires only a few minutes throughout the growing season.
Step 1: Wait for Adequate Growth
Allow plants to reach at least 8 inches in height before beginning.
Hilling too early may slow growth by burying excessive foliage.
Step 2: Create a Loose Soil Mound
Use a hoe, rake, or garden trowel to pull loose soil toward the stem.
Avoid compacting the mound, as potatoes grow best in well-aerated soil.
Step 3: Leave Foliage Exposed
Always keep the upper leaves uncovered.
The exposed foliage continues photosynthesis, supplying energy for tuber production.
Step 4: Repeat Every Few Weeks
Continue adding soil as plants grow taller.
Most gardens require two or three hilling sessions during the season.
Alternative Materials for Hilling
Traditional soil is not the only option.
Many gardeners successfully use:
- Straw
- Leaf mold
- Finished compost
- Grass clippings (chemical-free)
- Shredded leaves
- Wood shavings aged appropriately
Organic materials gradually decompose and improve soil quality while protecting developing potatoes.
Common Potato Hilling Mistakes
Avoiding a few common errors can improve harvest results.
Hilling Too Late
Once plants have stopped active vertical growth, additional hilling provides limited benefits.
Start early enough to encourage new stolon formation.
Covering Too Much Foliage
Completely burying the plant can reduce photosynthesis and slow development.
Always leave several inches of healthy leaves exposed.
Using Compacted Soil
Heavy, compacted soil restricts root growth and may lead to smaller harvests.
Loose, friable soil works best.
Ignoring Exposed Tubers
Check mounds periodically throughout the season.
Any visible potatoes should be covered immediately to prevent greening.
Do All Potato Varieties Need Hilling?
Most traditional potato varieties benefit from hilling, but results vary.
Indeterminate potato varieties often continue producing tubers along developing stems and generally respond best.
Determinate varieties typically produce tubers in a more concentrated layer and may show less dramatic yield increases from repeated hilling.
Checking variety-specific growing information can help optimize results.
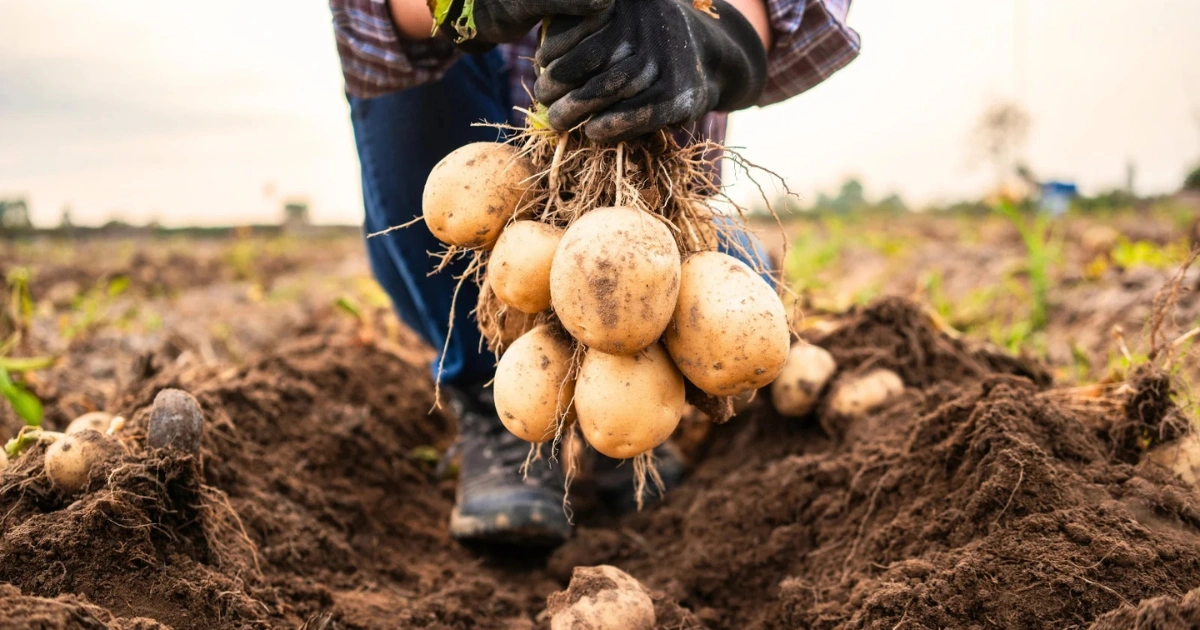
Signs Your Potatoes Are Ready to Harvest
Several indicators suggest harvest time is approaching:
- Flowers have faded
- Foliage begins yellowing
- Stems start dying back
- Potato skins become firm
For storage potatoes, many gardeners wait until the foliage has largely died back before harvesting.
This allows skins to toughen and improves storage life.
Frequently Asked Questions
Does potato hilling really increase yield?
In many cases, yes. Hilling can encourage the formation of additional stolons and protect developing tubers, often resulting in larger harvests.
How many times should potatoes be hilled?
Most gardens require two to three hilling sessions during the growing season, depending on plant growth and variety.
Can straw be used instead of soil?
Yes. Straw is a popular alternative because it keeps tubers covered, conserves moisture, and makes harvesting easier.
When should I stop hilling potatoes?
Stop once flowering begins or when plants have reached their mature height. At this stage, tuber enlargement becomes the plant’s primary focus.
What happens if potatoes are not hilled?
Exposed potatoes may turn green and become unsuitable for consumption. Plants may also produce fewer protected tubers.
Internal Linking Suggestions
For SecretsoftheGreenGarden.com, consider linking to:
- Growing Potatoes in Raised Beds
- Best Organic Fertilizers for Vegetable Gardens
- How to Improve Garden Soil Naturally
External Linking Suggestions
For authoritative gardening guidance, consider referencing:
- University of Minnesota Extension – Growing Potatoes in Home Gardens
- University of Illinois Extension – Potato Growing Guide
- USDA Agricultural Research Service
Conclusion
Potato hilling remains one of the simplest and most effective techniques for improving potato production. By gradually building soil around growing plants, gardeners can protect developing tubers from sunlight, reduce weed pressure, improve moisture retention, and potentially increase yields. Whether grown in traditional rows, raised beds, or containers, properly hilled potatoes often reward gardeners with healthier plants and a more abundant harvest at the end of the season.