
Grow Your Garden With Just One Plant
Hydrangeas are some of the most beloved flowering shrubs in home gardens—and for good reason. Their lush blooms and vibrant colors make any space feel more alive. What’s even better? You can multiply your hydrangeas easily without spending a dime on new plants.
This guide walks you through the simple, step-by-step process of propagating hydrangeas using cuttings. Whether you’re new to gardening or a seasoned green thumb, this method is beginner-friendly and highly rewarding.
Step 1: Choose a Healthy Stem
The success of propagation begins with selecting the right stem.
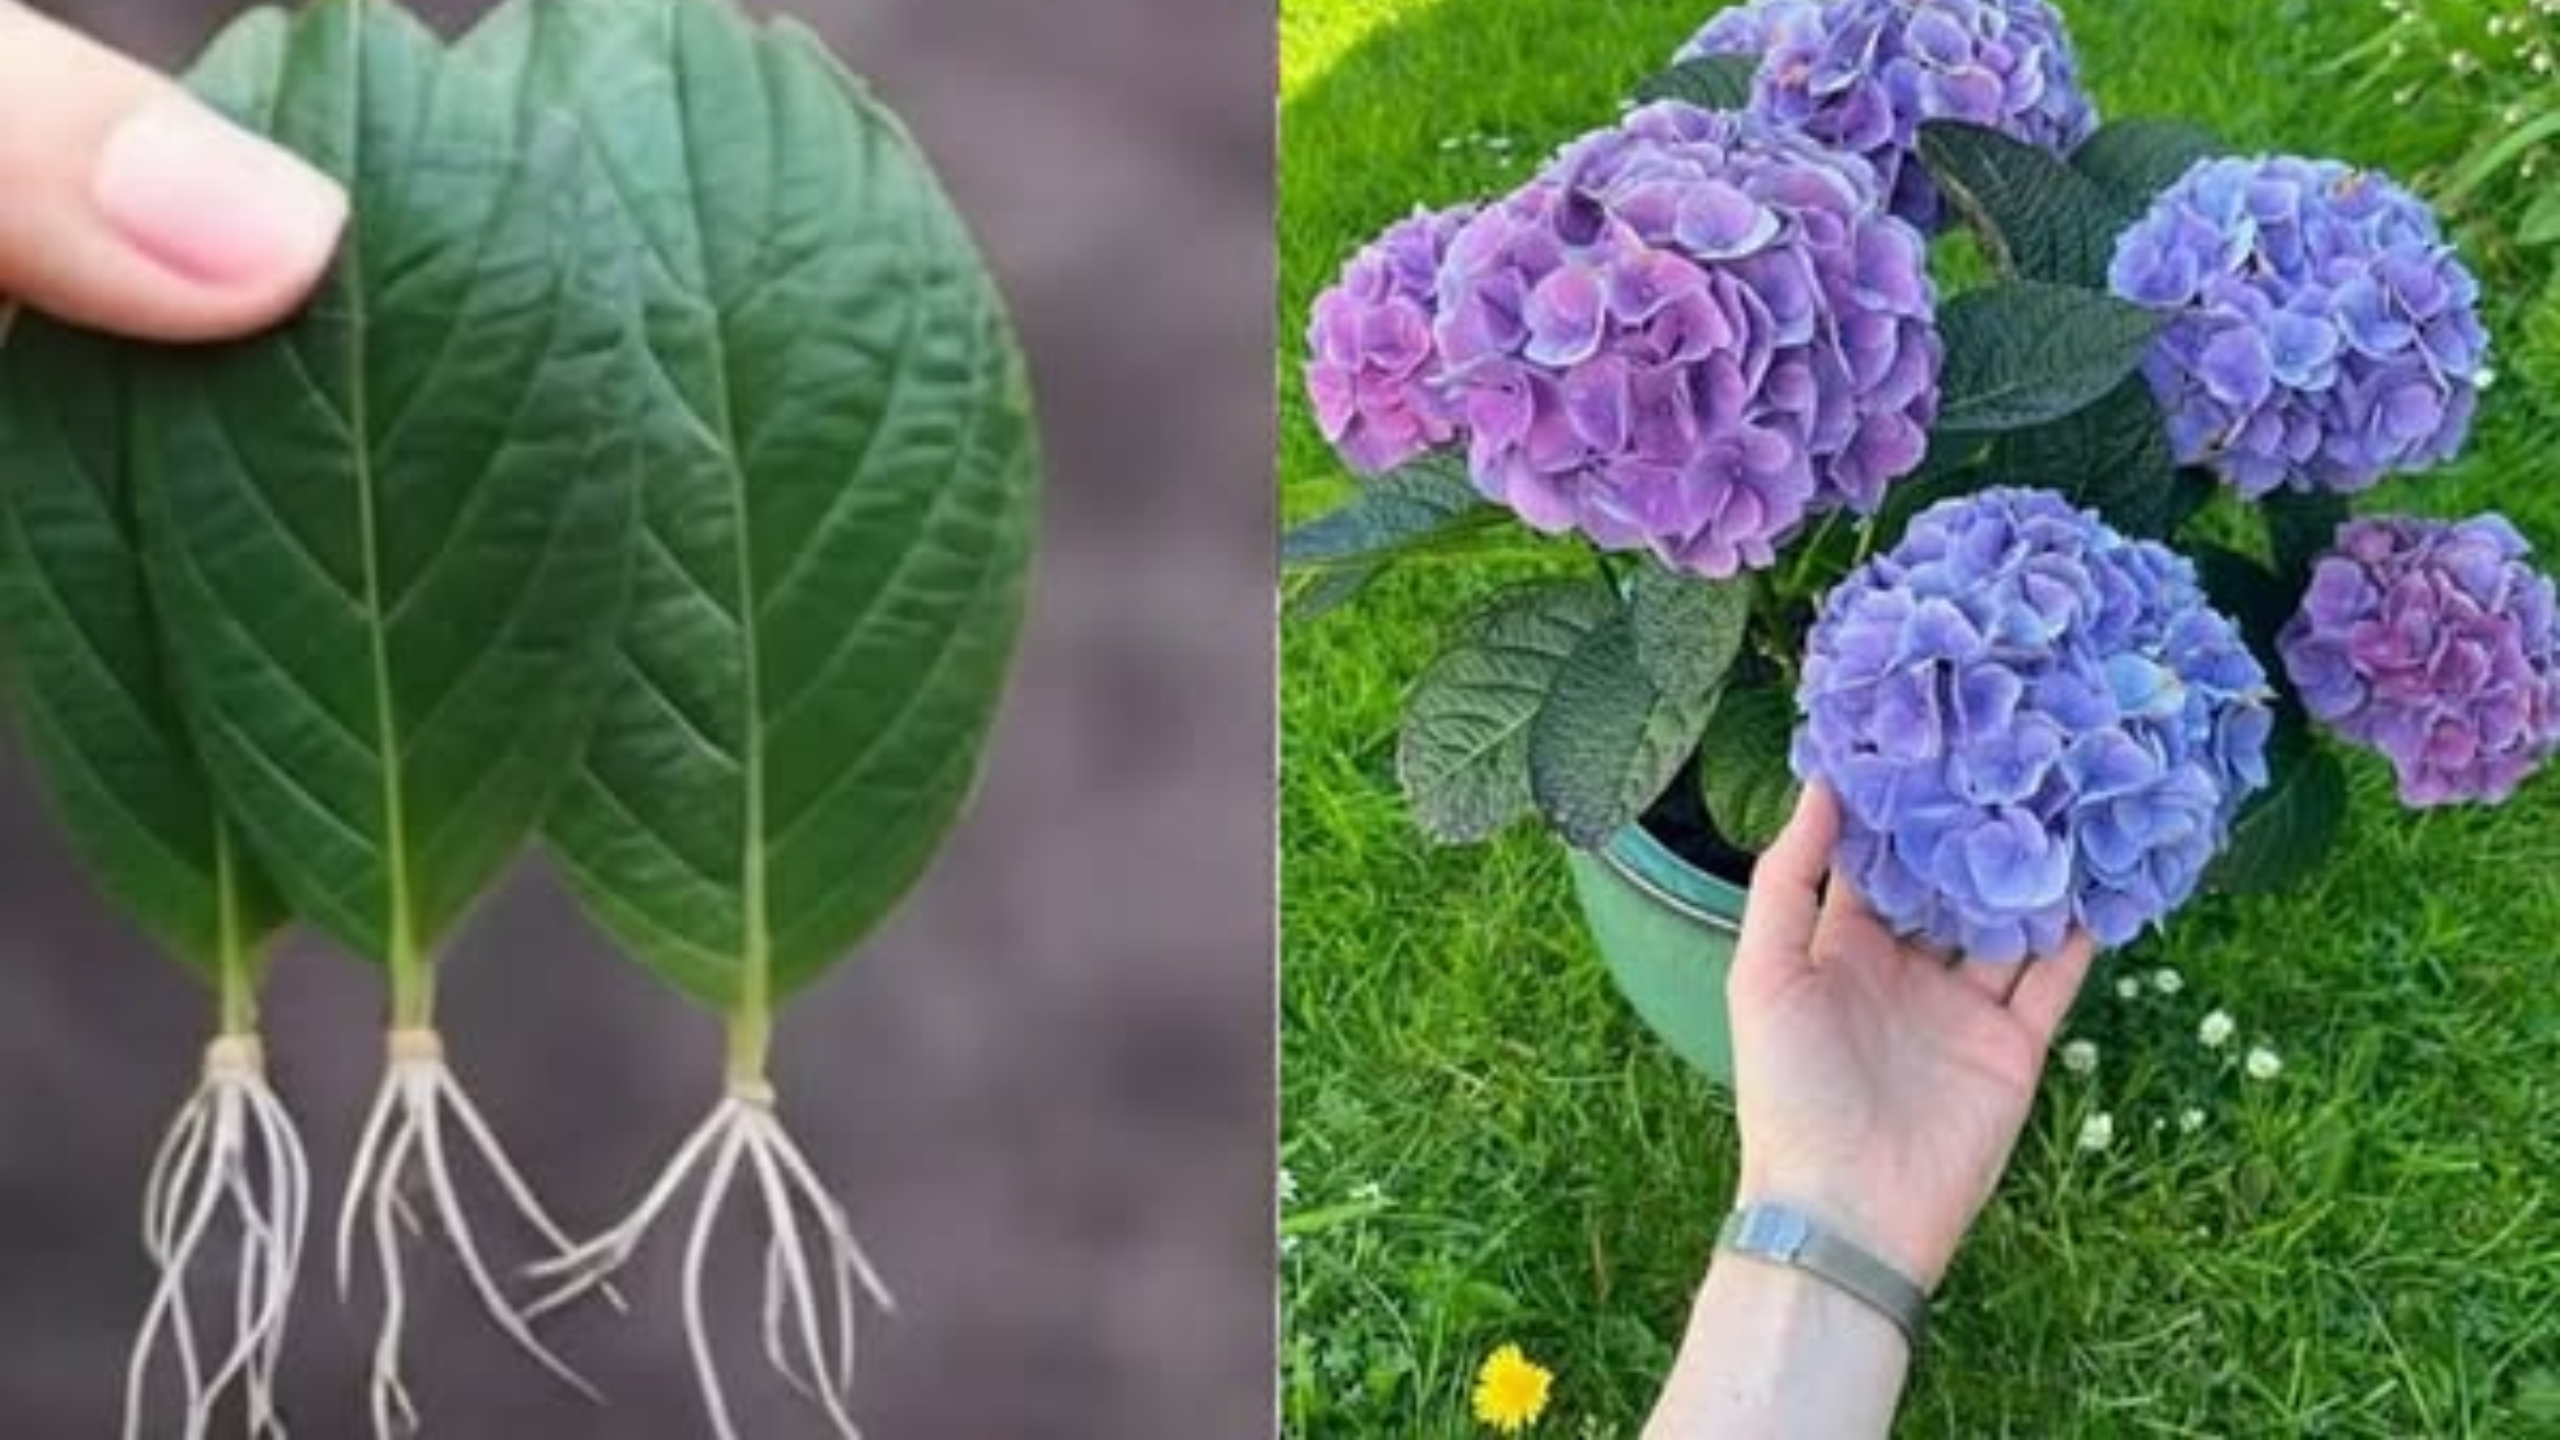
Look for a non-flowering stem that’s green, flexible, and around 4 to 6 inches long (10–15 cm). This is often called a “softwood” cutting—young, but mature enough to grow roots. Ideally, the stem should have 2 to 3 visible leaf nodes, which are the spots where leaves grow from the stem.

Why not a flowering stem?
Flowering stems divert energy to blooming rather than root development. Non-flowering stems are more likely to root quickly and grow into healthy plants.
Step 2: Make a Clean Cut
Once you’ve found the right stem, use clean, sharp scissors or pruning shears to make your cut just below a node. Nodes are essential because they’re where new roots will emerge.
Next, remove the bottom leaves to expose the nodes, and leave only 1 or 2 leaves at the top of the cutting. This helps the plant conserve energy and focus on root growth.
Pro Tip: If the remaining leaves are large, you can snip them in half to reduce moisture loss without removing them entirely.
Step 3: (Optional) Use Rooting Hormone
While not absolutely necessary, applying a rooting hormone to the cut end of the stem can boost your chances of success. Rooting hormone helps stimulate root development and protects the cutting from rot or disease.
If you don’t have rooting hormone on hand, no worries—many gardeners see great results without it!
Step 4: Plant Your Cutting
Now it’s time to plant.
Fill a small pot with moist, well-draining potting soil—something rich in organic material but light enough to allow airflow. Make a small hole in the center and gently insert your cutting, with the exposed node buried in the soil.
Press the soil around the stem lightly to secure it in place, making sure not to crush the delicate cutting.
Step 5: Create a Humid Environment
Hydrangea cuttings love humidity.
To maintain the ideal environment, cover the pot with a clear plastic bag or a mini greenhouse dome. This traps moisture and keeps the cutting from drying out while roots are forming.
Place your covered pot in a bright, warm area, but keep it out of direct sunlight, which can overheat the plant or cause leaf burn.
Tip: Open the bag every couple of days for a few minutes to allow air circulation and prevent mold growth.
Step 6: Water and Wait
Hydration is key—but so is balance. Keep the soil consistently moist, not soggy. Overwatering can lead to root rot, especially in the early stages.
With the right conditions, your hydrangea cutting should begin developing roots within 2 to 4 weeks.
To test for root growth, give the cutting a very gentle tug. If there’s resistance, roots are forming!
🌸 After Rooting: Transplant and Care
Once your cutting has a solid root system and starts to show new growth, it’s ready for its next stage.
You can now transplant it into a larger pot or directly into your garden. If planting outdoors, choose a spot with morning sun and afternoon shade—hydrangeas love indirect light.
Be sure to water regularly, especially during dry spells, and protect young plants from harsh sun and strong wind while they establish.
✅ Why Propagate Hydrangeas?
There are plenty of reasons to try your hand at propagating these gorgeous plants:
- It’s cost-effective – Grow new plants without buying more.
- It’s easy and fun – Even beginners can see success with minimal tools.
- It’s satisfying – Watching something you propagated thrive in your garden is incredibly rewarding.
- It’s shareable – Give friends or neighbors a living gift from your garden.
amoxil for sale online – https://combamoxi.com/ amoxil pills
buy forcan pill – https://gpdifluca.com/ buy forcan sale
oral cenforce 50mg – https://cenforcers.com/ cenforce cost
purchase cialis – tadalafil professional review can cialis cause high blood pressure
tadalafil review forum – strongtadafl cheap cialis online overnight shipping
viagra 50mg buy – buy viagra hong kong how can i order viagra online
This is the stripe of serenity I get high on reading. this
Thanks an eye to sharing. It’s outstrip quality. https://buyfastonl.com/amoxicillin.html
This is the make of delivery I find helpful. https://ursxdol.com/cialis-tadalafil-20/
Palatable blog you procure here.. It’s intricate to espy great calibre writing like yours these days. I really comprehend individuals like you! Withstand guardianship!! https://prohnrg.com/product/omeprazole-20-mg/
The thoroughness in this draft is noteworthy. https://aranitidine.com/fr/ivermectine-en-france/
More posts like this would make the online play more useful. https://ondactone.com/simvastatin/
This is the stripe of content I enjoy reading.
order celecoxib online
More posts like this would make the blogosphere more useful. http://web.symbol.rs/forum/member.php?action=profile&uid=1171369
dapagliflozin 10mg drug – this buy cheap generic forxiga
xenical over the counter – on this site xenical ca
The thoroughness in this piece is noteworthy. http://iawbs.com/home.php?mod=space&uid=916809
You can conserve yourself and your dearest nearby being heedful when buying panacea online. Some druggist’s websites control legally and sell convenience, reclusion, rate savings and safeguards for purchasing medicines. buy in TerbinaPharmacy https://terbinafines.com/product/coumadin.html coumadin
More articles like this would frame the blogosphere richer. order haldol 10 mg pills
This is the kind of scribble literary works I rightly appreciate.
https://t.me/officials_pokerdom/3179
https://t.me/dragon_money_mani/22
casino craps
top rated online casino
best online real money casino
bet mgm grand betmgm-play betmgm free 200
Experience the emotions of a live casino. In crown coin casino login, roulette, blackjack, and much more are available. Become part of the elite players!
Sweet Bonanza turns every spin into a delicious thrill ride. Collect sweet bonanza no deposit matching treats anywhere for payouts, then unleash the free spins round. Sweet rewards await!
Conquer the casino floor with buffalo might. buffalo slot machine explodes with 1024 ways, bonus retriggers, and progressive herds of cash. Play now!
Chumba Casino — where players win real money without ever depositing. Grab your macumba welcome offer and start playing the best games now!
Play today, brag tomorrow. stake vip makes winning look easy.
Experience the best online casino action with DraftKings casino app. New users get 500 bonus spins for a $5 wager plus a safety net of up to $1,000 in credits on day-one losses. Slots, roulette, live dealers—it’s all here!
Tisice zakazniku uz setri. Pridejte se na opravdovalekarna.cz
opravdovalekarna.cz
Connect the millions delightful momentous on fanduel casino Nevada – the #1 real pelf casino app in America.
Pick up your $1000 OPERATE IT AGAIN hand-out and modify every twirl, хэнд and roll into official cash rewards.
Firm payouts, immense jackpots, and habitual action – download FanDuel Casino now and start playing like a pro today!
The wheel spins faster when you’re watching – http://aranitidine.com/betano-bonus-2026-grab-200-free-spins-500-match-right-now/ , Play like the next spin already paid rent .
Des conseils experts, des produits de confiance et un service rapide – https://saintpierremagnycours-tourisme.jimdofree.com/associations-commerces-services/commer%C3%A7ants-services/pharmacie/ , Votre pharmacie de rГ©fГ©rence pour des conseils fiables et bienveillants .
Backbiome is an advanced daily wellness supplement formulated to help support spinal comfort, reduce feelings of built-up tension, and promote freer, smoother movement throughout backbiome everyday life.