
Table of Contents
- Why Curing Matters After Harvest
- What Happens During the Curing Process?
- When to Harvest Onions and Garlic
- H2: How to Cure Onions After Harvest
- How to Cure Garlic Properly
- Ideal Curing Conditions
- How to Tell When Curing Is Complete
- Preparing Onions and Garlic for Long-Term Storage
- Best Storage Conditions
- Common Storage Problems
- Practical Tips
- Common Mistakes
- Frequently Asked Questions
- Conclusion
How to Cure Onions and Garlic After Harvest (So They Actually Last)
Harvesting a beautiful crop of onions or garlic is only half the job. If they’re stored immediately after pulling them from the garden, there’s a good chance they’ll soften, mold, or sprout much sooner than expected. Learning how to cure onions after harvest is one of the most valuable skills for gardeners who want their homegrown harvest to last for months instead of weeks.
Curing is the process of allowing the outer layers and necks of onions—and the wrappers and stems of garlic—to dry under controlled conditions. During this time, excess moisture leaves the bulbs, outer skins become papery, and the neck seals naturally, reducing the risk of decay during storage. University Cooperative Extension programs consistently recommend proper curing because it dramatically improves storage life and reduces losses.
Fortunately, curing doesn’t require expensive equipment. With a warm, dry, shaded location and good airflow, most home gardeners can successfully prepare onions and garlic for long-term storage.
Why Curing Matters After Harvest
Freshly harvested bulbs contain a great deal of moisture.
Immediately after harvest, onion necks remain soft, garlic stems are still green, and protective outer skins have not fully dried.
If bulbs are stored in this condition, moisture becomes trapped around the tissues, creating favorable conditions for fungi, bacteria, and rot.
Proper curing allows the plant to complete its final stage after harvest by:
- Drying the outer layers.
- Sealing the neck.
- Reducing moisture loss during storage.
- Forming protective papery skins.
- Improving shelf life.
Without curing, even perfectly grown onions and garlic may deteriorate surprisingly quickly.
What Happens During the Curing Process?
Although bulbs have been harvested, they continue undergoing natural changes.
Moisture gradually moves out of leaves, stems, and outer scales.
The neck tissue on onions dries and tightens, helping prevent microorganisms from entering the bulb.
Garlic develops firm protective wrappers around each clove.
Rather than being “dried out,” cured bulbs simply become stable enough for long-term storage.
Extension horticulturists consider curing an essential step for storage varieties.
The University of Minnesota Extension provides excellent guidance on harvesting and storing onions and garlic:
https://extension.umn.edu/
When to Harvest Onions and Garlic
Correct harvest timing contributes significantly to successful curing.
Onions
Bulb onions are generally ready when:
- Most tops naturally fall over.
- Foliage begins yellowing.
- Bulbs have reached mature size.
- Outer skins begin developing.
Avoid pulling onions too early while tops remain completely green unless weather conditions require harvest.
Garlic
Garlic is usually harvested when:
- Several lower leaves have turned brown.
- Upper leaves remain partially green.
- Bulbs have reached full size.
- Individual cloves are well formed but not splitting apart.
Harvesting too late increases the risk of bulbs separating underground, reducing storage quality.
H2: How to Cure Onions After Harvest
Once onions are harvested, begin curing as soon as practical.
Step 1: Handle Bulbs Carefully
Avoid bruising or damaging bulbs during harvest.
Cuts and impacts shorten storage life.
Step 2: Leave Foliage Attached
Do not remove tops immediately.
Leaves continue drying naturally during curing.
Step 3: Choose the Right Location
Ideal curing conditions include:
- Warm temperatures.
- Dry air.
- Excellent ventilation.
- Protection from rain.
- Full shade or indirect light.
Direct sunlight may overheat bulbs or cause uneven drying.
Step 4: Arrange for Airflow
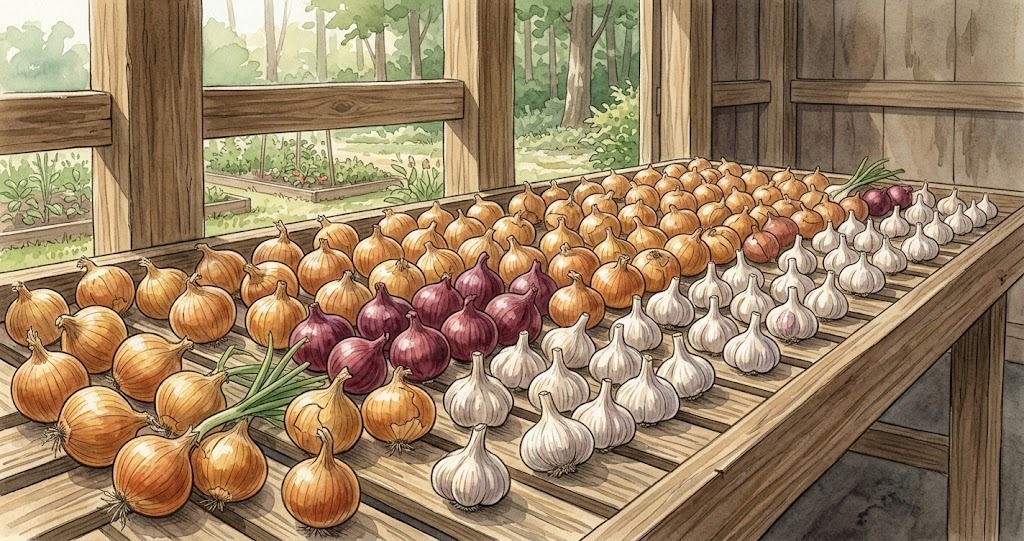
Spread onions in a single layer on:
- Screens
- Mesh racks
- Wire shelves
- Dry tables
Alternatively, bundle or braid tops if airflow remains adequate.
Avoid piling bulbs deeply.
Step 5: Wait Patiently
Most onions require approximately 2 to 4 weeks to cure, depending on weather, humidity, and bulb size.
High humidity may lengthen the process.
How to Cure Garlic Properly
Garlic curing follows many of the same principles.
Keep the Entire Plant Intact
Leave:
- Roots attached.
- Leaves attached.
- Stems attached.
These structures continue drying naturally.
Provide Good Ventilation
Garlic may be:
- Hung in bundles.
- Spread on screens.
- Placed on mesh shelves.
Air should circulate freely around every bulb.
Avoid Washing
Do not wash freshly harvested garlic.
Simply brush away loose soil after curing is complete.
Typical Curing Time
Garlic generally cures in 2 to 4 weeks, depending on environmental conditions.
Large bulbs and humid weather may require additional time.
Ideal Curing Conditions
Successful curing depends more on the environment than on exact dates.
The goal is a location that is:
- Warm
- Dry
- Well ventilated
- Protected from direct sun
- Sheltered from rain
Garages, sheds, covered porches, barns, or well-ventilated outbuildings often work well if temperatures remain moderate and humidity stays relatively low.
Air movement is especially important.
Fans may help improve circulation in humid climates.
How to Tell When Curing Is Complete
Rather than relying only on the calendar, examine the bulbs.
Properly Cured Onions
Look for:
- Dry necks.
- Papery outer skins.
- Firm bulbs.
- Completely dry roots.
The neck should no longer feel soft or moist.
Properly Cured Garlic
Signs include:
- Dry wrappers.
- Firm cloves.
- Dry roots.
- Brittle stem.
The bulb should feel solid with several protective outer layers remaining intact.
Preparing Onions and Garlic for Long-Term Storage
Once curing is complete, finish preparing the bulbs.
Trim the Tops
For onions, trim dried tops to approximately one inch unless braiding.
For garlic, stems are commonly trimmed after curing unless decorative braids are desired.
Trim Roots
Roots may also be trimmed once completely dry.
Sort Carefully
Store only healthy bulbs.
Use damaged bulbs first.
Discard bulbs showing:
- Mold
- Soft spots
- Rot
- Severe bruising
- Split cloves (for long-term storage)
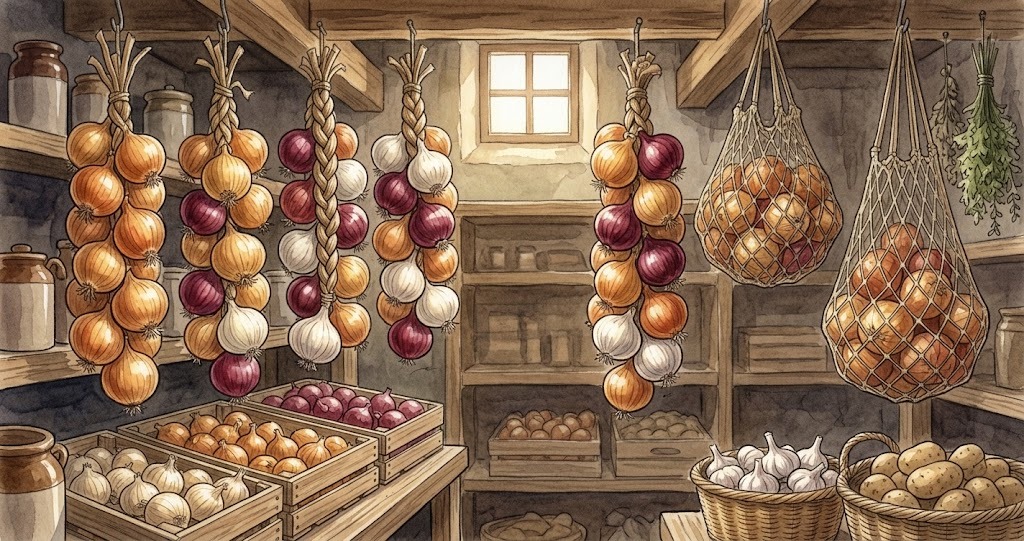
Best Storage Conditions
Proper curing is only the first step.
Storage conditions also determine longevity.
Most storage onions perform best in:
- Cool temperatures.
- Dry conditions.
- Good air circulation.
- Low humidity.
Garlic prefers similar conditions but often tolerates slightly warmer temperatures than onions.
Avoid storing onions and potatoes together.
Potatoes release moisture and gases that may shorten onion storage life.
Mesh bags, wire baskets, or slatted crates promote airflow much better than sealed plastic containers.
Common Storage Problems
Even well-cured bulbs eventually deteriorate.
Recognizing problems early helps prevent losses.
Sprouting
Warm temperatures and excess humidity encourage sprouting.
Soft Rot
Usually associated with excessive moisture or damaged bulbs.
Mold
Poor airflow and damp storage conditions increase fungal growth.
Shriveling
Extremely dry storage conditions may gradually dehydrate bulbs.
Regular inspection allows gardeners to remove problem bulbs before nearby onions or garlic become affected.
If you enjoy preserving your own harvest, you may also like our guide:
https://secretsofthegreengarden.com/how-to-save-tomato-seeds/
Practical Tips
- Harvest during dry weather whenever possible.
- Leave foliage attached during curing.
- Spread bulbs in a single layer.
- Maximize airflow around every bulb.
- Cure in shade rather than direct sun.
- Check bulbs regularly for signs of spoilage.
- Store only fully cured, undamaged bulbs.
Common Mistakes
Washing Bulbs Before Curing
Excess moisture increases the risk of decay.
Curing in Direct Sunlight
Strong sunlight may damage bulbs and cause uneven drying.
Removing Tops Too Soon
Attached foliage supports proper curing.
Storing Damaged Bulbs
Bruised or diseased bulbs rarely store well.
Using Plastic Bags
Poor airflow traps moisture and encourages mold.
Frequently Asked Questions
How long should onions cure?
Most onions require approximately 2 to 4 weeks, depending on humidity and environmental conditions.
How long should garlic cure?
Garlic typically cures within 2 to 4 weeks, although humid conditions may extend the process.
Can I cure onions outside?
Only if weather remains consistently warm and dry. Protect bulbs from rain, heavy dew, and direct sunlight.
Should I wash onions after harvest?
No. Brush away loose soil after curing rather than washing freshly harvested bulbs.
Why are my stored onions sprouting?
Warm temperatures, excess moisture, or naturally shorter-storage varieties may encourage sprouting.
Conclusion
Learning how to cure onions after harvest is one of the easiest ways to dramatically improve storage life and reduce waste. By allowing bulbs to dry slowly in warm, shaded, well-ventilated conditions, gardeners create the protective outer layers that keep onions and garlic firm for months instead of weeks.
Combined with proper harvest timing, careful handling, and cool, dry storage, curing transforms a successful harvest into a dependable pantry staple that can be enjoyed throughout much of the year. A little patience immediately after harvest pays off with better flavor, fewer losses, and longer-lasting homegrown produce.
il Health, compost, Container Gardening
Internal Link Suggestions
Anchor text: How to Save Tomato Seeds the Right Way
Link: https://secretsofthegreengarden.com/how-to-save-tomato-seeds/
Anchor text: Blossom End Rot on Tomatoes: Why It’s Not Really About Watering
Link: https://secretsofthegreengarden.com/blossom-end-rot-tomatoes/
External Dofollow Authoritative Sources
University of Minnesota Extension – Harvesting and Storing Home Garden Vegetables
https://extension.umn.edu/
Iowa State University Extension – Harvesting, Curing, and Storing Onions and Garlic
https://yardandgarden.extension.iastate.edu/
University of Illinois Extension – Growing and Storing Garlic and Onions
https://extension.illinois.edu/