
Step 1: Prepare Your Materials
Before starting, gather everything you’ll need:
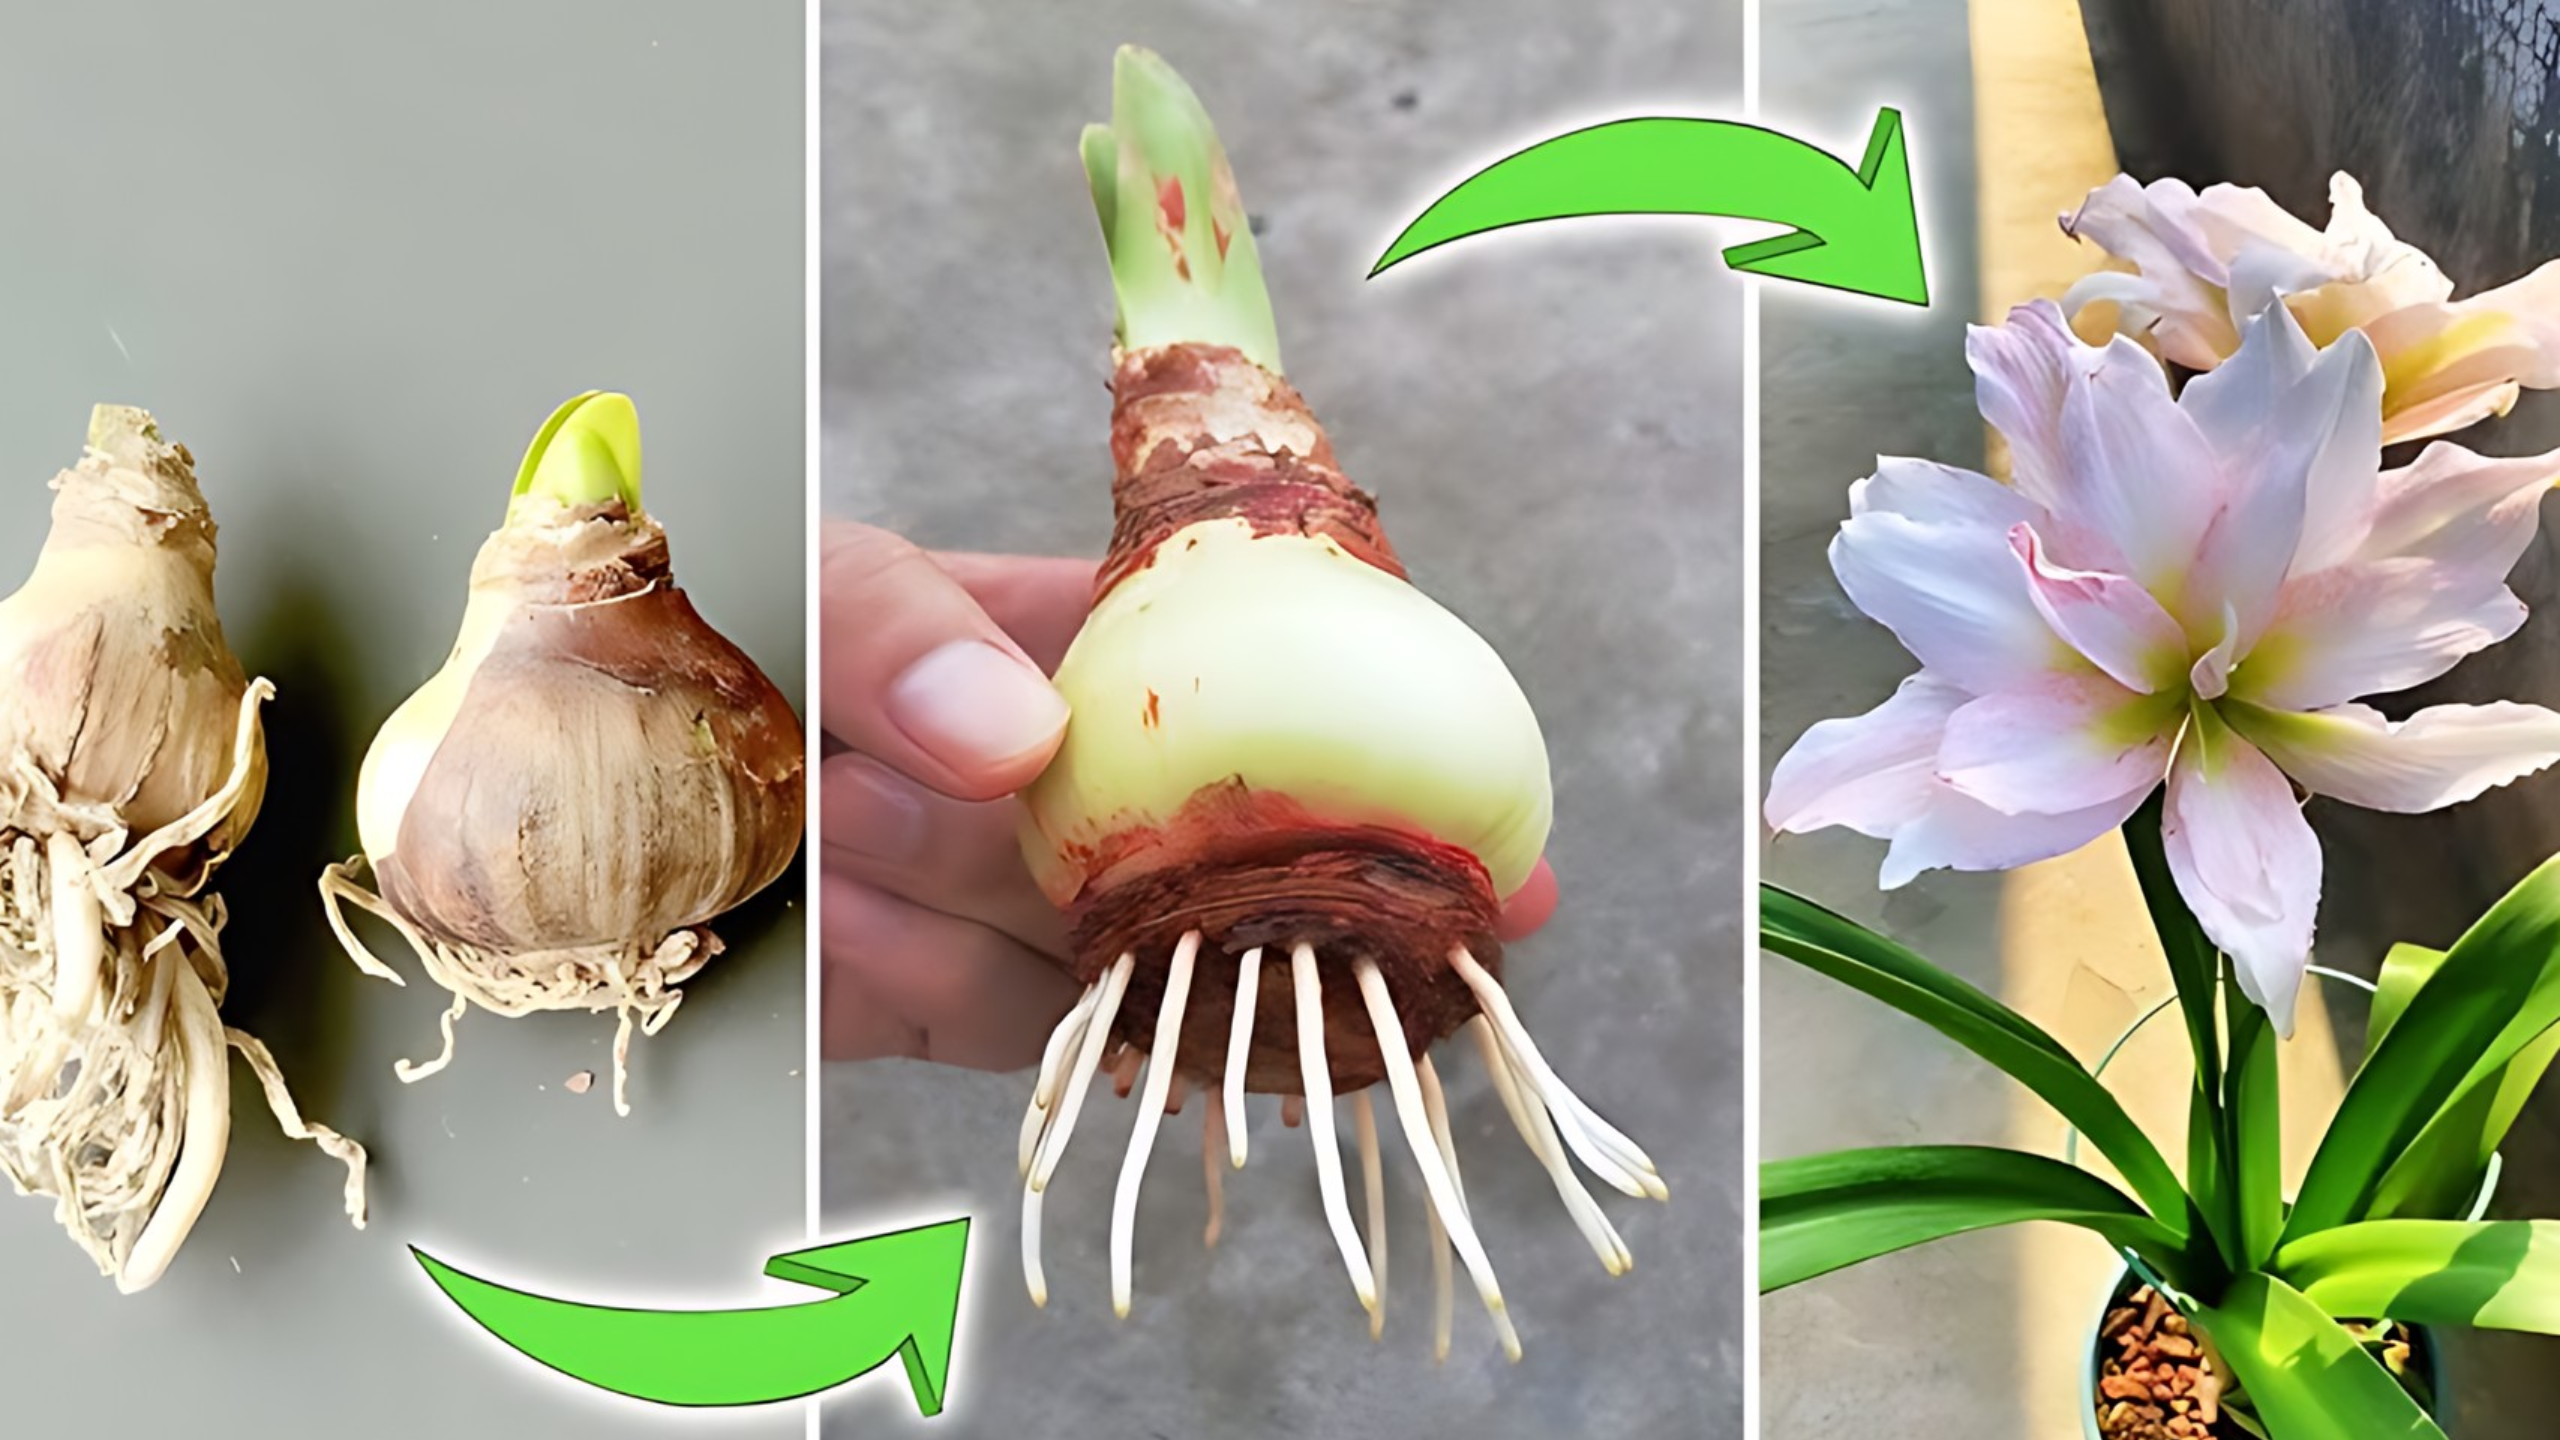
- A healthy amaryllis bulb
- Clear plastic vases or cups (preferably transparent)
- Smooth pebbles or small rocks (guijarros)
- Fresh water
Choose a bulb that looks healthy—firm, free of mold, and with no signs of disease. The right bulb is crucial for vibrant blooms and successful growth.
Step 2: Prepare the Vases for Growing
Your vases play a key role in supporting the bulb’s roots and ensuring proper drainage.
- Create drainage holes: If the plastic cups don’t have drainage, carefully make a few small holes at the bottom to prevent water from stagnating and causing rot.
- Add support: Place a layer of pebbles at the bottom of each vase. This layer will support the bulb and keep it stable as roots grow downward. Think of it as building a sturdy foundation for your plant.
Step 3: Position the Bulb

Now, gently place the amaryllis bulb on top of the pebbles.
- Placement: Position the bulb so that its pointed tip faces upward.
- Covering the roots: The bottom part of the bulb should be above the water level, but roots will develop downward into the water over time.
- Stability: Ensure the bulb is secure in the rocks, preventing it from tipping over as it grows.
Step 4: Add Water Carefully
Pour water into the vase so it reaches just below the base of the bulb, ensuring the roots will eventually grow into it.
- Water level: About 1-2 centimeters below the bulb’s bottom is ideal.
- Water quality: Use clean, room temperature water. Change it every two to three weeks to prevent mold and maintain oxygen levels.
Step 5: Find the Perfect Spot for Your Vase
Amaryllis loves sunlight.
- Light placement: Place your vase in a bright spot, such as a south- or west-facing window where it gets plenty of direct sunlight.
- Avoid drafts: Keep it away from drafts or temperature fluctuations, which could hinder growth.
Step 6: Maintain and Care for Your Growing Plant
Growing amaryllis in water requires some attentive care.
- Monitor water levels: Keep the water at the right level, adding more as the water evaporates.
- Change water regularly: Refresh the water every 2-3 weeks to prevent stagnation and pests.
- Ensure stability: As roots grow and the plant gets taller, gently support the flower stalk with stakes or tutores to prevent it from toppling over.
Step 7: Observe Root and Stem Development
Within a few weeks, you’ll notice roots developing in the water, anchoring the bulb more firmly.
- Growth signs: The emergence of a flower stalk is an exciting milestone—often appearing after several weeks of growth.
- Patience is key: Each bulb may grow at a different pace, but consistent care will bring beautiful results.
Step 8: Provide Support for the Flowering Stem
As your amaryllis blooms, the flower stalk can become quite tall and heavy.
- Use supports: Gently tie the stalk to a small stake or tutores to keep it upright.
- Prevent damage: Supporting the stalk reduces the risk of breakage and ensures a graceful display.
Step 9: Enjoy the Stunning Flower Display
After your patience and care, your amaryllis will finally bloom, showcasing large, vibrant flowers that make any space more cheerful.
- Timing: Expect blooms in a few weeks after the stalk emerges. The flowers can last for several weeks, providing long-lasting beauty.
- Enhance your decor: Place the vase in a prominent spot to enjoy the colors and fragrance. It’s a perfect centerpiece or gift idea.
Additional Tips and FAQs
Can I grow amaryllis directly in water without pebbles?
While it’s possible, using pebbles or rocks provides essential support and helps stabilize the bulb, leading to better growth and flowering.
What if the roots start rotting?
Rotting usually indicates stagnant water or overwatering. Always ensure good drainage, change the water regularly, and avoid overfilling.
How long does the flowering last?
Typically, the blossoms last for about 2 to 3 weeks. Proper care and support can extend this time.
Can I grow amaryllis in water permanently?
Yes, many enjoy growing amaryllis in water year-round, but for a robust bloom, many also choose to transfer bulbs to soil after flowering.
Final Thoughts
Growing amaryllis in water using simple plastic vases is a delightful project that brightens your home without much fuss. With proper preparation, attentive watering, and support, you’ll enjoy stunning flowers that add vibrancy and elegance to any space. Plus, it’s a wonderful way to connect with nature and enjoy the rewarding process of nurturing a plant from bulb to bloom.
If you’re ready to try it out, gather your materials today and watch as your beautiful amaryllis transforms your home into a floral paradise!
I must thank you for the efforts you’ve put in writing this blog.
I’m hoping to see the same high-grade blog posts from you
later on as well. In fact, your creative writing abilities has motivated me to get my own site now 😉
Why users still use to read news papers when in this technological
globe everything is existing on web?
Hey! This is my first comment here so I just wanted to give a quick
shout out and say I genuinely enjoy reading your posts. Can you recommend any
other blogs/websites/forums that deal with the same subjects?
Appreciate it!
What’s up, of course this post is genuinely fastidious and I have learned lot of things from it
on the topic of blogging. thanks.
Outstanding quest there. What happened after? Good luck!
navigate to this site [url=https://keplr-extension.com]keplr Extension[/url]
Awesome! Its really amazing piece of writing, I have got much clear
idea concerning from this paragraph.
WOW just what I was looking for. Came here by searching for
xnxx.com
read this article [url=https://sites.google.com/mycryptowalletus.com/phantom-walletlogin/]phantom Download[/url]
look at this site [url=https://sites.google.com/mycryptowalletus.com/metamaskwalletlogin/]Metamask Extension[/url]
go right here [url=https://sites.google.com/mycryptowalletus.com/metamask-wallet-login/]MetaMask Download[/url]
go to my blog [url=https://phantom-wallet.net]phantom wallet[/url]
I’ve read some good stuff here. Definitely price bookmarking
for revisiting. I wonder how a lot attempt you place to
create this kind of fantastic informative site.
Equilibrio in situ
La Nivelación de Partes Móviles: Esencial para una Operación Sin Vibraciones
¿ En algún momento te has dado cuenta de movimientos irregulares en una máquina? ¿O tal vez escuchaste ruidos anómalos? Muchas veces, el problema está en algo tan básico como un desequilibrio en alguna pieza rotativa . Y créeme, ignorarlo puede costarte bastante dinero .
El equilibrado de piezas es una tarea fundamental tanto en la fabricación como en el mantenimiento de maquinaria agrícola, ejes, volantes, rotores y componentes de motores eléctricos . Su objetivo es claro: impedir oscilaciones que, a la larga, puedan provocar desperfectos graves.
¿Por qué es tan importante equilibrar las piezas?
Imagina que tu coche tiene un neumático con peso desigual. Al acelerar, empiezan las vibraciones, el volante tiembla, e incluso puedes sentir incomodidad al conducir . En maquinaria industrial ocurre algo similar, pero con consecuencias aún peores :
Aumento del desgaste en bearings y ejes giratorios
Sobrecalentamiento de componentes
Riesgo de colapsos inesperados
Paradas sin programar seguidas de gastos elevados
En resumen: si no se corrige a tiempo, una leve irregularidad puede transformarse en un problema grave .
Métodos de equilibrado: cuál elegir
No todos los casos son iguales. Dependiendo del tipo de pieza y su uso, se aplican distintas técnicas:
Equilibrado dinámico
Ideal para piezas que giran a alta velocidad, como rotores o ejes . Se realiza en máquinas especializadas que detectan el desequilibrio en dos o más planos . Es el método más fiable para lograr un desempeño estable.
Equilibrado estático
Se usa principalmente en piezas como llantas, platos o poleas . Aquí solo se corrige el peso excesivo en una única dirección. Es rápido, sencillo y eficaz para ciertos tipos de maquinaria .
Corrección del desequilibrio: cómo se hace
Taladrado selectivo: se quita peso en el punto sobrecargado
Colocación de contrapesos: por ejemplo, en llantas o aros de volantes
Ajuste de masas: típico en bielas y elementos estratégicos
Equipos profesionales para detectar y corregir vibraciones
Para hacer un diagnóstico certero, necesitas herramientas precisas. Hoy en día hay opciones disponibles y altamente productivas, por ejemplo :
✅ Balanset-1A — Tu asistente móvil para analizar y corregir oscilaciones