
Yellow chrysanthemums are among the most cheerful and eye-catching flowers you can grow. Whether you’re looking to brighten up your garden or decorate your balcony with bursts of golden color, propagating these blooms from cuttings is a quick and simple way to expand your floral display.
Follow this step-by-step guide to grow vibrant yellow chrysanthemums from cuttings—with minimal fuss and rewarding results.
Why Grow Chrysanthemums from Cuttings?
Propagating chrysanthemums (commonly called “mums”) from cuttings allows you to:
Save money by multiplying your plants
Maintain the exact color and traits of the parent plant
Enjoy faster blooms than starting from seeds
Control quality and timing of growth
Let’s get started!
Step 1: Select Healthy Cuttings
Start with a mature yellow chrysanthemum plant that’s free of disease and pests. Choose green, healthy shoots that haven’t yet flowered. These are more likely to root successfully.
Each cutting should be:
About 10 to 15 cm (4–6 inches) long
Free of any buds or blooms
Taken from the top or side shoots of the plant
Step 2: Prepare the Cuttings
Using a pair of sharp, sterilized scissors or garden shears, cut just below a leaf node—this is where roots are most likely to form.
Remove the bottom leaves, leaving just the top two sets.
If the top leaves are large, consider trimming them slightly to reduce moisture loss.
This helps the plant focus its energy on root development instead of maintaining foliage.

Step 3: Use Rooting Hormone (Optional but Recommended)
Dip the cut end of each stem into rooting hormone powder to encourage faster root growth and higher success rates.
While this step is optional, it’s especially helpful if you’re propagating multiple cuttings or if the environment isn’t ideal for rooting.
Step 4: Plant the Cuttings
Fill small pots or seedling trays with a light, well-draining potting mix—ideally a mix of peat, perlite, or sand.
Make a hole in the soil with a pencil or stick.
Insert the cutting so that the node is buried but the remaining leaves sit above the soil.
Firm the soil gently around the stem.
Tip: Avoid crowding the cuttings. Give each enough space for airflow and light.
Step 5: Create a Humid Environment
Moisture is key to successful rooting.
Cover the pots loosely with a clear plastic bag or place them in a propagation dome.
Ensure the covering doesn’t touch the leaves—use sticks or wire hoops if needed.
This mini greenhouse effect helps maintain high humidity, which is crucial during the rooting stage.
Step 6: Place in Bright, Indirect Light
Avoid direct sunlight, which can overheat or dry out the cuttings.
Instead, place them:
Near a bright window with filtered light
Or under grow lights if indoors
In a sheltered outdoor space if weather allows
Keep temperatures between 18–24°C (65–75°F) for best results.
Step 7: Water Gently and Consistently
The soil should remain moist but never soggy. Use a spray bottle or a gentle watering can to moisten the mix regularly.
Check soil moisture daily
Avoid overwatering to prevent rot
Don’t let the soil dry out completely
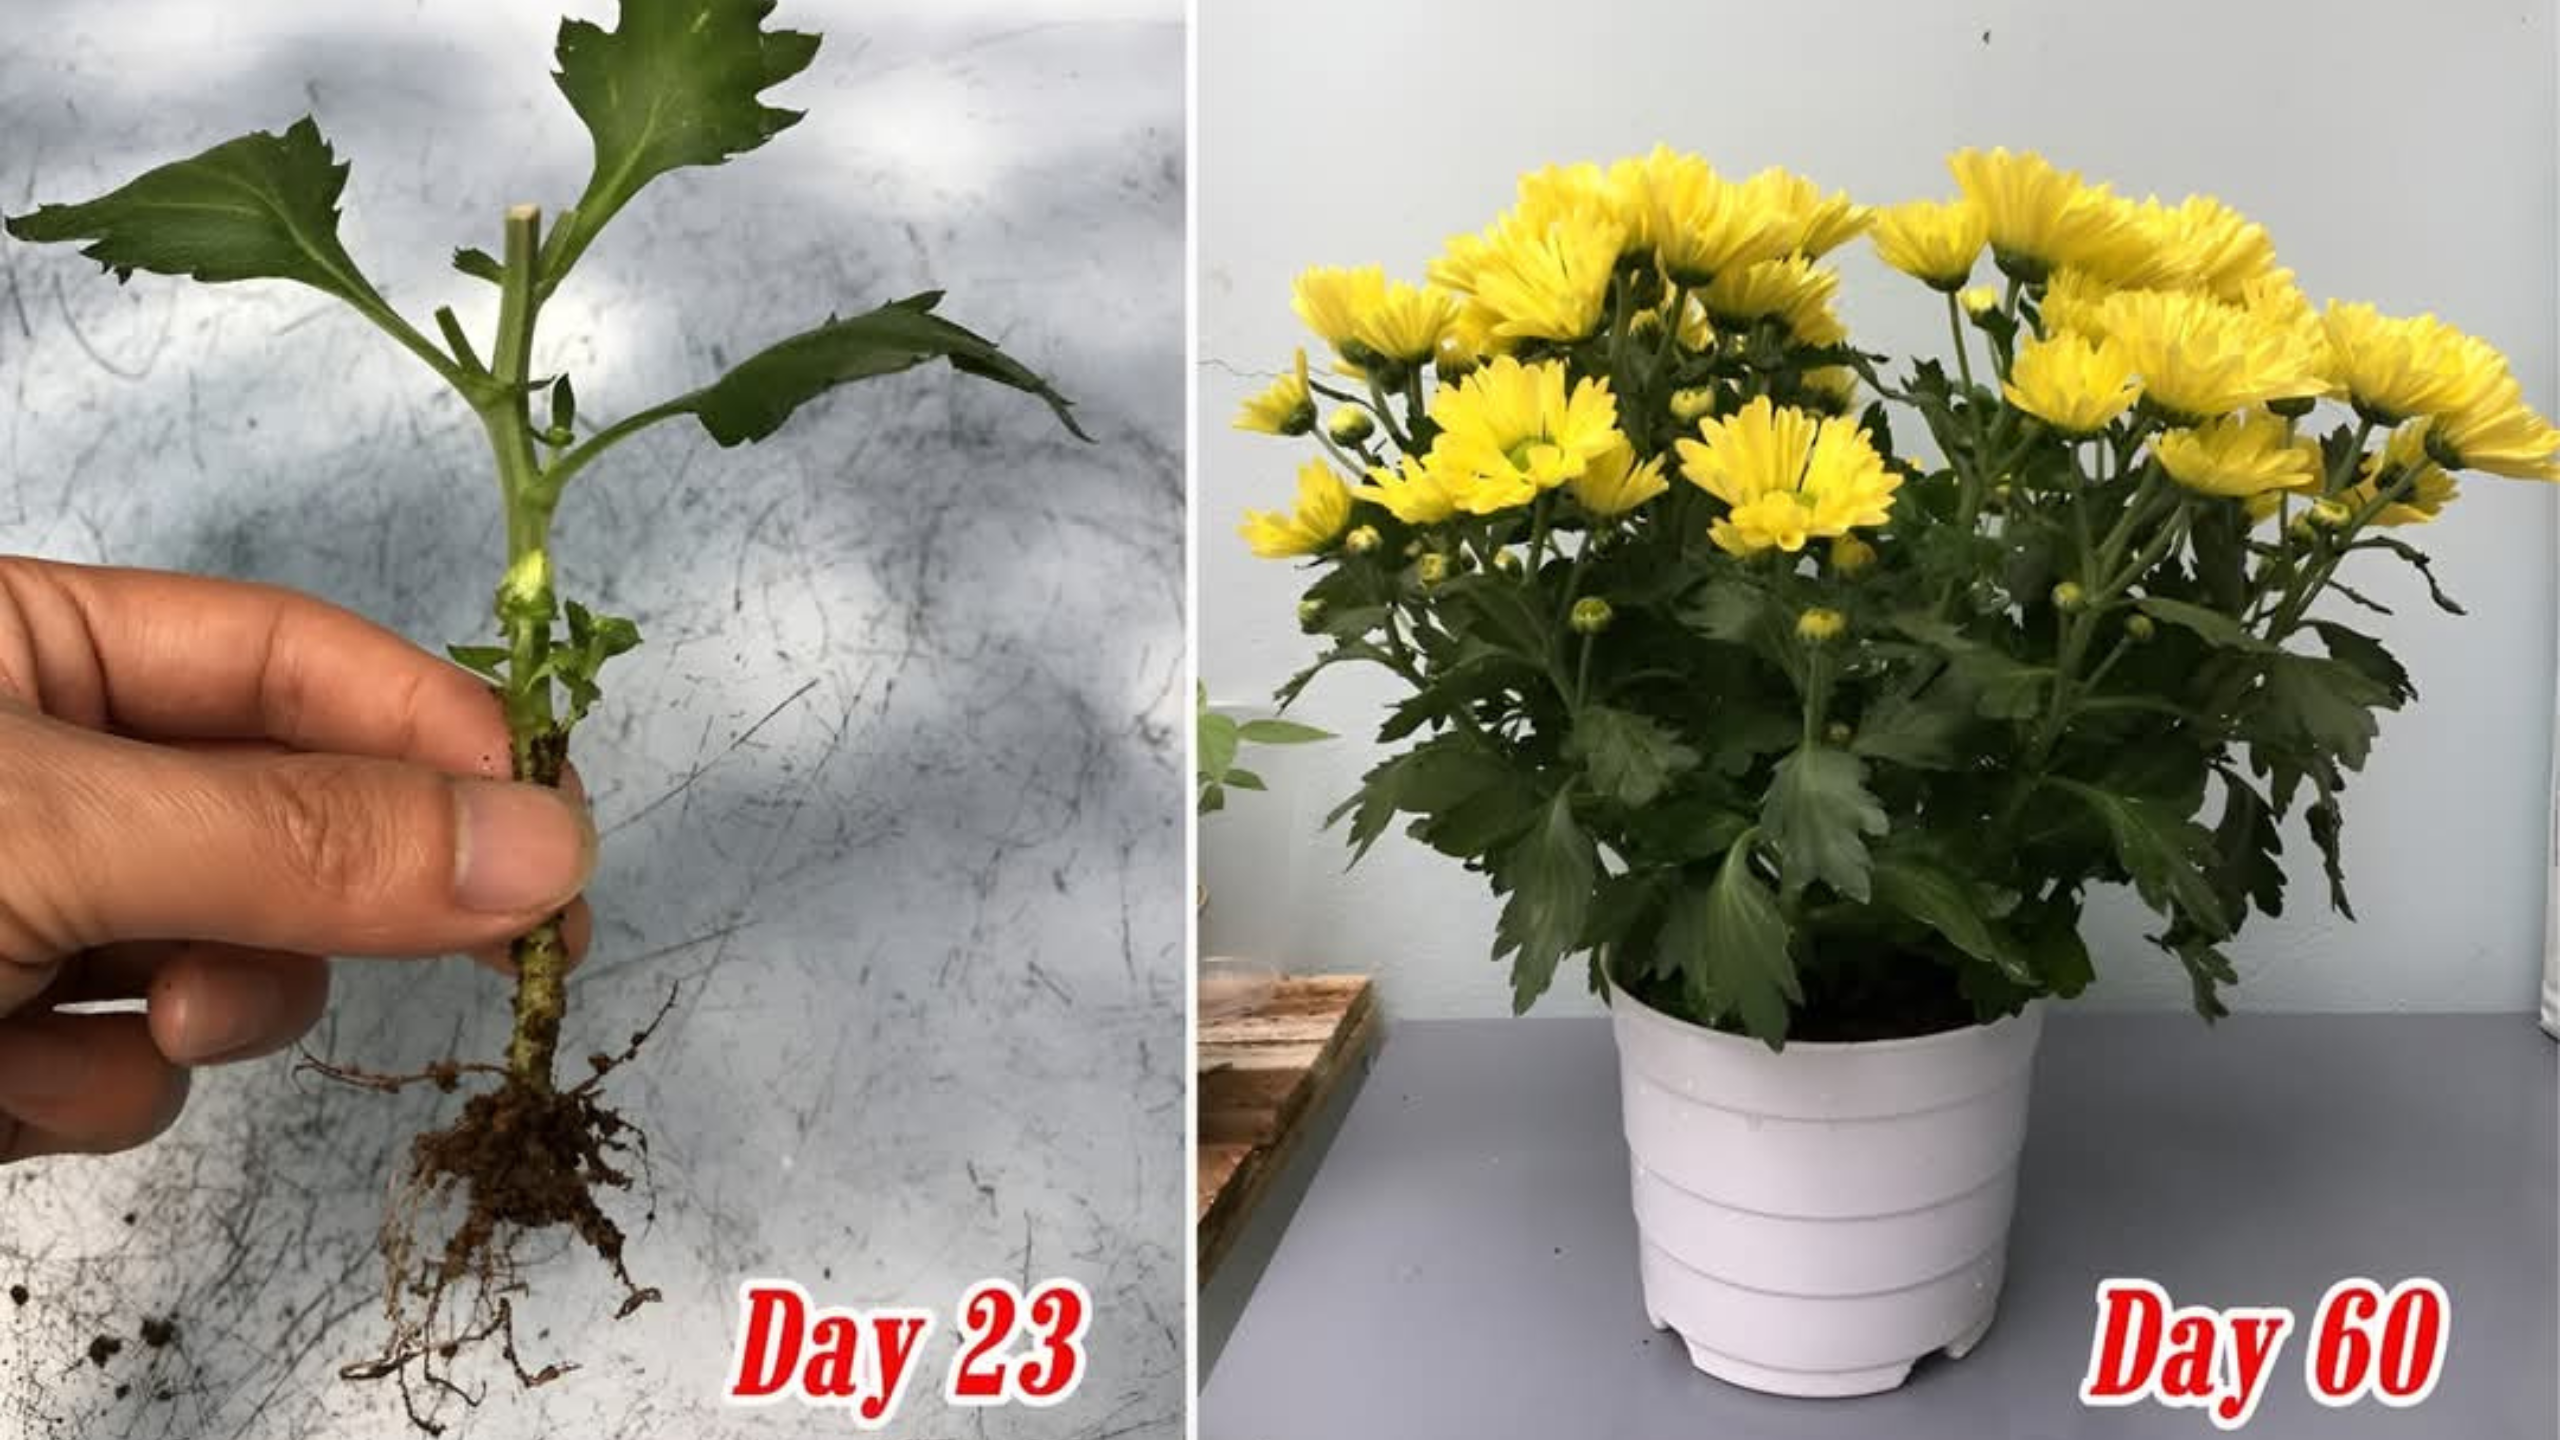
Step 8: Monitor Root Development
Roots typically form within 3 to 4 weeks, sometimes sooner in ideal conditions.
You’ll know it’s working if:
New leaves start to appear
The plant resists a gentle tug (indicating roots are anchoring)
If you see mold or rot, remove affected cuttings and ensure better air circulation or reduce humidity.
Step 9: Transplant to Larger Pots or Garden Beds
Once your cuttings are well-rooted and showing new growth, they’re ready to move on.
Transplant into individual pots or garden soil with good drainage
Handle gently to avoid damaging the new roots
Space them at least 20–30 cm apart to allow full growth
Let the new plants acclimate gradually if moving from indoors to outdoors.
Step 10: Long-Term Care for Blooming Success
To help your yellow chrysanthemums thrive:
Water regularly, especially during hot weather
Fertilize every 2–3 weeks during the growing season with a balanced fertilizer (10-10-10)
Pinch back tips early in the season to encourage bushier plants and more blooms
Deadhead spent flowers to extend blooming time
Protect from frost if you’re in a cold climate—mums prefer warmth
Final Thoughts
Propagating yellow chrysanthemums from cuttings is not only easy but deeply rewarding. Within a few weeks, you’ll have strong young plants ready to fill your garden with vibrant blooms.
Mit der Ausnahme von Live Casino Games und Jackpots können Sie alle Arten von Casino Games
ebenfalls ohne Anmeldung und ohne Echtgeld Einsatz spielen.
Die beliebtesten Spieleanbieter in Deutschland sind Novoline, Merkur und Gamomat, die viele Casinospiele anbieten, die aus landbasierten Spielotheken bekannt sind.
Damit haben Sie bei uns mehr Casino Spiele kostenlos zur Auswahl,
als bei jedem Online Casino mit Echtgeld und können die Online
Glücksspiele sogar ohne Anmeldung gratis spielen. Sie
können mit diesem „Spielgeld” spielen und auch nach Gewinnen Ihr Guthaben erhöhen. Allerdings können Sie sich die im Spiel gesammelten Credits niemals auszahlen lassen. Auf dieser Seite finden Sie eine Reihe von Filtern und Sortierwerkzeugen, mit denen Sie genau jene Spieltypen und Spielthemen bestimmen und auswählen können, die Sie spielen möchten. Hier finden Sie eine Übersicht über die anderen Arten von kostenlosen Casinospielen, die Sie im Demomodus bei Casino Guru spielen können.
Diese lizenzierten Casinos bieten eine sichere Spielumgebung und garantieren die Einhaltung der deutschen Gesetze. In Deutschland werden Online Casinos seit dem Glücksspielstaatsvertrag 2021 von der Gemeinsamen Glücksspielbehörde der Länder (GGL) reguliert. Die Qualität und Vielfalt der Online Casino Spiele hängt stark von den Softwareanbietern ab.
Einzahlungsboni gehören zu den wichtigsten Angeboten neuer Online Casinos – sie schenken Ihnen zusätzliches Guthaben und verlängern den Spielspaß von Anfang an. Neue Online Casinos locken mit attraktiven Bonus Angeboten, die Ihnen den Einstieg ins Spiel erleichtern und zusätzlichen Spaß bieten. Sie haben sich seit kurzem in den Casinos online etabliert. Wir prüfen, ob neue Anbieter eine breite Auswahl an Top-Slots bieten – von bekannten Klassikern bis hin zu neuen Trend-Spielen.
References:
https://online-spielhallen.de/ggbet-casino-aktionscode-ihr-schlussel-zu-exklusiven-vorteilen/
Enter your deposit amount (check the casino’s minimum deposit).
Some casinos may ask for identity verification upfront, while others
only require it when withdrawing winnings.
Skrill is a widely used e-wallet, but in Australia,
it’s primarily accessible for casino payments through Utorg, a third-party processor.
Neosurf is a prepaid voucher system that allows players
to fund their accounts without sharing banking details.
Similar to Visa, Mastercard is a go-to choice for many Aussie players.
These are the ones you’re most likely to find at the casinos on our lists.
Not really a fan of horror-themed pokies, but this
one’s the exception. So, this is the section where I tested most of the games, and my favourite turned
out to be Wild Witches. All of these offers have wagering requirements ranging
from 30x-40x (except for the cashback), and each one
requires a different bonus code.
References:
https://blackcoin.co/online-gambling-in-australia-a-comprehensive-overview/
With the casino bonus code no deposit, gamblers can get the perk that offers free spins for the
game Starstruck, which is a retro slot-themed game.
Who doesn’t love free cash and winning opportunities, especially when you are playing to your heart’s desire in an online
casino in Australia? No deposit bonuses are usually free and granted upon registration with the casino.
Deposit-free bonuses are a way for casinos to attract
more customers. Yes, you can definitely win real money with a
no deposit bonus. Alternatively, it is ok to deposit real money and receive other,
definitely more rewarding kind of bonus, the match deposit,
instead.
So to ease your search and get you to your favorite gambling site faster, we would like
to recommend you an amazing casino site for Aussie players — WildTornado.
Moreover, we have indicated popular bonuses and bonus codes for those
casinos, where possible. This approach allows
us to recommend only the highest quality websites and enables you
to choose the best Australian online casino.
Below are the top online pokies enjoyed by Aussies at
casinos. Finding a trustworthy PayPal online casino isn’t
just about luck — it’s about knowing what to look for.
References:
https://blackcoin.co/the-match-game-rules-wins-and-popular-strategies/
casino sites that accept paypal
References:
https://balajee.co.in/
online pokies paypal
References:
https://tayseerconsultants.com/
gamble online with paypal
References:
http://www.pottomall.com/bbs/board.php?bo_table=free&wr_id=6040943
paypal online casino
References:
http://www.pottomall.com/bbs/board.php?bo_table=free&wr_id=6040909