
Roses are often called the “queen of flowers” for their unmatched beauty and enchanting fragrance. Whether you’re an experienced gardener or a beginner, propagating roses from cuttings offers a rewarding way to expand your garden without purchasing new plants. If you’re eager to learn an easy, natural method that boosts your success rate, you’re in the right place. Today, I’ll guide you through the process of growing roses from 10cm cuttings—using a simple homemade fertilizer made from banana peels. This approach isn’t just cost-effective; it also enhances plant health and creates a lush, vibrant rose garden.
What You Need to Get Started
Preparing for successful rose propagation doesn’t require many tools or supplies. Here’s what you’ll need:
- Fresh rose cuttings, approximately 10cm long
- Rooting hormone (or a natural alternative like aloe vera gel)
- Sharp, clean pruning shears
- Well-draining potting mix
- Small pots or containers
- Clear plastic bags or plastic wrap
- Fresh banana peels
- Watering can or spray bottle
- Sunny spot with indirect sunlight
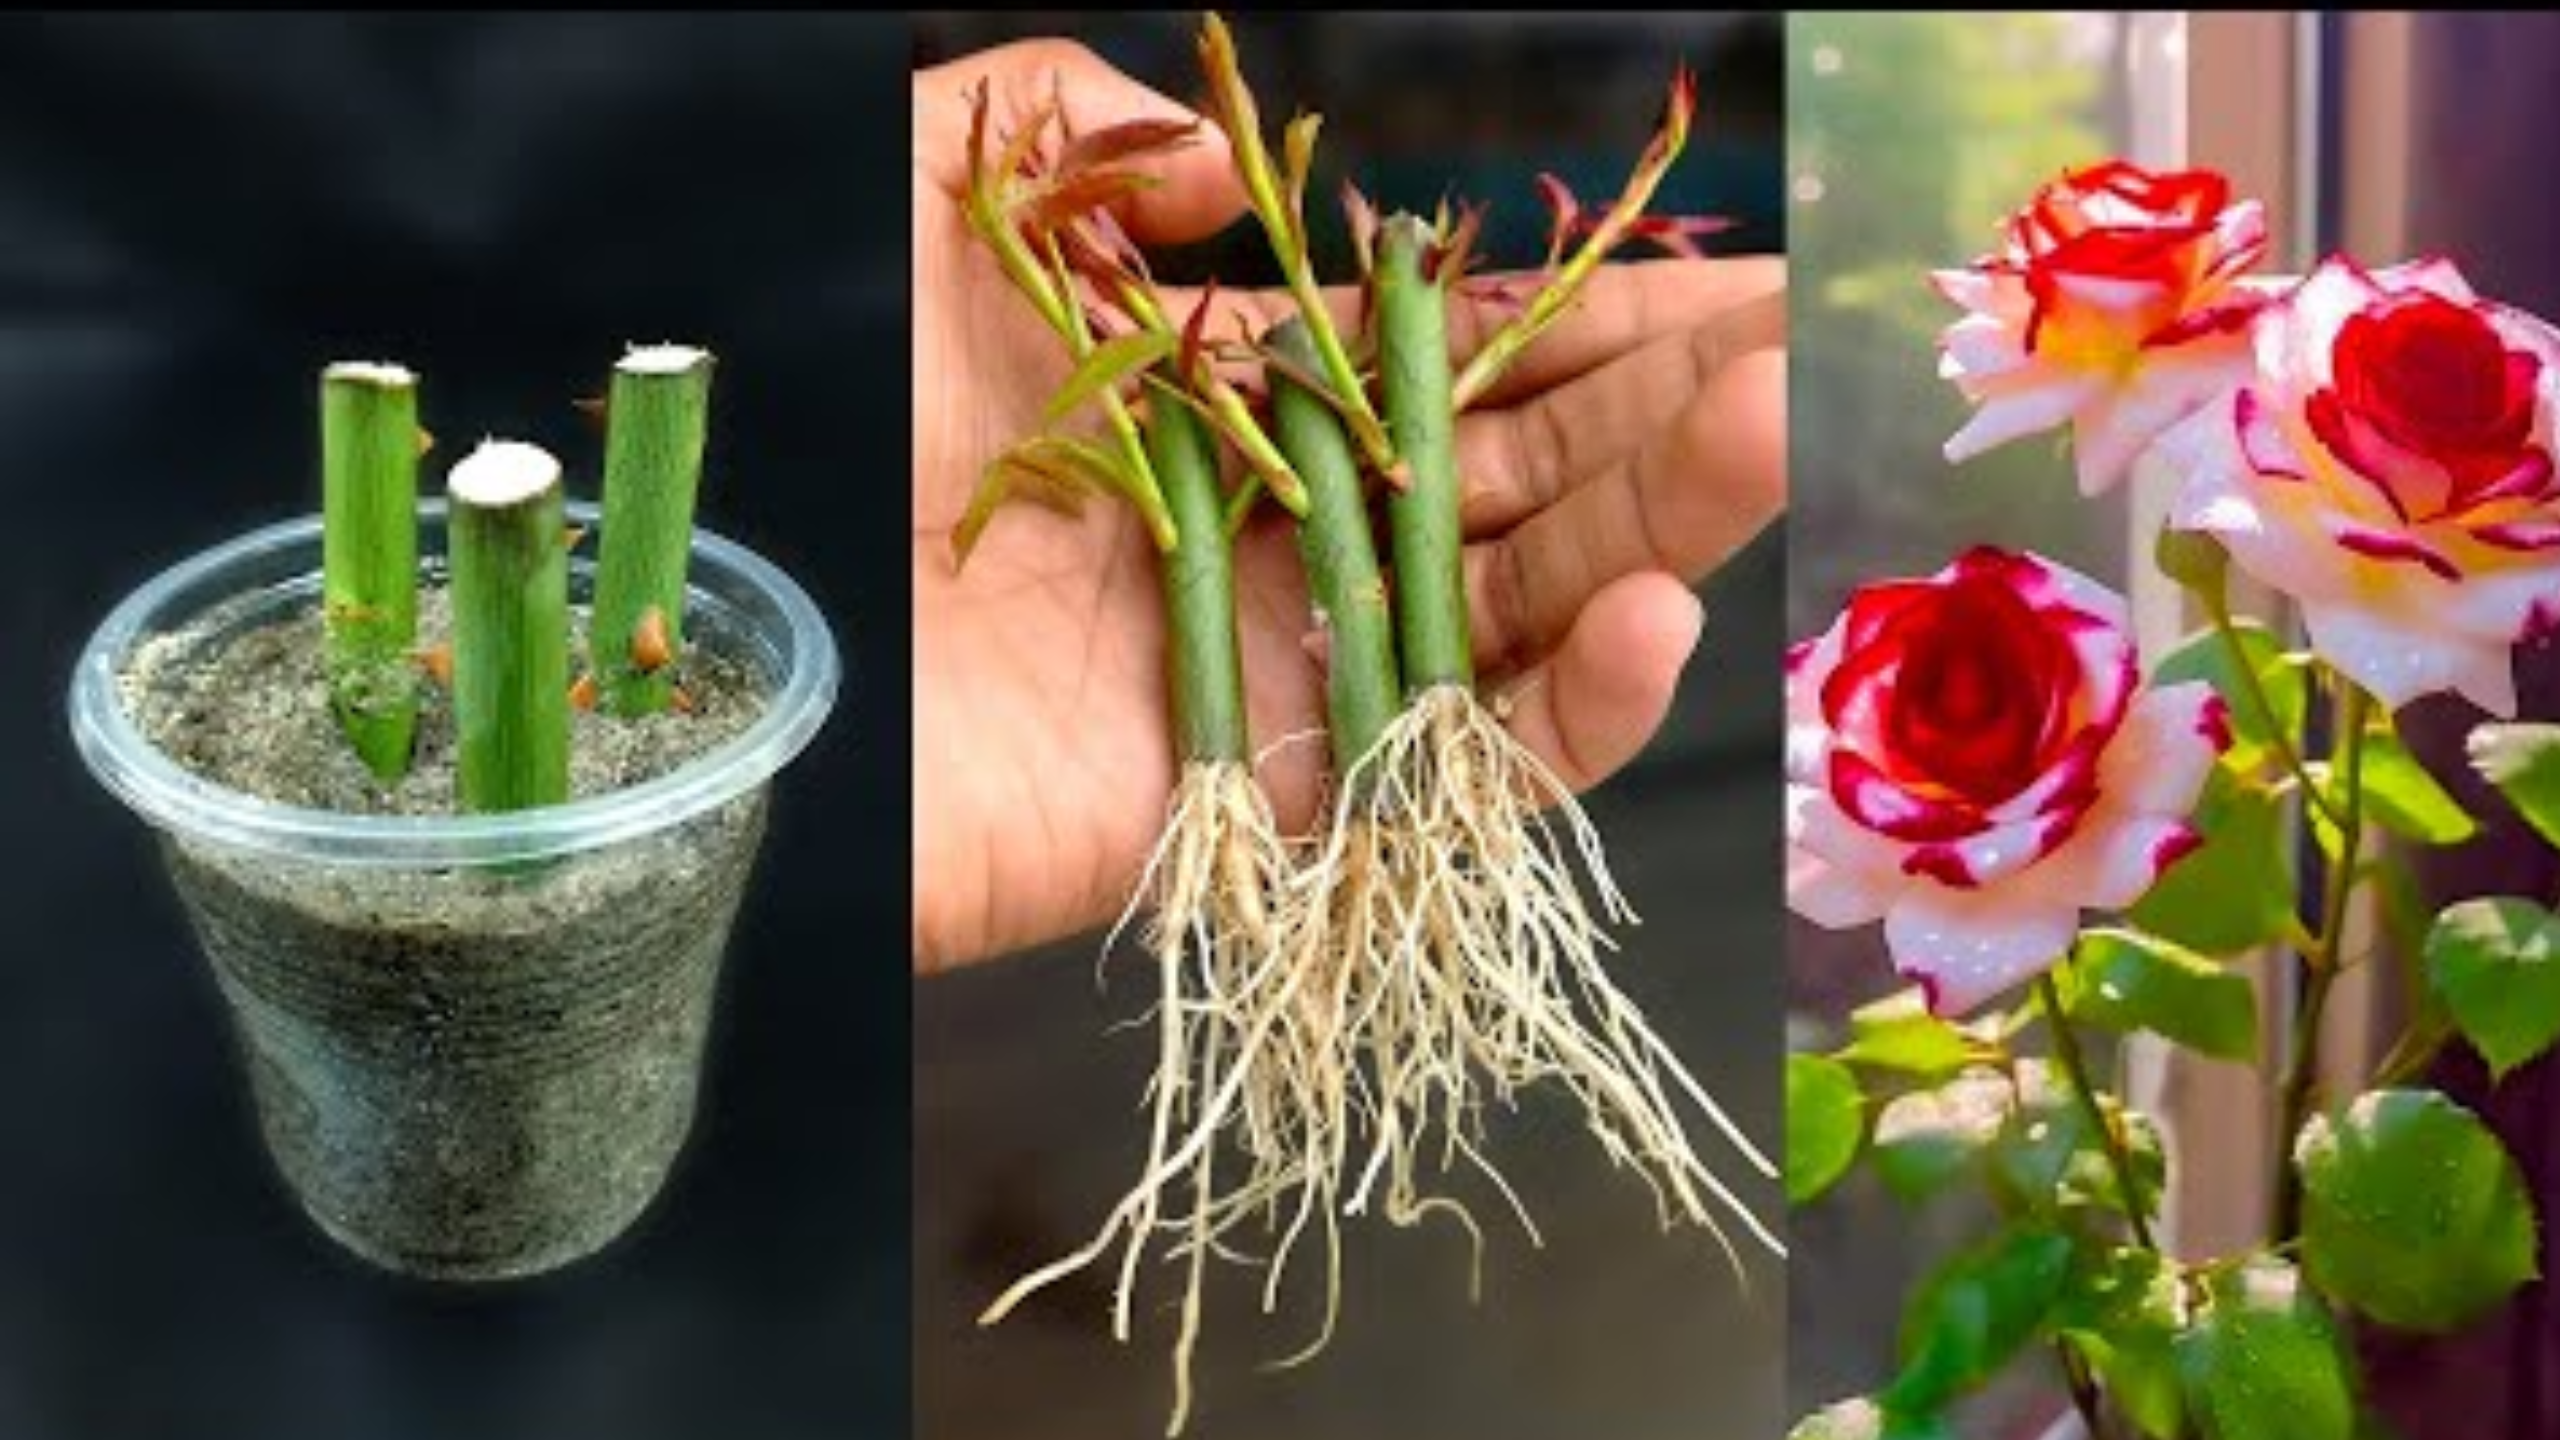
Step 1: Selecting and Preparing Your Rose Cuttings
Timing is key. Take your cuttings during spring or early summer when the plant is actively growing. Choose healthy stems with multiple leaf nodes—these are the small bumps where leaves emerge. Using sharp pruning shears, cut just below a leaf node, ensuring each cutting is about 10cm long.
Strip the lower leaves from the bottom half of each cutting to prevent rot and encourage root growth. Leave a couple of leaves at the top for nourishment. Properly prepared cuttings give your roses the best chance of developing roots.
Step 2: Applying the Rooting Hormone or Natural Alternative

Dip the bottom end of each cutting into rooting hormone powder, which signals the plant to produce roots. If you prefer a natural option, aloe vera gel can serve as an effective substitute. Aloe vera contains compounds that promote root development and help prevent infection.
Simply cut a small piece of aloe vera leaf, extract the gel, and coat the cut end of your rose stem before planting. This natural approach is eco-friendly, cost-saving, and often just as effective as commercial rooting hormones.
Step 3: Potting Your Cuttings
Fill your small pots or containers with light, well-draining potting mix designed for roses or flowering plants. Create a hole in the center with a pencil or stick, then carefully insert the cutting, burying about an inch into the soil. Gently press the soil around the base to secure the cutting.
Ensuring proper contact between the cutting and soil will support the development of roots and keep the stem stable during the rooting process.
Step 4: Nourishing with Banana Peel Fertilizer
Here’s where it gets interesting. Did you know banana peels are packed with essential nutrients like potassium, phosphorus, and calcium—nutrients roses love? To make your own natural fertilizer, cut fresh banana peels into small pieces and bury them gently around the base of your cuttings.
As the peels decompose over weeks, they release these vital nutrients into the soil, nourishing your young plants in a slow, steady manner. This simple, homemade fertilizer reduces the need for chemical feeds and encourages healthy growth.
Step 5: Creating a Humid Environment
Water your newly potted cuttings thoroughly, making sure the soil is moist but not waterlogged. To mimic the natural humidity of a greenhouse, cover each pot with a clear plastic bag or plastic wrap. Secure it with a rubber band or string, ensuring good air circulation but preventing excess humidity that might cause mold.
This mini-greenhouse traps moisture, promoting root formation. Remember to check regularly—mist the cuttings lightly if the environment seems too dry.
Step 6: Providing Proper Light and Care
Place your potted cuttings in a location with bright, indirect sunlight. Direct sun can overheat the delicate new roots and damage the leaves. Maintain consistent moisture levels by watering as needed—avoid letting the soil dry out completely.
Over the subsequent weeks, roots will start to develop. You can test their growth gently by tugging on the cutting; resistance indicates root growth. The process may take anywhere from a few weeks to a couple of months, so patience is key.
Step 7: Transplanting to the Garden
Once your cuttings have established healthy root systems—meaning they resist gentle tugging—it’s time to transplant them into your garden. Choose a sunny spot with well-drained soil. Dig a hole slightly larger than the root ball, plant your rose, and water generously to help it settle. Adding some compost or organic matter will give your new rose the best start.
Why This Method Works
Growing roses from cuttings is a cost-effective, enjoyable activity that literally allows you to clone your favorite varieties. The addition of homemade banana peel fertilizer enhances plant vigor and promotes lush, blooming roses. Plus, using natural ingredients reduces environmental impact and avoids synthetic chemicals.
Patience and consistent care will reward you with a thriving rose garden. Expect to see your new plants grow strong and healthy, producing beautiful flowers for years to come.
Final Thoughts
Whether you’re cultivating a few roses for your backyard or planning a larger garden, this method offers a simple, natural, and effective way to propagate roses. The key is in selecting healthy cuttings, nurturing them with care, and enriching the soil with homemade, nutrient-rich banana peel fertilizer.
Imagine your garden filled with vibrant, fragrant roses—your own thriving oasis—and knowing that you took a natural, eco-friendly approach to grow them. Share your success stories with friends or fellow gardeners and spread the joy of sustainable gardening!
Happy gardening!
Feel free to share this guide and inspire others to grow their own beautiful roses using natural methods.
I like the valuable info you provide in your articles.
I will bookmark your weblog and check again here regularly.
I’m quite certain I’ll learn lots of new stuff right here!
Good luck for the next!
Новини Житомира https://faine-misto.zt.ua последние события Житомира и области
Hi just wanted to give you a brief heads up and let you know a
few of the images aren’t loading correctly. I’m not sure why but
I think its a linking issue. I’ve tried it in two different browsers and both show the same outcome.
this post [url=https://apps.apple.com/us/app/skinsli-korean-skincare/id6479526408]korean skin care Cleansing Bar app store[/url]
site link [url=https://apps.apple.com/us/app/skinsli-korean-skincare/id6479526408]ebis iPhone mobile app[/url]
Сайт Одесса https://faine-misto.od.ua новости, события Одессы и области, обзоры мест
have a peek at this web-site [url=https://play.google.com/store/apps/details?id=com.skinsli]intime organique Google Play App[/url]
[url=https://tripscann21.top]tripscan25 id[/url] – tripscan 20, trip17
investigate this site [url=https://skinsli.com/products/heimish-moringa-ceramide-bb-cream-21-c-30-g]heimish Moringa Ceramide Bb Cream 21 C[/url]
anchor [url=https://apps.apple.com/us/app/skinsli-korean-skincare/id6479526408]korean skincare haircare Hair Masks mobile app iOS[/url]
Greate pieces. Keep posting such kind of information on your site.
Im really impressed by your blog.
Hey there, You’ve done a great job. I will certainly digg it and for my part suggest to my friends.
I’m confident they’ll be benefited from this website.
Сайт Одесса https://faine-misto.od.ua новости, события Одессы и области, обзоры мест
find out this here [url=https://apps.apple.com/us/app/skinsli-korean-skincare/id6479526408]puritoseoul app for iPhone[/url]