
Looking for a clever, cost-effective way to water your garden without breaking the bank? This spinning bottle irrigation trick is not just budget-friendly, it’s fun to build and helps your plants thrive. Whether you have a balcony garden, raised beds, or a veggie patch, this method brings life and motion to your watering routine.
If you’re already using techniques like wick irrigation or self-watering bottles, this rotating bottle spinner is a perfect addition to your low-maintenance gardening arsenal.
How It Works
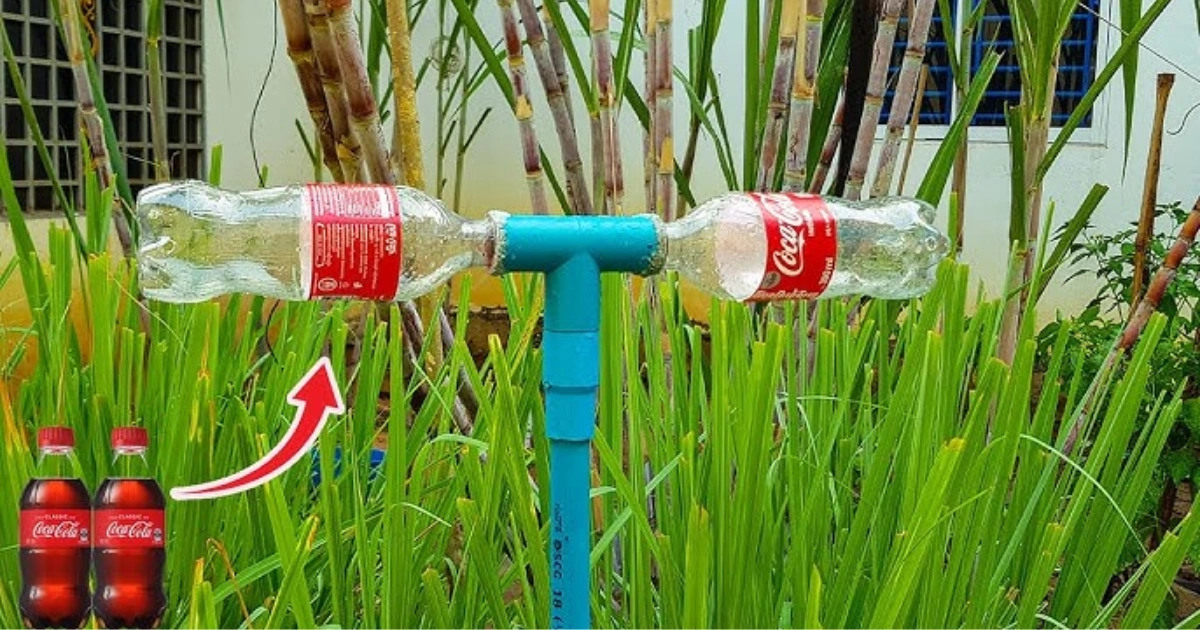
Using gravity and simple household items, this rotating irrigation system turns dripping water into movement. As water flows from a raised plastic bottle, it spins a small “water wheel” made from cut bottle pieces, spreading water gently over nearby soil. It mimics gentle rainfall and delivers water exactly where it’s needed.
This method not only recycles old bottles but also improves watering efficiency—especially during dry months. It’s ideal for beginner gardeners or anyone trying to use less water without sacrificing plant health. Plus, it pairs beautifully with companion planting beds and small pollinator gardens.
What You’ll Need 🧰
🍼 2 large plastic bottles (1.5–2L)
🪵 A bamboo skewer or metal rod
💧 2 short straws or tubing pieces
✂️ Scissors
🪡 String or garden wire
🔧 Nail or awl
🔥 Hot glue gun
🌿 Optional: small garden stake or stand
Make sure your bottles are clean and free of labels to avoid clogs or blockages in the drip holes.
Step-by-Step Build Guide
1️⃣ Prepare the bottles
Wash both bottles thoroughly. Cut the top off one to make the water reservoir. Cut the bottom off the second bottle, then slice it lengthwise in half to form two curved paddles.
2️⃣ Create the paddles
Glue a short straw or tubing piece into the inside curve of each paddle. These help catch water and spin the wheel. Make sure they’re sealed tightly.
3️⃣ Build the spinner
Use the nail or awl to poke a hole in the cap of your reservoir bottle. Insert the rod or skewer through it. Then attach the two curved paddles on either side, securing them with string or wire. They should spin freely around the skewer.
4️⃣ Make the water drip
Poke 2–4 small holes near the bottom of the reservoir bottle using your nail. This will allow water to drip slowly onto the paddles.
5️⃣ Set up in your garden
Place the assembled spinner on a raised platform, like a small stand or inverted pot. You can also tie it to a garden stake. The higher it is, the stronger the water pressure.
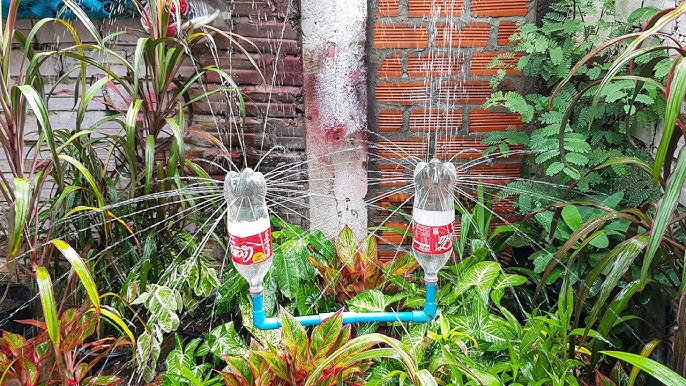
6️⃣ Test and adjust
Fill the reservoir with water and observe. The paddles should spin slowly, spraying small arcs of water. Adjust the hole size or paddle angle for best flow.
7️⃣ Maintain regularly
Every few days, clean the drip holes and check the paddles for balance. If water is spraying unevenly, rotate the skewers or reattach the paddles.
8️⃣ Combine with other methods
This spinner is great when used alongside a DIY olla irrigation pot for broader water coverage.
Benefits of This System 🌞
- Reuses waste bottles for eco-friendly watering
- Delivers slow, steady water directly to roots
- Saves time—less need for daily watering
- Prevents overwatering and soil erosion
- Adds fun movement to your garden beds
- Helps kids learn about water conservation
- Can be customized to suit pot gardens or large beds
For larger gardens, you can set up multiple spinners across your growing space. Try grouping them with tomatoes, herbs, or any crops that benefit from even, gentle moisture.
Seasonal Tips to Keep It Flowing 🌦️
☀️ Summer
Use larger bottles and smaller holes to slow evaporation. Shade the bottle if needed to prevent algae growth.
🍂 Autumn
Clear fallen leaves from drip holes and paddles. Position spinners near late-season crops like kale or Swiss chard.
❄️ Winter
Disassemble and store indoors if temperatures drop below freezing to avoid bottle cracking.
🌸 Spring
Perfect time to install before planting seedlings. Helps protect delicate roots from hose spray.
Mistakes to Avoid ❌
Drilling too many or too large holes
This leads to fast drainage and no spinning.
Weak glue on paddles
Paddles might fall off or stop catching water. Use strong waterproof glue.
Unbalanced spinner arms
If one paddle is heavier, it won’t spin. Trim or reposition for balance.
Bottles too low to the ground
You need gravity—raise them for better pressure and motion.
Ignoring maintenance
Leaves, dust, or algae can clog drip holes quickly. Clean them weekly.
FAQs
How far does the water reach?
Usually 6–12 inches in diameter. Varies with hole size and water level.
Can I use different bottle sizes?
Yes. Try smaller for potted herbs, larger for veggie beds.
What if it doesn’t spin?
Check that the paddles are balanced, and water is dripping onto them evenly.
Is this safe for food gardens?
Yes, as long as the bottles were food-grade and cleaned well.
Can I use rainwater in this system?
Absolutely! Collect rain in a container and pour it into the reservoir.
More Garden DIY You’ll Love
Try pairing this spinner with upcycled watering hacks or get inspired by vertical garden irrigation ideas also found on the blog.
Combining techniques helps create a low-maintenance oasis—especially useful during vacations or busy weeks.
Try It and Share Your Results 🌎💬
This simple rotating irrigation tool can change the way you water—while recycling and having fun. Whether you’re watering strawberries, herbs, or tomatoes, it brings motion and mindfulness to your green space.
Have you made one yourself? Got a clever upgrade idea? Share your creation or ask questions in the comments. And don’t forget to pass this idea along to a fellow gardener looking for smart, sustainable tricks.
https://t.me/s/Starda_officials
https://t.me/kazino_s_minimalnym_depozitom/10
В мире ставок, где всякий площадка стремится зацепить обещаниями легких призов, рейтинг честных сайтов казино
является как раз той картой, которая ведет через ловушки обмана. Для хайроллеров плюс дебютантов, которые устал с фальшивых посулов, он средство, чтоб ощутить реальную выплату, будто ощущение ценной фишки на ладони. Обходя ненужной болтовни, только надёжные площадки, в которых отдача не лишь число, а реальная удача.Составлено по гугловых запросов, как ловушка, которая захватывает топовые актуальные тенденции в рунете. Тут минуя пространства к клише трюков, любой элемент как ставка на покере, там обман выявляется сразу. Хайроллеры знают: по рунете тон разговора на сарказмом, где сарказм маскируется словно совет, помогает миновать обмана.В http://www.don8play.ru этот рейтинг ждёт словно готовая колода, приготовленный к старту. Посмотри, если хочешь почувствовать ритм реальной азарта, без мифов плюс провалов. Игрокам кто любит ощущение приза, это будто взять фишки на руках, а не глядеть по дисплей.
**mitolyn official**
Mitolyn is a carefully developed, plant-based formula created to help support metabolic efficiency and encourage healthy, lasting weight management.