
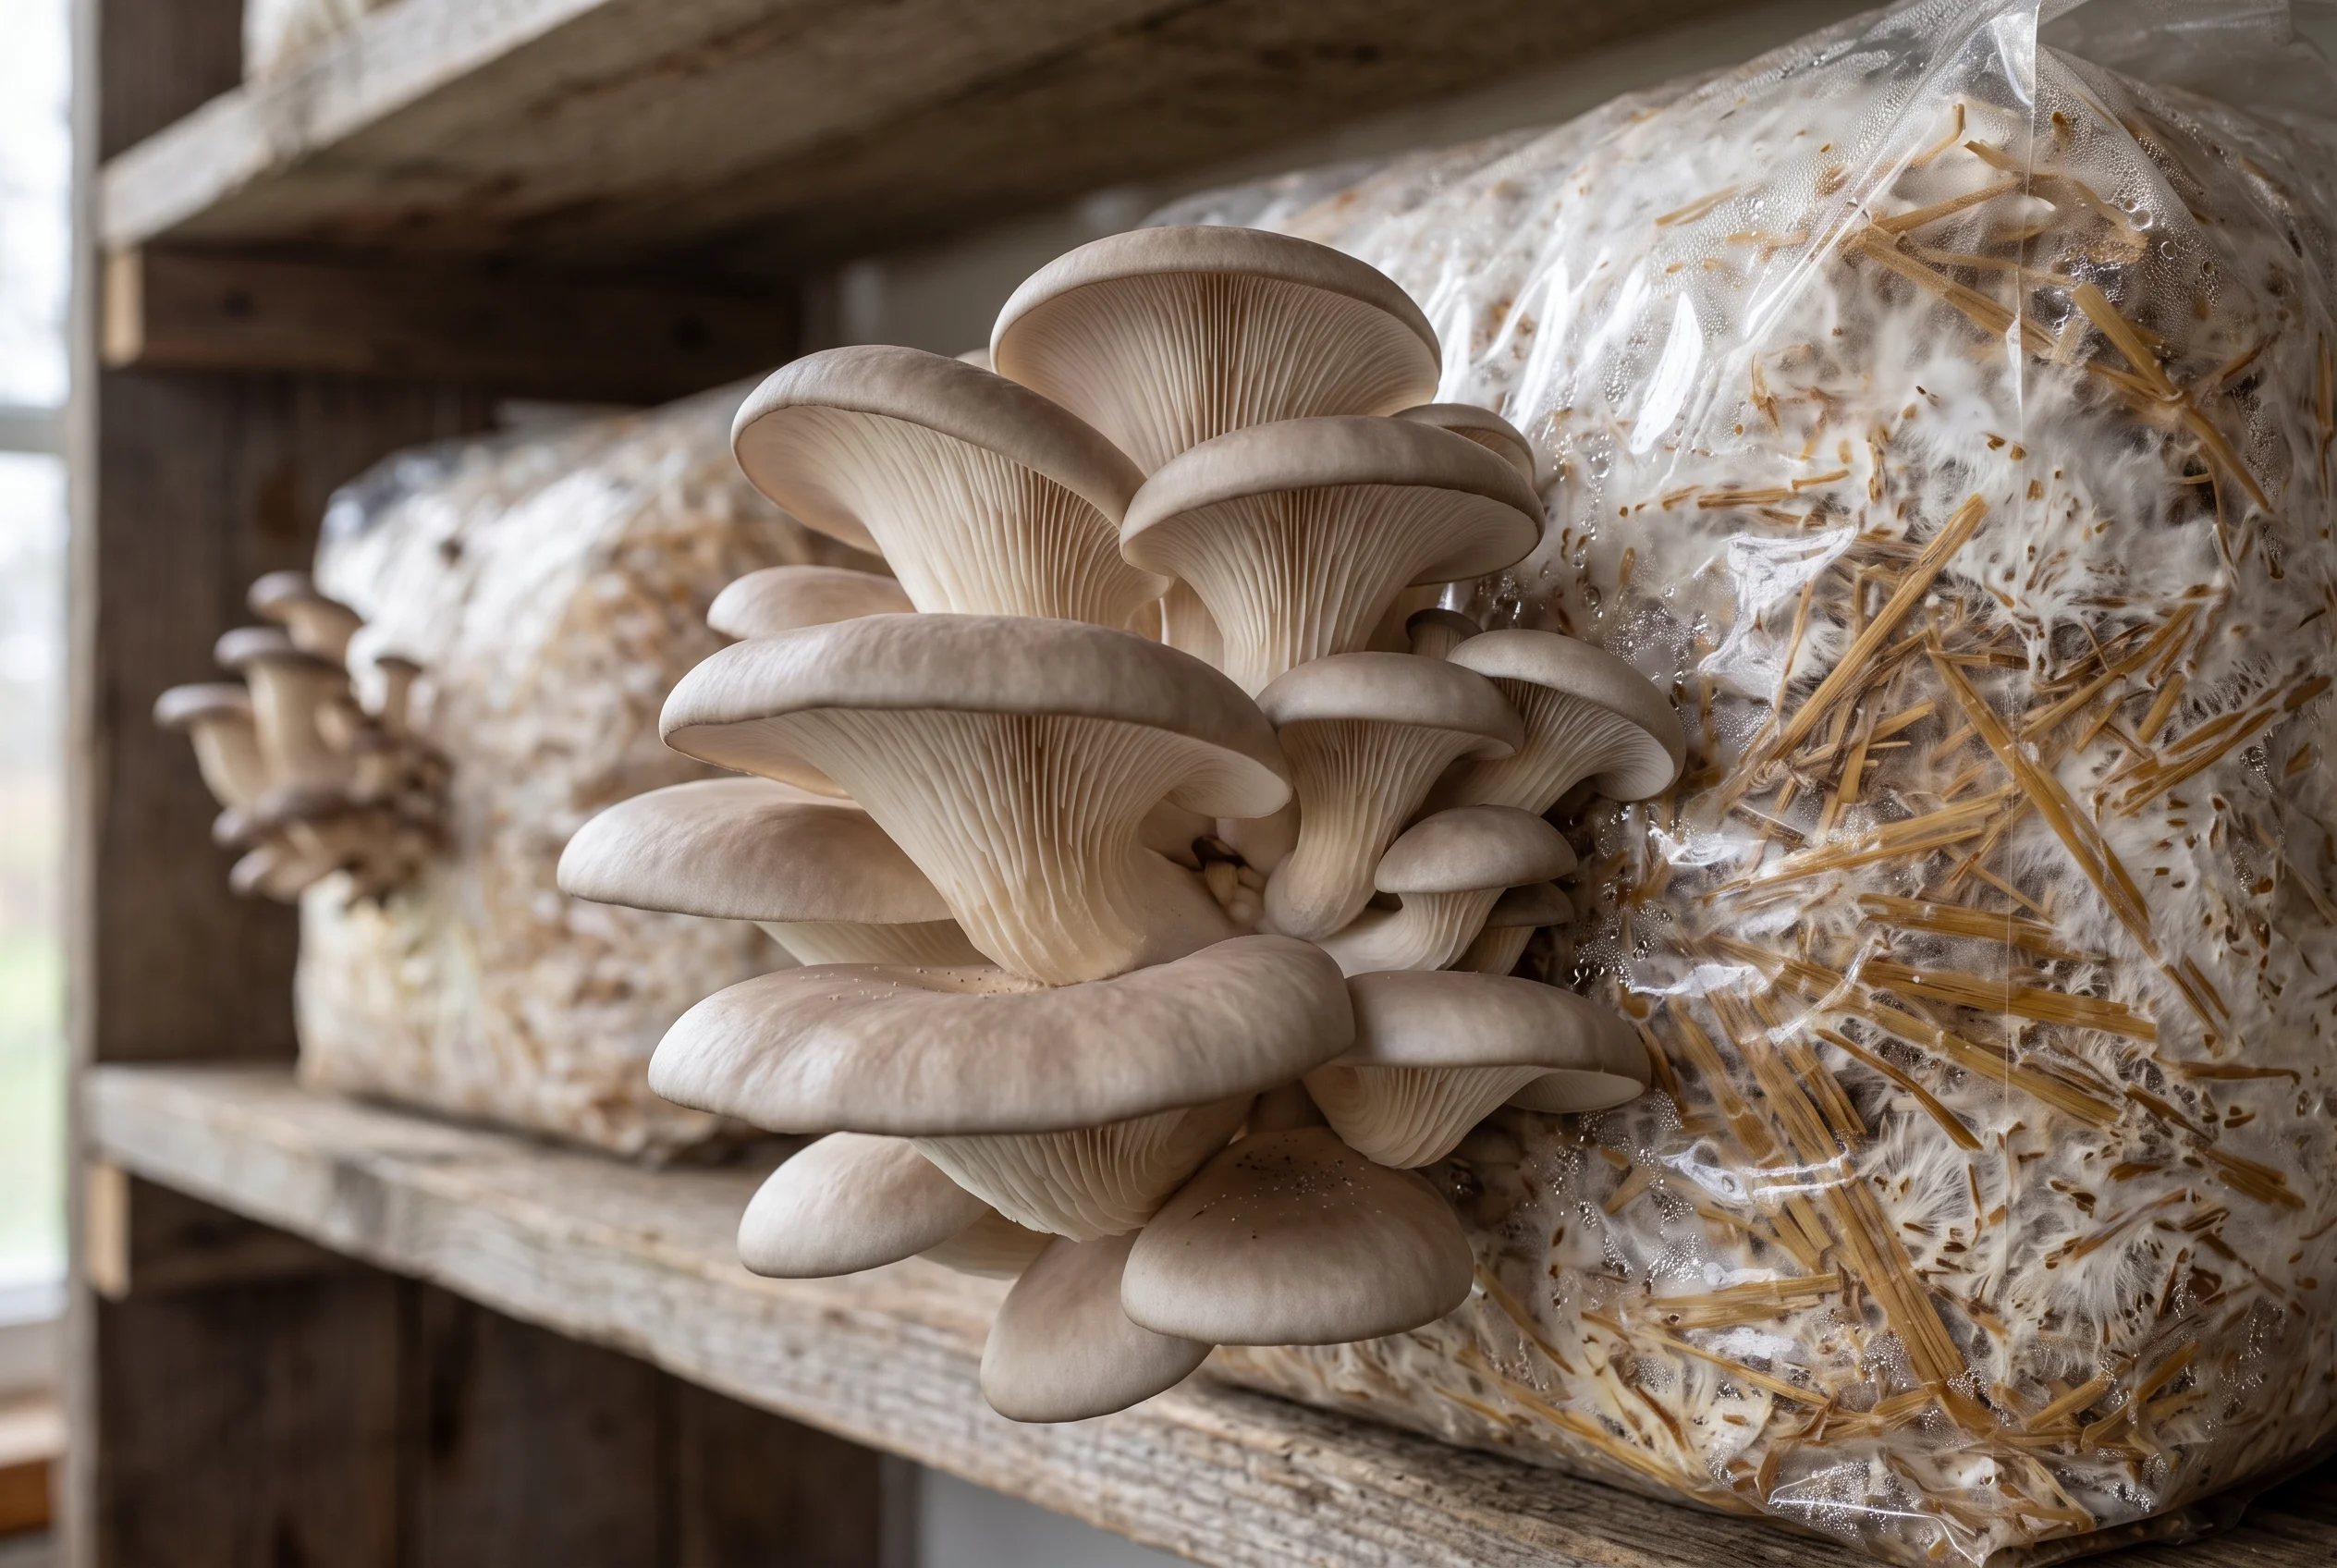
Learning how to grow oyster mushrooms in straw bags is an accessible way to produce edible mushrooms at home using an agricultural byproduct. With properly prepared straw, healthy mushroom spawn, moisture, and fresh air, an ordinary growing bag can become a productive miniature mushroom garden.
Oyster mushrooms (Pleurotus species) are decomposer fungi. Their threadlike mycelium grows through straw, releasing enzymes that help break down plant fibers and absorb nutrients. Once the substrate is colonized and environmental conditions are suitable, clusters of mushrooms can emerge through openings in the bag.
The process involves six main steps: selecting straw, pasteurizing it, adding mushroom spawn, filling growing bags, allowing mycelium to colonize, and encouraging fruiting.
This guide explains each stage, including practical growing conditions, contamination prevention, harvesting, and troubleshooting.
Table of Contents
- Why Oyster Mushrooms Grow Well on Straw
- Materials Needed to Grow Oyster Mushrooms in Straw Bags
- Choosing and Preparing the Right Straw
- How to Pasteurize Straw for Oyster Mushrooms
- How to Inoculate Straw With Oyster Mushroom Spawn
- How to Prepare and Fill Mushroom Growing Bags
- Oyster Mushroom Mycelium Colonization
- How to Encourage Oyster Mushrooms to Fruit
- Harvesting Oyster Mushrooms From Straw Bags
- Common Oyster Mushroom Growing Problems
- Can Straw Bags Produce More Than One Harvest?
- Safety Tips for Growing Edible Mushrooms at Home
- Frequently Asked Questions
- Conclusion
Why Oyster Mushrooms Grow Well on Straw
Oyster Mushrooms Are Decomposer Fungi
Unlike green plants, mushrooms do not obtain energy through photosynthesis. Oyster mushrooms release enzymes that break down components of plant cell walls, including cellulose, hemicellulose, and lignin.
Their mycelium absorbs nutrients from the decomposing material, supporting fungal growth and eventually mushroom production.
Straw as a Growing Substrate
Wheat and oat straw are commonly used because they contain plant fibers that oyster mushrooms can utilize. Straw is also relatively inexpensive, lightweight, and easy to pack into bags.
However, it must be clean and properly prepared. Contaminated or excessively wet straw can encourage competing microorganisms.
The Difference Between Mycelium and Mushrooms
Mycelium is the network of microscopic fungal filaments growing throughout the straw.
The visible oyster mushrooms are fruiting bodies produced by that network. Their purpose is to develop and release reproductive spores.
Materials Needed to Grow Oyster Mushrooms in Straw Bags
Gather these materials before beginning:
- Clean, dry wheat or oat straw
- Commercially produced oyster mushroom grain spawn
- Clean mushroom cultivation bags with suitable gas exchange
- A heat-safe container and equipment for pasteurization
- A thermometer
- Clean water, gloves, and mixing containers
- A clean surface for handling the substrate
- A suitable colonization area
- A humid, ventilated fruiting location
Choose a commercially cultivated oyster mushroom strain appropriate for your available temperatures. Different Pleurotus species and strains have different environmental requirements.
Choosing and Preparing the Right Straw
Selecting Clean, Dry Straw
Choose straw that smells fresh and shows no visible mold, rot, or unusual discoloration.
Avoid chemically contaminated material or straw stored in persistently damp conditions.
Cutting Straw Into Manageable Pieces
Cutting straw into shorter sections makes it easier to hydrate, mix with spawn, and pack evenly.
Pieces approximately 2–5 inches long are manageable for many small-scale setups, although exact lengths are not critical.
Hydrating the Substrate
Straw must contain enough moisture to support fungal growth without becoming waterlogged.
After pasteurization and draining, it should feel moist but not release a stream of water when gently squeezed.
Excess water can create poorly aerated areas that favor contamination.
How to Pasteurize Straw for Oyster Mushrooms
Why Pasteurization Matters
Straw naturally contains bacteria, molds, and other microorganisms.
Pasteurization reduces competing organisms, giving oyster mushroom mycelium a better opportunity to colonize the substrate.
Pasteurization is not the same as sterilization. It reduces microbial competition rather than eliminating every microorganism.
Hot-Water Pasteurization
A commonly used small-scale approach is to immerse straw in water maintained at approximately 160–170°F (71–77°C) for about one hour.
Use a thermometer to monitor the water rather than relying on appearance alone. Keep the straw submerged and follow a validated procedure suited to your equipment and substrate.
Hot water and saturated straw can cause serious burns. Use heat-resistant equipment, avoid lifting heavy wet material alone, and allow sufficient cooling time.
Cooling and Draining the Straw
After treatment, drain the straw in a clean area.
Allow it to cool to near room temperature before adding spawn. Excessive heat can damage or kill the mushroom mycelium.
The substrate should remain evenly moist without collecting free water at the bottom of the bag.
How to Inoculate Straw With Oyster Mushroom Spawn
Choosing Healthy Mushroom Spawn
Purchase oyster mushroom spawn from a reputable supplier. Grain spawn is particularly convenient for beginners because it can be distributed throughout the straw.
Use spawn labeled with the species or strain and follow the supplier’s storage and handling instructions.
Mixing Spawn With Prepared Straw
Work on a clean surface after the pasteurized straw has cooled.
Break up the grain spawn gently and distribute it throughout the moist straw. You can mix the two materials evenly or alternate layers of straw and spawn as you fill the bag.
Follow the spawn supplier’s recommended inoculation rate. Using too little spawn may slow colonization and leave more time for competitors to establish.
Preventing Contamination
Wash your hands, clean equipment, and minimize unnecessary exposure of the prepared substrate.
Do not place cooled straw directly onto dirty floors or reuse unclean containers.
Cornell Small Farms describes both mixing and layering as established inoculation methods for oyster mushroom straw cultivation.
How to Prepare and Fill Mushroom Growing Bags
Pack the inoculated straw firmly enough to eliminate large empty spaces, but avoid compressing it into an excessively dense, poorly aerated mass.
Use bags intended for mushroom cultivation, preferably with filtered gas-exchange patches or another suitable ventilation arrangement.
During colonization, the fungus requires oxygen even though fresh-air demands are lower than during fruiting.
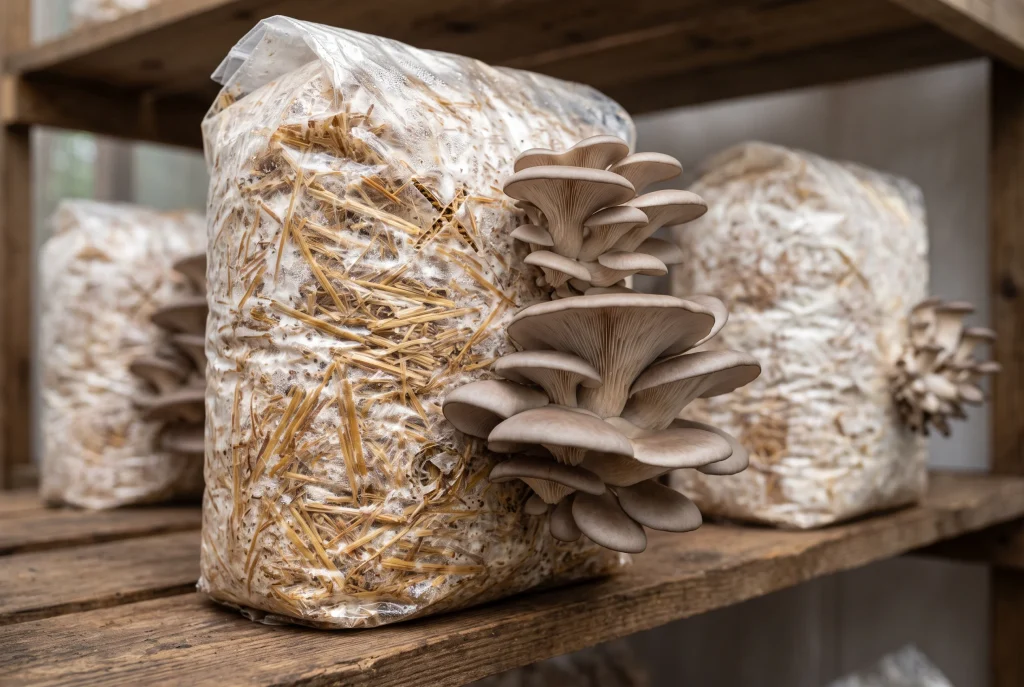
Once the straw is fully colonized, mushrooms can develop through appropriately sized openings in the plastic.
Some cultivation systems use pre-made perforations, while others introduce fruiting slits after colonization. Follow the method suited to your bag and strain.
Oyster Mushroom Mycelium Colonization
How White Mycelium Spreads Through Straw
After inoculation, the oyster mushroom mycelium begins growing from the spawn into the surrounding straw.
White fungal threads gradually spread between straw fibers, eventually producing a more uniformly colonized substrate.
The process is often called the spawn run.
Suitable Colonization Conditions
Maintain the temperature recommended for your particular oyster mushroom strain.
For many commonly cultivated oyster strains, incubation conditions around 68–77°F (20–25°C) are used, but some strains prefer different temperatures.
The growing substrate can become warmer than the surrounding air because fungal metabolism generates heat.
Cornell reports a broad incubation period of approximately 14–28 days for oyster mushrooms on straw, depending on the cultivation system.
Recognizing Healthy Colonization
Healthy oyster mycelium typically appears white and spreads progressively through the substrate.
However, white coloration alone cannot guarantee that the bag is uncontaminated.
Watch for unusual colors, slimy areas, sour odors, or unexpected changes in texture.
Second website image placement: Scientific cutaway showing white oyster mushroom mycelium spreading through straw inside a cultivation bag.
How to Encourage Oyster Mushrooms to Fruit
Once the substrate is colonized, conditions must favor the development of mushroom fruiting bodies.
Fresh Air and Carbon Dioxide
Oyster mushrooms need adequate fresh-air exchange during fruiting.
Excess carbon dioxide can produce unusually elongated stems and poorly developed caps.
Improve ventilation without exposing the mushrooms to strong, drying air currents.
Humidity and Moisture
Developing mushrooms require humid surroundings.
The University of Florida’s oyster mushroom cultivation guide describes fruiting conditions around 90% relative humidity in one cultivation system.
Avoid constantly soaking the mushroom caps or allowing standing water to accumulate.
Light and Temperature
Oyster mushrooms do not photosynthesize, but light helps regulate normal fruiting development.
Indirect daylight or suitable artificial lighting is generally sufficient.
Many oyster strains fruit successfully near 68°F (20°C), although exact temperature requirements vary substantially between species and strains.
Formation of Mushroom Pins
Small developing mushrooms, called pins or primordia, appear near suitable openings.
These structures enlarge into clusters of overlapping caps.
Maintain humidity and ventilation as the mushrooms grow, and monitor them regularly for signs of drying or abnormal development.
Harvesting Oyster Mushrooms From Straw Bags
Harvest oyster mushrooms when their caps are well developed and the edges are beginning to flatten, preferably before heavy spore release.
Hold the cluster near its base and gently twist it free, or use a clean knife to cut the cluster from the substrate.
Avoid tearing large portions of colonized straw from the bag.
Place harvested mushrooms in a breathable container and refrigerate promptly.
For best quality, use them while fresh. Cook oyster mushrooms thoroughly before eating.
Common Oyster Mushroom Growing Problems
| Problem | Possible cause | Recommended action |
|---|---|---|
| Green mold | Competing fungi | Discard contaminated bags |
| Excessively wet straw | Poor drainage | Improve moisture control in the next batch |
| Slow colonization | Temperature, spawn quality, or contamination | Check growing conditions and spawn |
| Long stems, small caps | Insufficient fresh air | Increase air exchange |
| Dry or aborted pins | Low humidity or drying airflow | Stabilize humidity |
| No mushroom formation | Unsuitable fruiting conditions or incomplete colonization | Check strain requirements |
| Sour or unpleasant odor | Bacterial contamination or oxygen-poor conditions | Discard affected substrate |
| Excess condensation | Temperature differences or excessive moisture | Improve environmental management |
Do not consume mushrooms from visibly contaminated or foul-smelling cultivation bags.
Can Straw Bags Produce More Than One Harvest?
Oyster mushrooms can produce additional crops after the first harvest.
Each separate period of mushroom production is called a flush.
After harvesting, keep the colonized substrate under suitable conditions and monitor moisture.
Additional mushrooms may appear if the mycelium remains healthy and sufficient nutrients and water are available.
Later flushes may be smaller or less reliable. The number of successful harvests depends on the substrate, strain, environmental conditions, and contamination pressure.
Safety Tips for Growing Edible Mushrooms at Home
Use correctly identified commercial spawn rather than attempting to cultivate unidentified wild mushrooms.
Maintain clean equipment and discard growing bags that develop suspicious mold or unpleasant odors.
Avoid inhaling concentrated mushroom spores, especially when harvesting mature clusters indoors. Good ventilation helps reduce airborne spore accumulation.
Take care when handling hot pasteurization water, and keep growing areas separate from food preparation surfaces where practical.
Refrigerate harvested mushrooms promptly and cook them thoroughly before consumption.
For a related look at how organic materials support fungi and other decomposers, see How the Mulch You Choose Changes Your Soil Beneath the Surface. The same broad principle of biological decomposition connects mushroom cultivation with soil health.
Frequently Asked Questions
1. Can oyster mushrooms grow in a bag of straw?
Yes. Oyster mushrooms can colonize properly prepared straw and produce edible mushroom clusters through openings in a suitable cultivation bag.
2. What type of straw is best for oyster mushrooms?
Clean wheat or oat straw is commonly used. Choose dry, mold-free material and prepare it properly before inoculation.
3. Do I need to pasteurize straw before growing mushrooms?
Pasteurization is strongly recommended for beginners because it reduces competing microorganisms. Some alternative substrate treatments exist, but untreated straw can be less reliable.
4. How long does oyster mushroom mycelium take to colonize straw?
Colonization commonly takes around two to four weeks, depending on the strain, temperature, spawn quantity, and growing conditions.
5. Do oyster mushrooms need sunlight?
They do not need sunlight for photosynthesis, but indirect light helps support normal fruiting development. Strong direct sunlight may dry or overheat the growing substrate.
6. How much ventilation do oyster mushroom bags need?
They need suitable gas exchange during colonization and considerably more fresh air during fruiting. Long stems and undersized caps can indicate inadequate ventilation.
7. Can I harvest oyster mushrooms more than once?
Yes. Healthy, adequately hydrated substrate may produce additional flushes after the first harvest, although further harvests are not guaranteed.
8. How do I recognize contaminated mushroom substrate?
Warning signs include green or other unusual mold growth, slimy areas, and sour or unpleasant odors. Discard suspicious bags rather than attempting to harvest edible mushrooms from them.
Conclusion
Learning how to grow oyster mushrooms in straw bags demonstrates how an ordinary agricultural byproduct can support the production of fresh edible fungi.
The process begins with selecting clean straw and preparing it to reduce microbial competition. Healthy oyster mushroom spawn then colonizes the substrate, forming a network of white mycelium.
With suitable temperature, moisture, light, and fresh-air exchange, the fungus can produce clusters of oyster mushrooms through openings in the bag.
Success depends on careful preparation, sanitation, and attention to growing conditions rather than simply filling a plastic bag with untreated straw.
Beyond producing food, this method offers a fascinating opportunity to observe the ecological role of fungi. Oyster mushrooms are natural decomposers, capable of transforming plant material into new fungal biomass.
For gardeners interested in other uses of straw, Straw Bale Gardening: How to Grow Vegetables Without Soil or Beds explains how straw can also support vegetable cultivation through a different biological process.
Scientific References
The following are verified educational sources supporting the cultivation practices described above.
1. Cornell Small Farms Program — Four Methods of Commercial Cultivation. Includes oyster mushrooms on straw, substrate treatment, inoculation, and bag cultivation. Read Cornell cultivation guide.
2. University of Florida IFAS Extension — D.I.Y. FunGuide: Grow Your Own Oyster Mushrooms at Home. Covers home oyster mushroom production and fruiting conditions. Read UF/IFAS guide.
3. Penn State Department of Plant Pathology and Environmental Microbiology — Production Technology. Describes specialty mushroom production using prepared substrates and cultivation bags. Read production guidance.
4. Cornell Small Farms — Mushrooms. Overview of edible mushroom species and suitable cultivation substrates. Read mushroom growing overview.