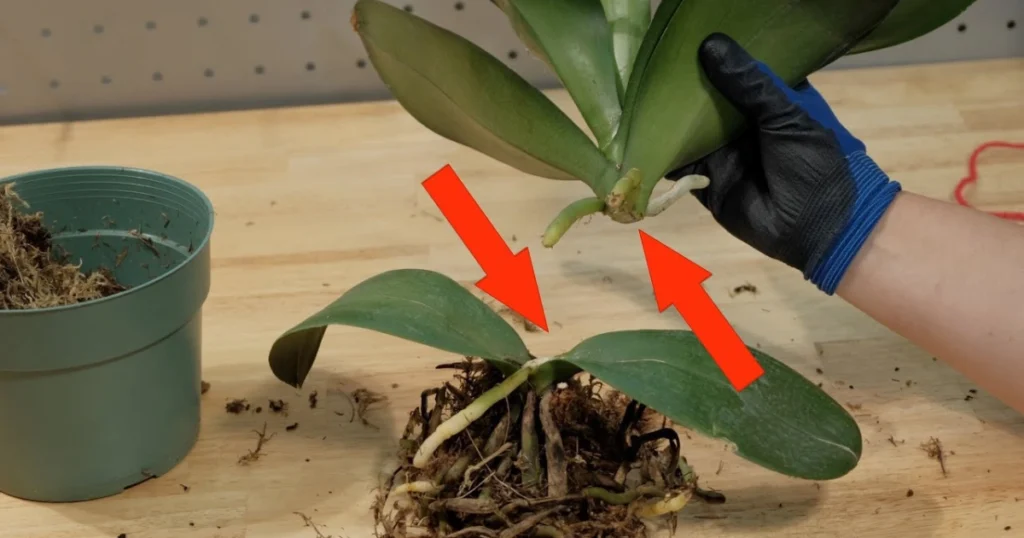
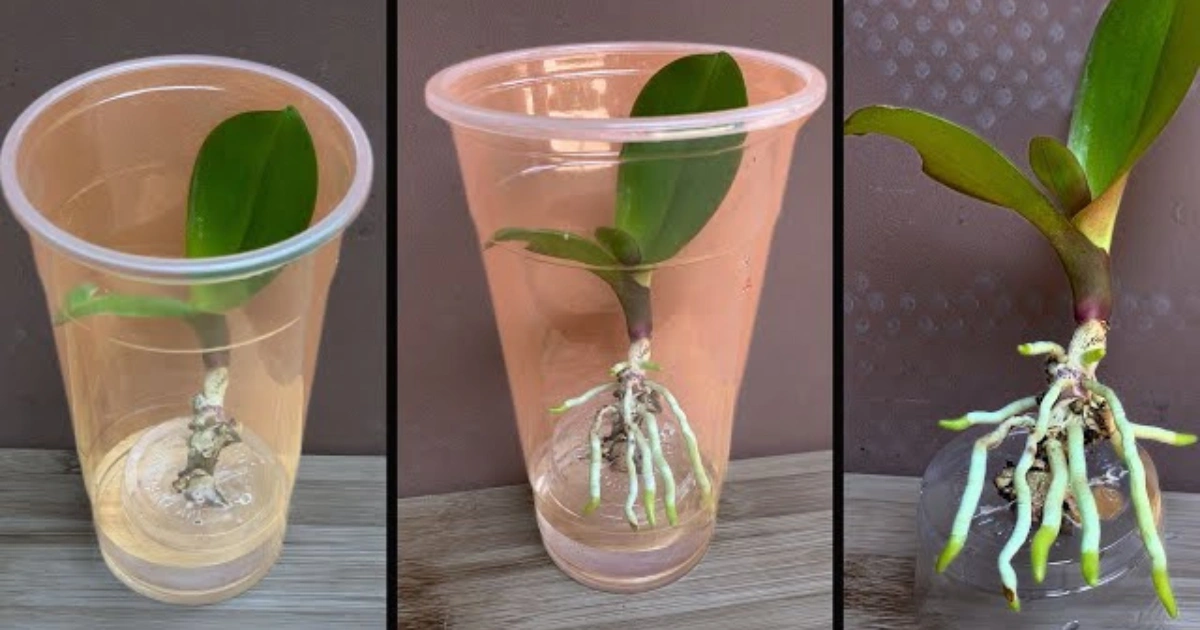
Phalaenopsis orchids, known for their elegant blooms and low-maintenance nature, can be propagated at home using a surprisingly simple method—even from dried stems. If you’ve ever wanted to multiply your orchids without expensive tools or advanced gardening skills, this natural approach offers an effective way to grow new orchid babies.
Why Propagate Orchids from Stems?

Most people think orchid propagation is only possible through seeds or tissue culture. However, Phalaenopsis orchids can occasionally produce new plants, or keikis, from flower spikes that look dried out. This sustainable, cost-effective method is perfect for home gardeners who want to expand their collection without starting from scratch.
What You’ll Need
- Dried orchid flower stems with visible bud nodes
- Powdered cinnamon (natural disinfectant)
- Fresh garlic cloves
- White rice
- Clean water
- Adhesive tape
- Floral foam or sponge
- Transparent plastic container with lid
Step-by-Step Guide to Propagating Phalaenopsis Orchids
1. Select Suitable Stems
Start by identifying dry or spent flower spikes that still have visible growth nodes or tiny bumps. These are potential points where new growth can emerge.
2. Disinfect the Stems
Cut the selected stems into segments about 15–20 cm long, making sure each has at least one visible node. Dust the cut ends with powdered cinnamon to prevent fungal infections. Allow the pieces to dry for 24 hours in a shaded, ventilated area.
3. Prepare a Natural Nutrient Solution
Create a homemade rooting stimulant by slicing one garlic clove and combining it with three tablespoons of white rice in approximately 600 ml of room-temperature water. Let the mixture sit for 30 minutes so the water absorbs the nutrients and beneficial compounds.
4. Mount the Cuttings on Foam
Secure each stem segment to a small piece of floral foam using adhesive tape. Ensure the node faces outward and has direct contact with the moisture and air, which is essential for sprouting.
5. Soak the Mounted Stems
Submerge the mounted stems (attached to foam) in the garlic-rice water for about 20 minutes. This step helps stimulate root development and cleanses the stems with natural antibacterial properties.
6. Set Up the Propagation Environment
Place the foam with the stem into a container partially filled with clean water—about two-thirds of the foam should be in contact with the water. This keeps the environment humid without waterlogging the cutting.
7. Cover to Create a Humid Mini Greenhouse
Seal the container with a transparent lid or cover to maintain high humidity. This encourages root and bud development. Place the container in a warm, bright area, but avoid direct sunlight, which could overheat the setup.
8. Change the Water Weekly
Maintain hygiene by changing the water once a week. This prevents bacterial buildup and ensures the cutting continues receiving fresh nutrients and oxygen.
9. Watch for Growth
After about three weeks, you should start to see green buds or shoots forming at the node. These are signs that your orchid propagation is successful.
10. Transplant When Ready
Once the new plantlet has grown a few healthy roots (usually after two months), carefully detach it and transplant it into a small orchid pot with a bark-based substrate. Continue caring for it as you would a mature Phalaenopsis.
Benefits of This Method
- Low cost and minimal materials required
- Natural and chemical-free rooting process
- Ideal for home gardeners with limited space
- Opportunity to revive old or spent flower spikes
Frequently Asked Questions
Can all Phalaenopsis stems be used for propagation?
Only flower stems with visible nodes and no signs of mold or decay are viable. Extremely dry, brittle, or blackened stems may not succeed.
How long does it take to see new orchid growth?
Initial bud formation usually appears within three weeks, while roots strong enough for transplanting develop around the two-month mark.
Do I need artificial lighting?
Natural indirect light is enough, but in dim environments, a low-intensity grow light can help stimulate faster development.
Why use garlic and rice water?
Garlic has natural antifungal and antibacterial properties, while rice water offers mild nutrients. Together, they act as a gentle, organic rooting solution.
Should I use rooting hormone?
While optional, many home gardeners prefer this all-natural method to avoid synthetic chemicals. Cinnamon powder works effectively to prevent rot.
Related Articles from secretsofthegreengarden.com
- How to Revive a Dying Orchid Without Chemicals
- 7 Indoor Plants That Multiply Easily from Cuttings
- Beginner’s Guide to Orchid Care in Small Spaces
Recommended External Resources
- American Orchid Society – Orchid Propagation Basics
- Royal Horticultural Society – Growing Orchids at Home
- Gardening Know How – Tips for Phalaenopsis Orchid Care
Conclusion
Propagating Phalaenopsis orchids from dry stems may seem unconventional, but with patience and a little care, it’s a highly rewarding process. This eco-friendly approach helps reduce waste while expanding your orchid collection naturally. If you follow the steps outlined above, you’ll enjoy seeing new life sprout from what once seemed like discarded stems.


What a great resource. I’ll be referring back to this often.
**mind vault**
mind vault is a premium cognitive support formula created for adults 45+. It’s thoughtfully designed to help maintain clear thinking
https://t.me/s/official_1win_aviator/49
https://t.me/s/official_1win_aviator/409
https://t.me/s/reyting_topcazino/22
https://t.me/s/ef_beef
https://t.me/s/officials_pokerdom/3338
https://t.me/officials_pokerdom/3126
برای دوستانی که به دنبال یک راهکار مطمئن برای وریفای حساب در بروکرهای فارکس هستند، پیشنهاد میکنم خدمات شوپی را بررسی کنند. این مجموعه به صورت تخصصی، وریفای قانونی حساب های فارکس را با مدارکی ارائه میدهد که کاملاً معتبر بوده و به نام خودتان صادر میشود. این روش دائمی است و ریسک بلاک شدن حساب شما را به صفر میرساند. کیفیت و پشتیبانیشان واقعاً عالی است.
📲👍 Ich habe einen Bonuscode ohne Einzahlung für einen mobilen Casino-Echtgeldbonus ohne Einzahlung verwendet und
es hat ohne Probleme funktioniert. Da ich nichts zu verlieren hatte,
probierte ich es aus und spielte ein paar Runden Blackjack online mit Spielgeld.
Der online-Casino-Austria-Bonus stach mir ins Auge, der
einen Bonus ohne Einzahlung nur für die Anmeldung bot. Ich gebe zu,
ich war skeptisch gegenüber online-Casinos. Laden Sie einfach einen unserer
Spielautomaten, Tischspiele usw.
Zu den renommiertesten gehören Giganten wie NetEnt, Play’n GO und Pragmatic Play, die alle für ihre herausragenden Slots und Tischspiele
berühmt sind. Jede Drehung, jeder Einsatz und jedes
Blatt bietet ein neues Abenteuer, das Sie auf eine Reise voller Spannung und Unterhaltung
entführt. Pro 20€ Echtgeldspiel erhalten Sie
einen Punkt – und je mehr Sie haben, desto mehr können Sie natürlich profitieren! Beeindruckend ist, dass Sie sich
jede Woche auf Boni mit bis zu 200% Bargeldbonus und zusätzlich 100 Gratis-Drehs freuen können. Die Höhe des Cashbacks ist dabei von Ihrem Status im Treueprogramm abhängig, was den Spielern einen zusätzlichen Anreiz bietet, ihre Position im Casino zu
verbessern.
References:
https://online-spielhallen.de/online-casino-bonus-november-2025-top-angebote/
https://t.me/s/ef_beef
اگر قصد مهاجرت یا سفر طولانیمدت دارید، حتما داشتن گواهینامه بینالمللی معتبر ضروریه. من از گرافیسو گواهینامه رانندگی قانونی کشورهای مختلف گرفتم و حتی در اروپا هم بدون مشکل ازش استفاده کردم. مدارک با دقت بالا طراحی میشن و از نظر ظاهری و سیستمی دقیقاً مشابه اصل رسمی اون کشورن.
Zudem sind deine persönlichen Daten dank SSL-Verschlüsselung jederzeit sicher.
In unserer Bewertung der seriösen Online Casinos in Österreich kommt das
MafiaCasino auf den zweiten Platz. Zudem findest du
hier zahlreiche sichere Zahlungsmethoden. Insgesamt bewerten wir es als das seriöseste.
Hierbei steht besonders die Glücksspiellizenz der Gemeinsamen Glücksspielbehörde der Länder
im Vordergrund. Casinoonline.de ist Teil der #1 Online Casino Authority®, dem weltweit größten Casino-Affiliate-Netzwerk.
Aus diesem Grund wissen unsere Experten, worauf es Spielern online ankommt.
In unlizenzierten Casinos kann es oft zu Problemen mit der Auszahlung Ihrer Gewinne kommen. Nein, es gibt keine
seriösen Casinos ohne Lizenz.
References:
https://online-spielhallen.de/plinko-casino-cashback-ihr-weg-zu-mehr-spielguthaben/
الان دیگه کاربرها صبر ندارن سایت ۳ ثانیه لود بشه؛ سریع میبندن و میرن سراغ رقیب. سرعت سایت مستقیماً روی فروش تاثیر داره. سایتیگو سایتها رو طوری بهینه میکنه که توی تستهای GTmetrix و PageSpeed نمره عالی بگیرن. این سرعت بالا هم تجربه کاربری رو بهتر میکنه هم سئو رو. اگر دنبال یک سایت موشکی هستید، حتماً نگاهی به نمونهکارهای طراحی وب سایت با سرعت لود بالا در سایتیگو بندازید.
Built on a reliable and fully licensed framework, our platform ensures fair gameplay and total transparency.
Special birthday gifts and personalised bonuses Personalised customer support with
faster withdrawal processing. The localised support
team is familiar with Australian regulations and preferences.
Sky Crown has built a solid reputation as one of Australia’s
most trusted online casinos.
Following further verification steps, the casino confirmed that her
withdrawal request was being processed. The player had since marked
the complaint as resolved, indicating that the issue had been addressed satisfactorily.
The player retained the option to reopen the complaint in the future if he chose to continue the dialogue.
References:
https://blackcoin.co/live-casino-hotel-maryland-the-ultimate-online-gambling-guide/
The Treasury Casino promotes a responsible approach to gambling and
offer gambling for your enjoyment. Centre Bar is the
place to unwind, refresh and enjoy company in a hospitable,
welcoming setting. Each game usually involves matching symbols on a screen that spin and stop to reveal one or several symbols.
The courtyard at the centre of the building was roofed over
for the conversion. The exterior of the building is highly intact while
the interior has had only minor modifications. Two wings containing toilets and washrooms project into the courtyard space.The
building has restrained rendered and painted interiors that feature
cedar joinery and ornamental plasterwork. The structure of the
third phase of the building consists of reinforced concrete
slabs supported on loadbearing masonry columns and steel girders.
The historic building is set to accommodate students and staff from the Schools of Business, Information Technology and Law, and will also serve as a “centre for postgraduate and executive education”.
On Sunday 25 August 2024, the Treasury Casino
closed in anticipation of the opening of the new casino at Queen’s Wharf.
Following a conservation project which commenced in 1993, the casino and hotel opened on 19 April 1995.
From 1989 to 1993, the Registrar-General has remained
the sole occupant of the Treasury Building (an occupancy of 100 years), but it
continued to be the best known and identifiable government office
building in Queensland.
References:
https://blackcoin.co/payid-online-casinos-australia/
australian online casinos that accept paypal
References:
http://ww.enhasusg.co.kr/bbs/board.php?bo_table=free&wr_id=3023766
online slots uk paypal
References:
https://kabayan.kr/bbs/board.php?bo_table=free&wr_id=64
http://images.google.ki/url?q=https://t.me/s/officials_7k/841
В лабиринте азарта, где всякий сайт пытается зацепить гарантиями легких джекпотов, рейтинг рублевых казино
становится именно той ориентиром, что ведет через заросли рисков. Тем ветеранов да новичков, которые пресытился из-за ложных посулов, это помощник, чтоб почувствовать настоящую отдачу, будто ощущение ценной монеты в пальцах. Без лишней ерунды, только проверенные площадки, там выигрыш не только показатель, но ощутимая везение.Составлено на основе яндексовых поисков, как ловушка, которая вылавливает наиболее свежие веяния по интернете. Здесь минуя пространства к шаблонных приёмов, всякий элемент будто карта в покере, в котором обман проявляется мгновенно. Профи видят: в стране тон письма с сарказмом, там сарказм маскируется как намёк, позволяет обойти рисков.В https://heylink.me/don8play такой рейтинг лежит как открытая раздача, приготовленный для игре. Зайди, коли желаешь почувствовать ритм настоящей азарта, минуя мифов плюс провалов. Для тех знает ощущение удачи, такое будто иметь карты у ладонях, вместо пялиться по монитор.
همه صاحبان سایت میدونن که لینک اول گوگل یعنی فروش چند برابری، ولی رسیدن به اونجا توی کلمات سخت واقعاً دشواره. خیلی از سئوکارها قول میدن اما وسط راه به بهانه آپدیت گوگل جا میزنن. سرویس جدید ادزنو دقیقاً دست گذاشته روی همین نقطه درد و “تضمین” میده که شما رو به رتبه یک میرسونه. اگه از وعدههای توخالی خسته شدید، رسیدن به رتبه اول گوگل به صورت تضمینی رو امتحان کنید.