
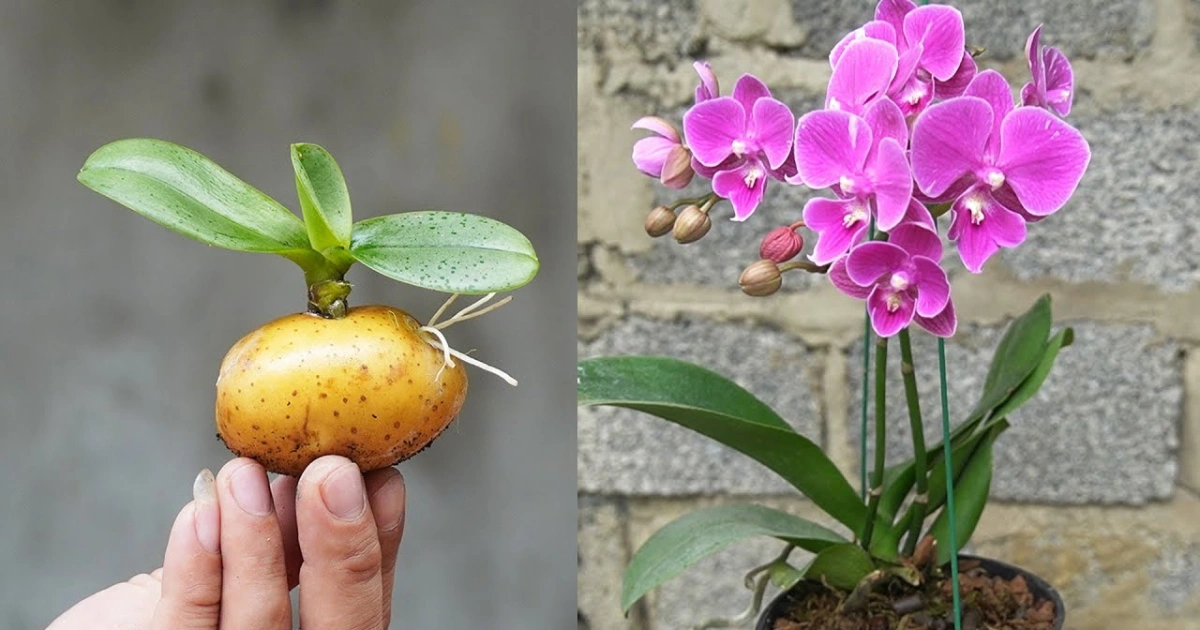
Orchids are among the most breathtaking houseplants, admired for their vibrant flowers and graceful structure. But what if you could grow an endless supply of orchids from just one plant—without spending another cent at the garden center?
That’s exactly what many home gardeners are doing using an unexpected helper: a humble potato.
In this guide, you’ll learn how to propagate orchids naturally using a potato and garlic. It’s a little-known trick passed down by experienced gardeners and gaining popularity for its simplicity, cost-effectiveness, and amazing results.
Before we dive in, make sure to check out our article on how to care for orchids indoors and this helpful tutorial on DIY humidity trays to keep your new orchids happy and hydrated.
Let’s get started on multiplying your orchids—naturally and endlessly.
Step-by-Step Guide: How to Propagate Orchids Using a Potato
This process uses everyday ingredients and materials, and it’s beginner-friendly. Follow each step carefully to give your orchid cuttings the best chance of rooting.
- Choose a healthy orchid cutting
Select an orchid that has flowered at least once and has firm, green stems. Avoid using any part of the plant that appears dry, brown, or mushy. - Disinfect your tools
Use rubbing alcohol or hot water to disinfect pruning shears or scissors. This helps prevent introducing fungi or bacteria to your new cutting. - Cut the stem properly
Snip a piece of orchid stem that includes at least one node or bud. Make the cut perpendicular, not angled, to increase surface area and stability. - Prepare the potato-garlic nutrient soak
In a small bowl, combine:- One piece of potato with sprouts (peeled or unpeeled)
- One garlic clove, finely chopped
- 1/4 cup of water
- Let it macerate in darkness
Cover the bowl and store it in a cool, dark spot (like a cupboard) for 5–7 days. This will draw out the nutrients and create a root-promoting liquid. - Strain the mixture
After a week, strain the mixture using a fine sieve or cheesecloth. Discard the solids and keep the liquid—this is your orchid nutrient soak. - Sterilize the orchid cutting
Dip the cut end of the orchid stem in a diluted hydrogen peroxide solution or dab with alcohol. This step prevents infections. - Soak the cutting in the potato-garlic solution
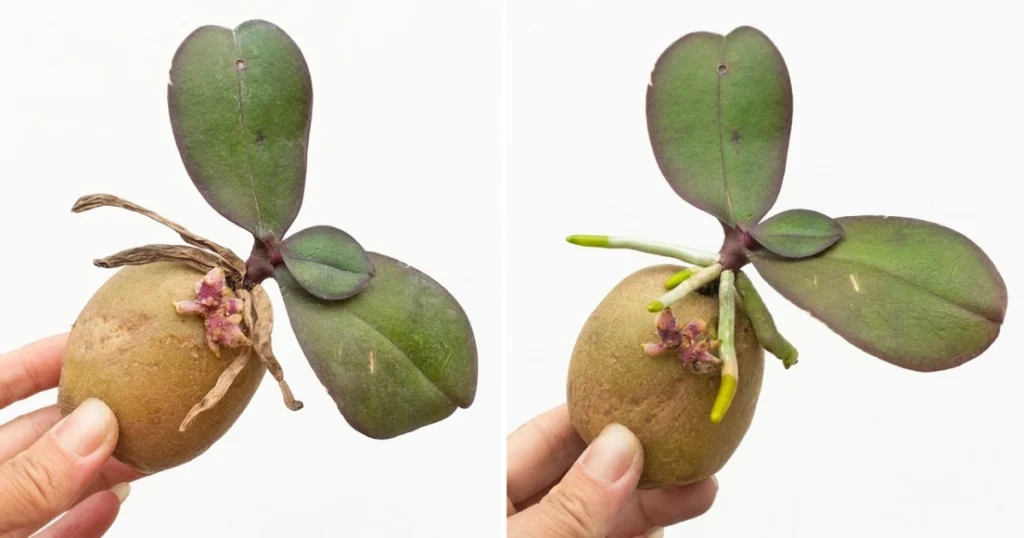
Place the cut end into the liquid soak and let it sit for 20–30 minutes to absorb beneficial compounds. - Plant in well-draining substrate
Use orchid bark or a loose, airy mix. Avoid compacted soil. Insert the cutting so that the treated end is in contact with the growing medium. - Maintain optimal conditions
Place the pot in a warm, humid location with indirect light. A bathroom or kitchen corner works perfectly. - Mist daily and avoid overwatering
Spray the air around the plant with water once or twice a day, but don’t saturate the soil. Orchids hate soggy roots. - Be patient and observe growth
Roots can begin forming in 2–6 weeks depending on temperature, humidity, and orchid species.
Tools and Materials Checklist 🧰
🍠 Potato with sprouts
🧄 Garlic clove
✂️ Disinfected pruning scissors
🌱 Healthy orchid stem with a node
🧴 Hydrogen peroxide or rubbing alcohol
💧 Small bowl and strainer
🪴 Orchid bark or specialized potting mix
🧂 Spray bottle for misting
Common Mistakes and How to Avoid Them
Using an unhealthy orchid cutting
Make sure the parent plant is well-maintained. Weak or stressed orchids don’t root well.
Not disinfecting tools or cuttings
Skipping this step invites bacteria and fungal infections that can kill your new plant before it roots.
Soaking the cutting too long
More is not better. Over-soaking can soften tissues and cause rot.
Planting in poor soil
Orchids need loose, breathable growing mediums like bark or sphagnum moss. Avoid dense soil that retains too much moisture.
Neglecting humidity
Orchids thrive in moist air. If your home is dry, use a humidity tray or group plants together to create a microclimate.
Placing in direct sunlight
Indirect light is best. Direct sun can scorch your delicate cutting.
Benefits of Propagating Orchids with a Potato
Eco-friendly and zero waste
This method uses leftover potato parts and a single garlic clove—no chemical rooting agents needed.
Inexpensive
Forget store-bought orchid propagation kits. Everything you need is likely already in your kitchen.
Natural rooting hormones
Potatoes contain natural sugars and enzymes that encourage root development. Garlic adds antimicrobial properties that reduce infection risk.
Beginner-friendly
Even first-time gardeners can follow this step-by-step technique and see results.
Repeatable process
Once you succeed, you can repeat the process every season with new cuttings.
Seasonal and Regional Tips
Tropical and humid regions
Propagation is faster. Still, ensure the area is well-ventilated to prevent mold growth.
Dry climates or winter seasons
Use humidity trays or place a damp cloth near the orchid to maintain moisture levels. Avoid placing near heaters.
Hot summer temperatures
Shorten the maceration period to 3–5 days, as fermentation accelerates in heat.
Cold environments
Keep the maceration bowl above 18°C and use a heating mat under the pot if necessary to stimulate rooting.
Frequently Asked Questions
How do you propagate orchids with a potato?
Cut a healthy stem from a flowering orchid. Soak the cut end in a potato-garlic liquid for 30 minutes, then plant it in well-draining substrate under humid conditions.
Why use garlic and potato?
Potatoes provide carbohydrates and nutrients that help root growth. Garlic has antibacterial properties that prevent rot and infection.
Does this method work on all orchids?
It’s most effective on orchids with pseudobulbs, like Dendrobium or Cattleya. Success may vary with Phalaenopsis and other species.
How long does it take for roots to grow?
Anywhere from 2 to 6 weeks, depending on the orchid type and environmental conditions.
Can I reuse the potato mixture?
No. The mixture loses potency after maceration and may harbor bacteria. Always prepare a fresh soak.
How often should I water the new cutting?
Mist regularly but only water when the medium is nearly dry. Too much moisture leads to rot.
What if my cutting doesn’t root?
Try adjusting humidity, light levels, or check for rot. Not every cutting takes root, so try with several stems for better chances.
Internal Linking Opportunities
For readers who want to take their orchid skills further, don’t miss:
- How to make DIY orchid fertilizer at home
- The top signs your orchid needs repotting
- Natural pest control for indoor orchids
These guides expand on caring for orchids after propagation, ensuring long-lasting health and beautiful blooms.
Conclusion
Propagating orchids using a potato might sound too good to be true—but it’s a trusted trick among seasoned gardeners. With a few simple ingredients, a little care, and the right conditions, you can enjoy the joy of watching new life take root again and again.
Give it a try, and let us know your results in the comments! Have you tried any other natural propagation techniques? Share your experience—and don’t forget to pass this guide along to other orchid lovers in your circle.
Happy growing! 🌸
Thanks for the different tips provided on this blog site. I have observed that many insurers offer buyers generous discount rates if they elect to insure many cars with them. A significant variety of households include several cars these days, in particular those with mature teenage youngsters still residing at home, and also the savings for policies can easily soon mount up. So it pays off to look for a bargain.
برای دوستانی که به دنبال یک راهکار مطمئن برای وریفای حساب در بروکرهای فارکس هستند، پیشنهاد میکنم خدمات شوپی را بررسی کنند. این مجموعه به صورت تخصصی، وریفای قانونی حساب های فارکس را با مدارکی ارائه میدهد که کاملاً معتبر بوده و به نام خودتان صادر میشود. این روش دائمی است و ریسک بلاک شدن حساب شما را به صفر میرساند. کیفیت و پشتیبانیشان واقعاً عالی است.
https://t.me/s/beEfCASiNo_OffICiALS
Die Stadt Amsterdam ist aus vielen Gründen ein fantastisches Reiseziel.
Wie in anderen Nationen sind ausgezahlte Gelder
einkommenssteuerfrei. Die erste wurde 1976 in Zandvoort eröffnet und ist seit dem 1.
Holland Casino ist die staatliche Spielbank der Niederlande und
betreibt 13 Filialen.
Bei den Flights gibt es innerhalb der ersten neun Blind Levels unlimited
Re-Entries. Das €1.100 Main Event bietet drei Starttage, wobei die Entscheidung an Day 3 fallen wird.
In Zusammenarbeit mit Holland Casino werden acht WSOP Circuit Events angeboten. Parking Zentrum wird von InPublic betrieben und befindet sich auf der Oosterdokseiland.Parking Zentrum gehört zu oosterdokseiland.nl.
Dann gibt es jede Menge zu entdecken.
Auch die Holland Casino Amsterdam Centrum sind so gestaltet,
dass Besucher sowohl tagsüber als auch abends bequem spielen können.
Für die Anfahrt zum Holland Casino Amsterdam Centrum bietet
sich die Nutzung der A10 Ringautobahn an,
von der aus Besucher den Schildern zum Stadtzentrum folgen können. Darüber hinaus bietet
das Casino besondere Veranstaltungen wie Winning Wednesday, bei dem Inhaber
der Favorites Card zusätzliche Preise gewinnen können, und das Sunday Royale, ein Event mit spannenden Spielen, Live-Unterhaltung und
tollem Essen.
References:
https://online-spielhallen.de/alles-zur-tipico-casino-auszahlung-schnell-sicher-und-transparent/
They operate under international licenses (such as Curaçao,
MGA, etc.) and may accept Australian players. Better yet, we even have the top
payment options to suggest that work for such transactions.
Make sure to check out our site because it is possible to play
Australian pokies for free
on our website. So, you can probably earn a good amount through these betting games if you invest the
time and practice a bit. Consider getting a no deposit bonus of 20 AUD that has a
wagering requirement of 30 X.
Check the bonus section of the website to see the rewards
and their expiry date after the account has been created.
When signing up, it is important to use the “CASINORITY”
bonus code in the designated field to guarantee the promo activation. Hexabet’s welcome bonus is a
20-free spins package, which is activated immediately after
registering the account. Whatever amount you have after meeting the
50x playthrough requirement that is below $200 is yours to keep.
If you think that’s harsh, you can as well not use the given bonus and,
just play for fun. To understand how no deposit bonus functions, let’s go back to basics.
This bonus gives users an excellent opportunity to enlarge winnings, but it is worth remembering that a
number of bonuses have conditions for winning with them.
We have thoroughly checked for the terms and conditions, which are adequate for the bonus type.
Nonetheless, this offer is one of the best free sign-up bonuses.
The total amount of bets is the total amount of money that the player has placed throughout the game, no matter whether won or lost.
Purchase crypto on exchanges like Binance, Coinbase, or Kraken. The slots are spinning, the dealers are
waiting, and now all that’s needed is you!
Taxes on gambling winnings vary – some regions tax gambling
income, while others don’t.
The government aims to strike a balance between allowing innovation in the
gambling industry and protecting consumers from potential risks.
This would provide a clear legal framework for operators to follow and give
consumers greater confidence in the legitimacy and security of the platforms
they use. It’s essential to understand the current laws and
regulations surrounding this type of gambling.
Simply put, cryptocurrency is a digital or virtual form of
currency that uses cryptography for secure financial transactions.
While constraints exist around eligibility in several
countries presently, Roobet focuses on usability, security and
entertainment for crypto gamblers looking to explore modern iGaming frontiers.
References:
https://blackcoin.co/top-10-popular-casino-games-trends-innovations-in-igaming/
us online casinos that accept paypal
References:
https://cabinet.wastay.com/
online pokies australia paypal
References:
jobsremote.work
paypal casinos online that accept
References:
payment.crimmall.com
اگر قصد مهاجرت به کانادا دارید یا بیزینس بینالمللی دارید، داشتن شماره واقعی با پیششماره +1 یک مزیت بزرگ است. خوشبختانه شوپی امکان خرید سیم کارت کانادا اورجینال را فراهم کرده که حتی در داخل ایران فعال است. از لحظه دریافت، میتوانید پیامکها، تماسها و کدهای تایید حساب بانکی را بدون محدودیت بگیرید.