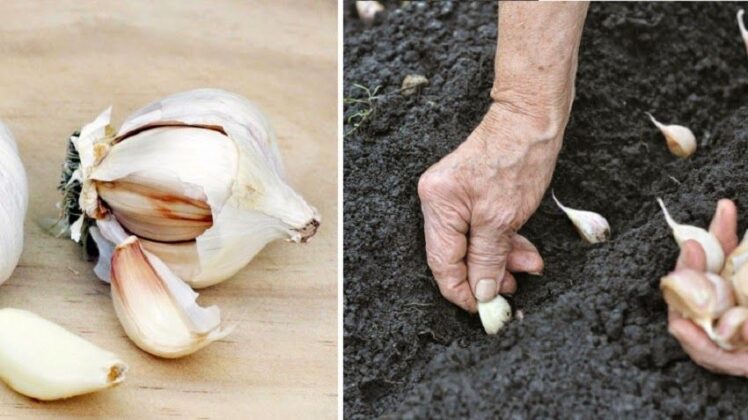
Growing garlic is simple and easy to do. In fact, growing garlic is done in just a few steps and with quick results. This is considering that the soil is suitable for sowing, it has adequate humidity and that the harvest is carried out at the right time.
With garlic sowing, in addition to ensuring a fresh seasoning on the table, it is also a guarantee of savings, given the price charged for each garlic clove.
WHEN IS IT BETTER TO GROW GARLIC?

When is the right time to plant garlic? In Brazil, garlic sowing will be better from March to July in the regions of the country where the temperature is colder, not exceeding 25º on average, for better bulb formation.
Very muddy or sandy soils should be avoided, light soils (sandy-clayey) are ideal for the roots to be “picked up” immediately after sowing. Your goal is to get a good development out of them before the plants go dormant.
Prepare the soil
To grow large heads of garlic, you need loose, fertile soil. Garlic growing beds, formed by gullies or free of weed seeds can beimprove them even more by mixing them with limestone a few weeks before sowing, which removes the “acidity” from the soil and provides calcium to the plants.
Dolomitic limestone is found in agricultural warehouses. Mix at a rate of 250 to 300 g for each m2 of bed. Along with sowing, loosen the soil with a digging fork, spread a layer of well-tanned organic matter 8-10 cm deep on the beds, mixing as well.
Prepare the soil for planting garlic: For organic matter, use a well-aged mixture of compost, aged leaf mold, and manure. All of this takes a while to reach the ideal breakdown point. To avoid disease problems, do not plant garlic in the same place 2 years in a row. Make several shallow grooves in the ground 8 inches apart.
Choose your varieties
Types of garlic: Purple and white garlic are the best known to Brazilians. Some types of garlic have cloves that grow around a hard central stem. This stem forms a flower stalk at the top, which many growers cut to redirect energy to the bulb.
There are other types of garlic that form more teeth, on the outside of the head and also in the center. Break off a large head of garlic and plant only the largest cloves. The larger the cloves, the more likely it is to produce a large head of garlic. Separate the smallest teeth to use in the kitchen.
There are 3 types of garlic that are differentiated by the color of the skin: white garlic or common garlic, pink garlic or early garlic and red rocambole garlic. You can also know the time of production and harvest of the cultivated garlic, since there are varieties with a longer or earlier life cycle.
Plant a carnation: Harvest a head
How to plant garlic: Put the garlic cloves in at planting time. In a furrow, mix the soil with a good recommended chemical fertilizer, found in the branches. Set the teeth apart, not being able to come into direct contact with the fertilizer, as it can damage them. Hold the tip of each tooth (bulb) up and push it into the ground about 5 cm deep. In the same groove, place the teeth at a distance of 8 to 10 cm.
Once all the tines are in the ground, smooth the surface of the soil with your fingers or a rake to fill in the holes and water well. If you are planting more than one variety, be sure to label each type of garlic.
Make a map of the garlic plantation so that if the labels are lost, you know how to separate the types.
Irrigation and cultural treatments
Top growth begins when the weather warms up and the days get longer. Garlic isn’t greedy for water, but it doesn’t like to dry out either. When the soil seems to dry an inch below the surface, it’s time to water.
In general, with the use of a good fertilizer and water, the garlic will take shape, beginning to form cloves.
The air and the planted area should be kept free of weeds, especially in the first 2 months. In case of pests and / or diseases, mainly use the alternative insecticides and fungicides for the cultivation done in the backyard.
Harvest Time and Care
Harvest when the plants have 5 or 6 green leaves, and one or the other begins to turn yellow, dry. Each green leaf represents a layer of wrapping around the head.
Be careful, during harvest, you can damage the outer layer. Later clean the garlic heads, you will likely lose another layer or two. The goal is to end up with 2-3 thin layers surrounding each bulb.
To harvest, direct a fork into the garden underneath the plants (be careful not to damage them), gently drop them, and scoop them out.
Shake off excess soil and place the plants in a pile. Once you finish harvesting, move the plants to an airy area protected from the sun and rain.
If you are growing more than one variety of garlic, keep each variety separate and well labeled so you know what is what.
Cure, Clean and Store the heads
To cure garlic and prepare for storage, hang bare bulbs with foliage in bunches or spread out on a table or shelf.
You can start eating the garlic immediately, but retainers intended for storage should be cured. After a few weeks of curing, it is time to clean the restia. Cut the rods to 12 inches and also the roots.
Scrub the outer layer of skin around the lamp and use a nail brush or toothbrush to gently remove any dirt stuck to the base.
Try not to remove more layers than necessary. Store the resins in a dark, well-ventilated place.
