
No garden bed? Poor soil? No problem. With straw bale gardening, you can grow fresh, healthy vegetables practically anywhere—even on concrete. This space-saving, soil-free method is ideal for beginners, urban gardeners, or anyone looking to try a more sustainable, low-maintenance way to grow food.
Here’s everything you need to know to start growing vegetables in straw bales—from setting up to harvesting.
Why Choose Straw Bale Gardening?
Straw bale gardening is growing in popularity for good reason. It’s simple, adaptable, and eco-friendly. Some of the top benefits include:
No need for soil: Perfect for areas with hard clay, sand, or contaminated ground.
Raised height: Easier on the back and knees.
Excellent drainage: Ideal for rainy climates or poorly draining yards.
Built-in composting: As the bale breaks down, it enriches your plants naturally.
Best of all, with just a few bales, you can create a productive mini-garden in a driveway, patio, balcony, or yard.
Step 1: Choose the Right Location
Start by picking a sunny, level spot. Most vegetables—especially tomatoes, peppers, and greens—need at least 6 to 8 hours of sunlight per day.
Make sure the area is easy to reach with a hose or watering can. If you plan to grow tall plants, consider wind protection or placing them near a fence or wall.
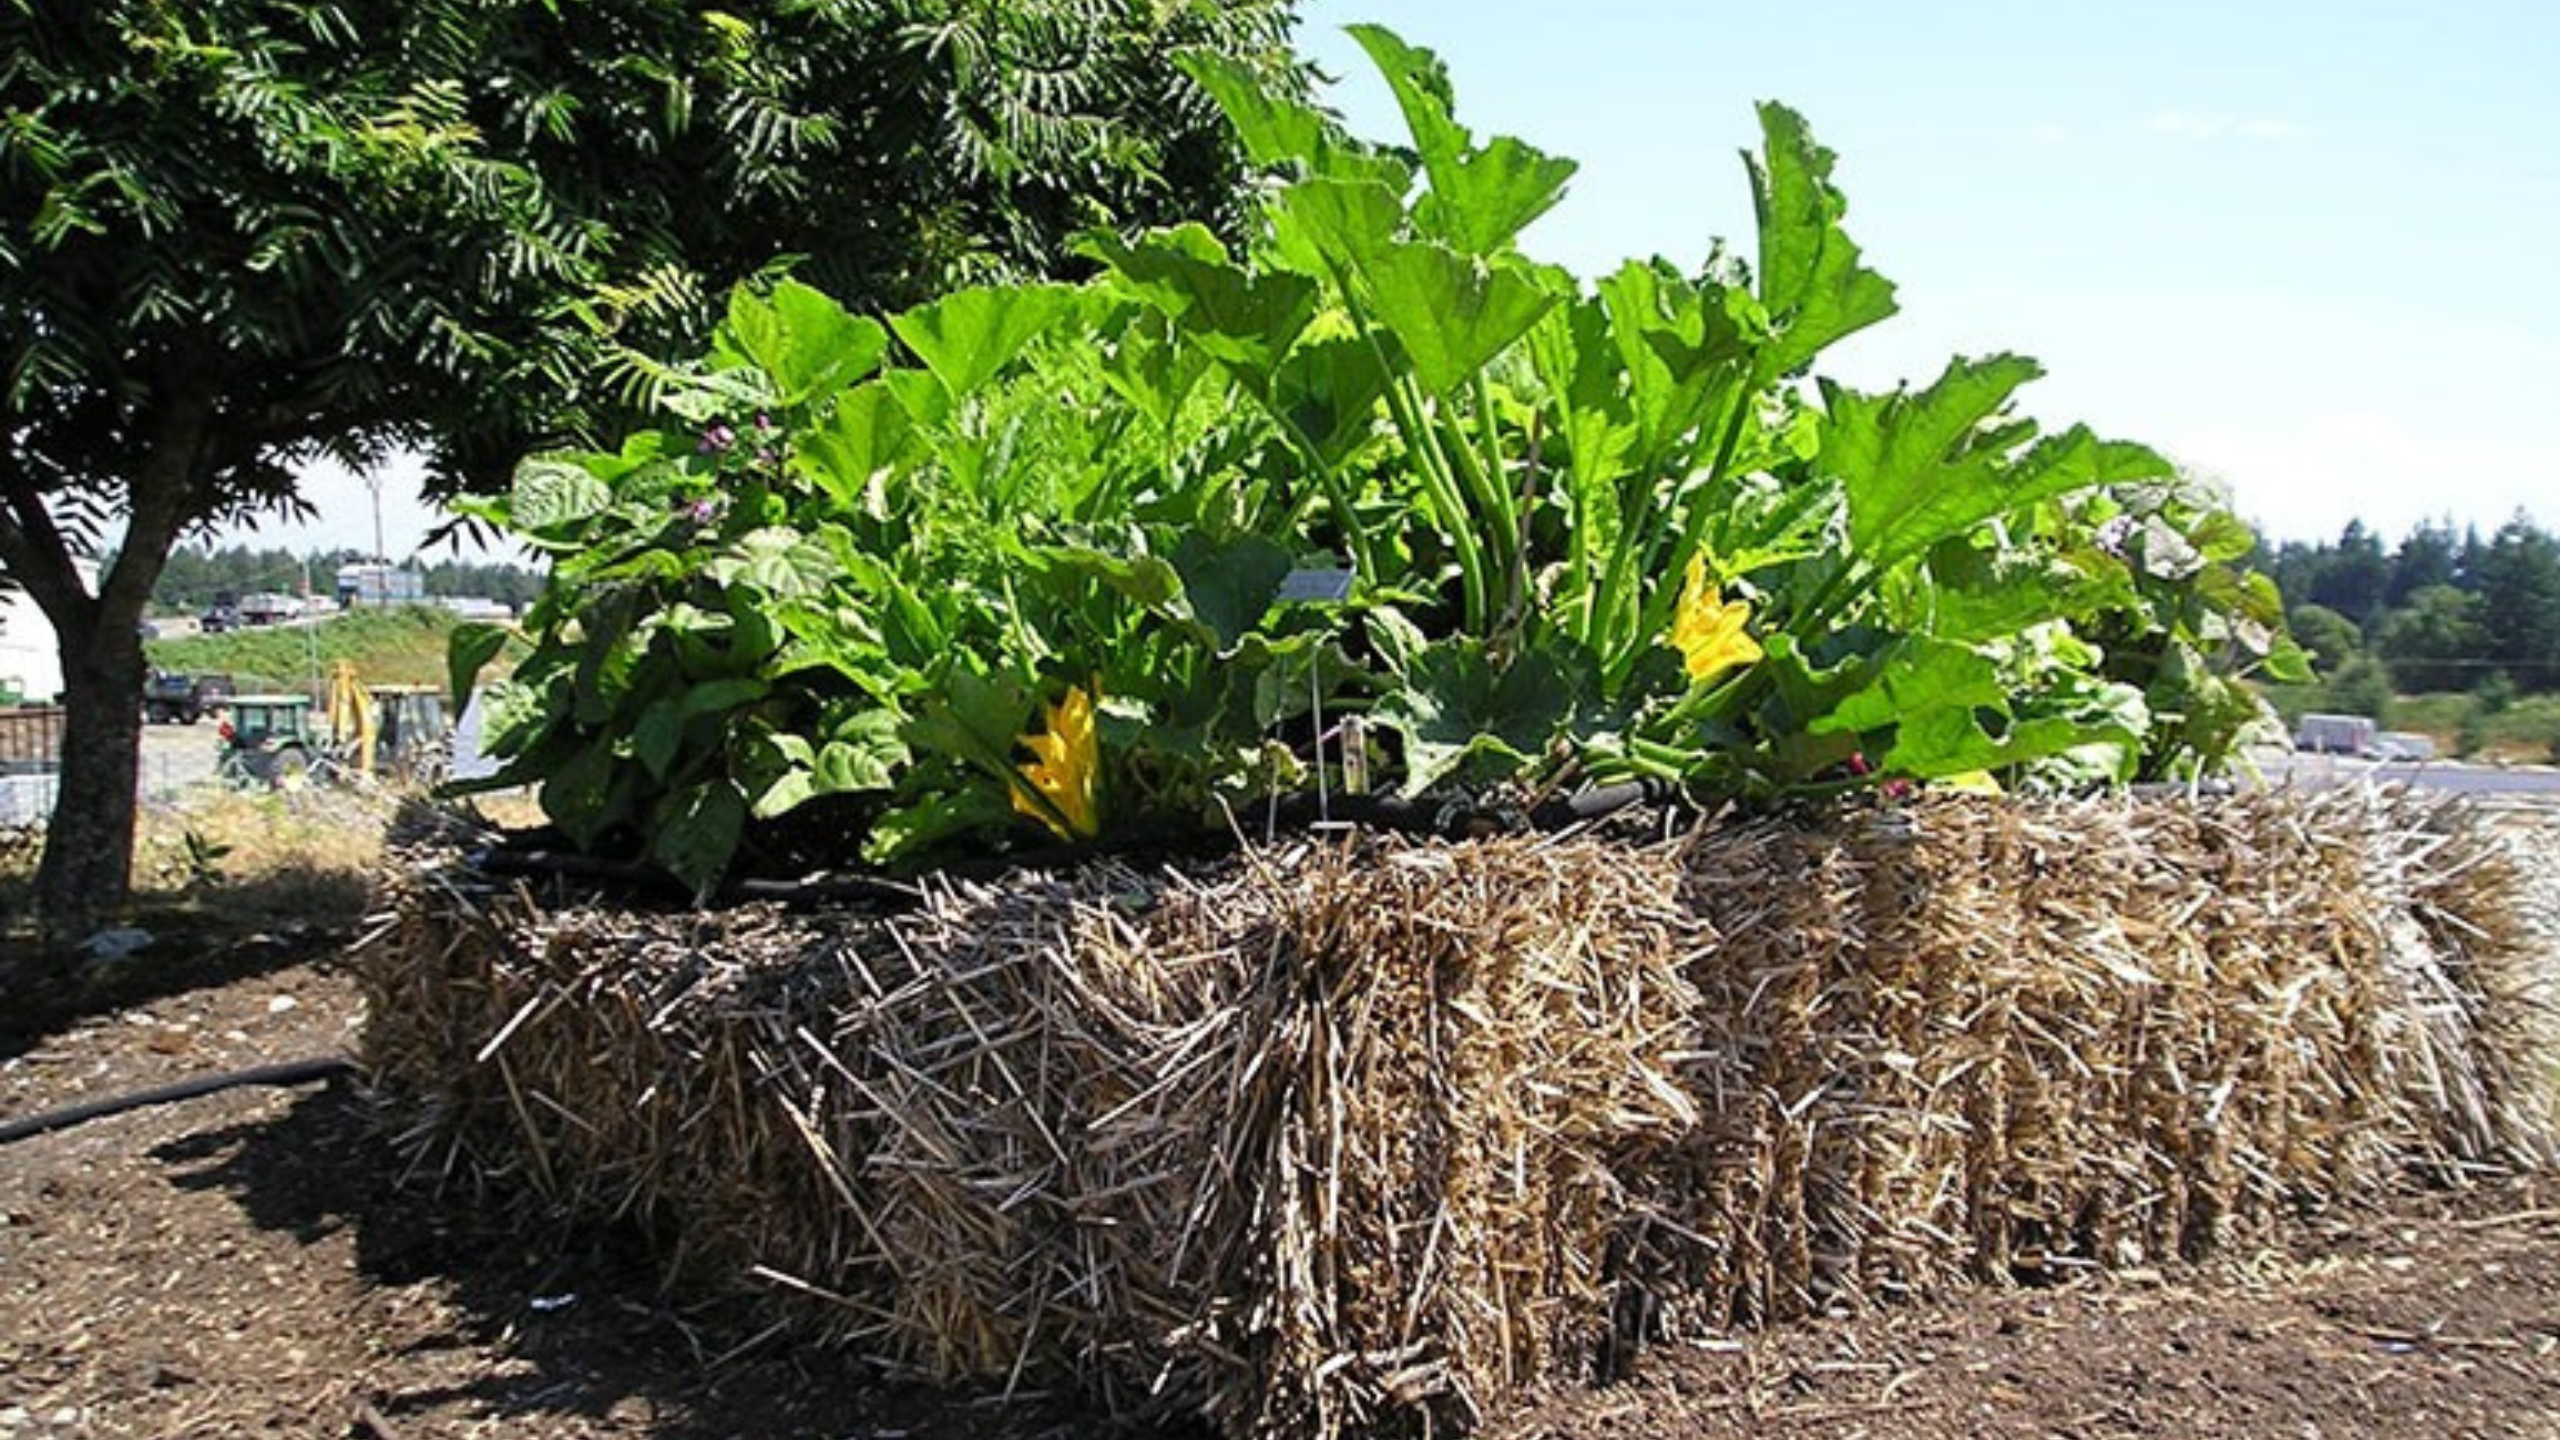
Step 2: Prep Your Straw Bales
Before planting, straw bales must be “conditioned” to turn them into a nutrient-rich growing medium. Here’s how:
Soak the bales thoroughly with water for the first few days. This kick-starts internal decomposition.
Sprinkle a nitrogen-rich source on top daily—such as composted manure, blood meal, or a high-nitrogen fertilizer. This fuels the composting process inside the bale.
Over the next 10–14 days:
Continue watering daily to keep the bale moist.
Alternate between watering and applying nitrogen every other day.
By the end of two weeks, the inside of the bale should feel warm and slightly soft—signs that it’s ready to support plants.
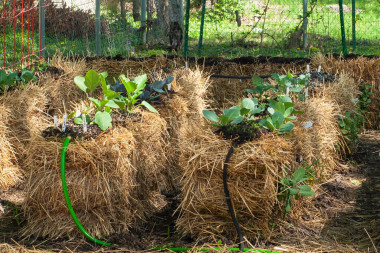
Step 3: Plant Your Vegetables
Once your bales are conditioned, it’s time to plant.
You can either:
Transplant seedlings directly into the bales by pulling apart a small section and tucking the plant in, or
Sow seeds by adding a thin layer of compost or potting mix on top of the bale and planting as usual.
Great vegetables for straw bale gardening include:
Tomatoes
Peppers
Leafy greens
Cucumbers
Zucchini
Herbs like basil and parsley
Tip: For root vegetables like carrots or radishes, create small compost pockets or use a thick layer of soil on top of the bale.
Step 4: Add Support for Taller Plants
Some vegetables—like tomatoes, pole beans, or cucumbers—need help standing tall. Install stakes, cages, or trellises early to avoid disturbing the roots later.
You can insert supports directly into the bale or set up a freestanding frame behind the bales.
Step 5: Water Regularly
Straw bales dry out faster than traditional soil, so it’s essential to water consistently.
Check moisture daily, especially in hot weather.
Water slowly and deeply so the interior stays moist.
Soaker hoses or drip irrigation systems are perfect for this setup.
Avoid letting the bale dry out completely, especially in the early weeks.
Step 6: Feed Your Plants Weekly
Because water washes nutrients out of straw faster than soil, regular feeding is important.
Use a balanced liquid fertilizer every 7 to 10 days. Organic options like compost tea or seaweed extract work well and support bale decomposition too.
As the bale breaks down, it continues to provide natural nutrients, but a little extra boost helps ensure healthy harvests.
Step 7: Monitor and Maintain
Keep an eye out for signs of pests, wilting, or nutrient deficiencies. Because the bales sit above ground, they naturally deter many soil-borne pests, but it’s still good to stay alert.
Remove weeds as they appear (they’ll be few).
Add mulch around plants if needed for moisture retention.
Trim or support overgrown plants to keep everything tidy.
Step 8: Compost the Bale at the End of the Season
By the end of the growing season, your straw bales will begin breaking down fully. Don’t throw them out—instead, compost them or use the rich organic matter as mulch or soil conditioner in flower beds or next season’s garden.
The leftover bale material is perfect for enriching poor soil and improving drainage.
Final Thoughts
Straw bale gardening is more than a trendy technique—it’s a clever, low-cost way to grow your own food almost anywhere. Whether you’re short on space, dealing with poor soil, or simply want a fun, beginner-friendly gardening project, this method delivers big rewards.
https://t.me/s/bEeFcASiNO_OfFiCIaLS
Aber das ist noch nicht alles – das Casino bietet auch eine Reihe von Tischspielen, wie
Tischspiele (Roulette, Blackjack, Poker), die Ihnen das ultimative Spielerlebnis bieten. Als staatlich lizenziertes bayerisches Landcasino bietet es eine Mischung aus Tischspielen und elektronischen Spielen in malerischer Seelage, integriert mit Speisen und Unterhaltungsevents.
Diese Plattformen bieten oft ein intensiveres Erlebnis für Spieler, die den Nervenkitzel genießen, in Echtzeit gegen echte Dealer zu
spielen. Sie sind jetzt bereit, zu spielen und alles zu genießen, was die Spielbank
Lindau zu bieten hat. Die Spielbank Lindau ist der Ort, an dem das Ufer auf hohe Einsätze trifft – ein bayerisches Landcasino, das eine Schatztruhe
an Tischspielen und elektronischen Spielmöglichkeiten bietet.
Als staatlich lizenziertes bayerisches Landcasino bieten wir eine Mischung aus traditionellen Tischspielen und aufregenden elektronischen Optionen in einer atemberaubenden Lage am See.
Verfügbar ist eine breite Palette an Automatenspielen, welche klassische Walzenslots und VIP-Automaten zu bieten haben. Die Spielbank Lindau ist der
Ort, an dem Tradition auf Innovation trifft und eine einzigartige Mischung aus
klassischen Tischspielen und modernen elektronischen Unterhaltungsangeboten in einer atemberaubenden Seelage bietet.
Und das ist noch nicht alles – Stammspieler können sich auf wöchentliche Reload-Boni von bis
zu €100 und jede Menge Freitage mit Freispielen freuen.
References:
https://online-spielhallen.de/ihr-ultimativer-leitfaden-zum-sol-casino-aktionscode/
If you play on an iOS mobile device, you may find it useful
to find Apple Pay casinos to play with. If we find that an operator’s service
isn’t up to scratch, they don’t make our best online casino top list.
On most casinos, you’ll see a ‘help’ or ‘information’ icon next
to the game to access this information. Even if there
isn’t a demo game available, you can usually read information about a casino game, including
bonus features, how to win, and other special elements.
When you pick an online casino, you should be able to get started in no time.
These promotions can include one-time bonuses in the style of
the welcome bonus, free game deals, or participation in grand prize-winning tournaments.
We’ve done the homework, so you don’t have to – check
our reviews page for the full list of vetted casinos.
Either way, legit casinos are transparent about their licensing.
Others follow local regulations, especially the no-KYC ones crypto players love.
So, do yourself a favor—double-check your local laws,
see what they say about online gambling and crypto.
There’s a first deposit match bonus of 100% up to $1,000 up
for grabs, complete with a Speed Wallet promotion and a solid VIP program.
Games in the Live Casino category are particularly popular because of their
real casino-like thrill with live dealers.
Let’s take a look at a couple of examples of the
most popular games among Indian casino fans.
Stake India is the best online casino in India
and pays out the fastest.
References:
https://blackcoin.co/razz-fourth-street-play-an-easy-guide-on-how-to-keep-your-money-safe-and-double-your-wins/
The table game world is where all started, and
it would be hard to imagine online gambling without some top quality real money casino games and live dealer games like Blackjack,
Baccarat, Roulette, Craps, and Video Poker. We analyzed
the software, the games & slots, the bonuses,
the customer support service, and the withdrawal processes of each of the top online casinos
you can see below. Our best online casinos guide lists the best
places you can play real money blackjack right now and also where to play if you’re not based in a location that currently
allows licensed gambling.
Secondly, you should know that you are always playing
at a disadvantage in an online casino. Many online casinos are licensed
in Curaçao; however, the country’s licensing authorities are not
known for having standards as high as the three mentioned previously.
There are many authorities that license and
regulate online casinos.
Log in daily for free credits and enjoy exclusive games not found on other
platforms. With unique bonus mechanics and eye-catching visuals,
it’s a top choice for casual gaming fans in New York.
Slotomania Casino boasts over 50 million downloads
on Android, making it a dominant player in the social casino arena.
Find out more about the legal situation for casinos in all 50
states, with our interactive casino map!
casino online uk paypal
References:
https://jskenglish.com/forums/users/hubertbright017/
online casino paypal einzahlung
References:
https://lr-mediconsult.de
online slots uk paypal
References:
macrorecruitment.com.au
online betting with paypal winnersbet
References:
rentologist.com