

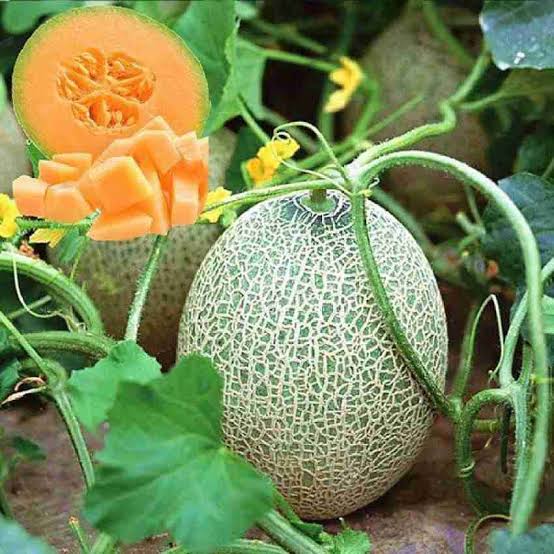
Growing melons in containers is a rewarding way to enjoy fresh, homegrown fruit without needing a large garden space. What makes this process even more appealing is that it can be done sustainably, using kitchen scraps and waste to fertilize your plants. Here’s a step-by-step guide to help you grow melons in containers while reducing waste and ensuring your plants thrive.
Materials You’ll Need
Before you begin, gather the following materials:
- Melon Seeds: Choose a melon variety that is suitable for container gardening.
- Two Cups of Water: For soaking the seeds and ensuring they are hydrated.
- One Cup of Hot Water: To disinfect the seeds.
- Paper Towels: To aid in the pre-germination process.
- Seedling Pots: For starting your melon seeds.
- Container with Drainage Holes: A container of about 50 cm x 50 cm size works well for growing melons.
- Compost: Rich in nutrients for healthy growth.
- Crushed Eggshells: To add calcium to the soil and prevent common plant issues.
- Bamboo Stakes and Stainless Steel Wire: For supporting the growing melon vines.
- Kitchen Waste Fertilizer: Organic waste like vegetable scraps can be converted into a nutrient-rich liquid fertilizer.
- Bananas: For potassium-rich fertilizer.
With everything in hand, you are ready to start the melon-growing process!
Step-by-Step Instructions
Step 1: Soak the Melon Seeds
Begin by soaking your melon seeds in a cup of hot water for about 20 minutes. This process helps to kill any germs or pathogens on the seeds, ensuring a better chance of germination.
Step 2: Clean the Seeds and Prepare for Pre-Germination
After soaking, clean the seeds and place them on a paper towel. Fold the towel over the seeds and keep it in a warm, dark place to encourage the seeds to germinate. Check every day to ensure the towel stays damp but not soaking wet. This method will help the seeds sprout quickly.
Step 3: Transfer to Seedling Pots
Once your seeds have sprouted, it’s time to transplant them into seedling pots. These small pots will give your seedlings a safe space to grow until they are strong enough to move into the larger container. Ensure the pots have good drainage to avoid waterlogging, which can harm the plants.
Step 4: Add Compost to the Container
Fill the bottom of your container with a layer of compost. Compost enriches the soil and provides the plants with essential nutrients that will help them grow vigorously. It also improves the drainage of the soil, which is crucial for melon plants.
Step 5: Add Kitchen Waste Fertilizer
Next, place your homemade kitchen waste fertilizer in the container. This can be made by collecting vegetable scraps, fruit peels, or other organic waste and letting them decompose into a nutrient-rich liquid. This eco-friendly fertilizer will nourish your plants throughout their growth.
Step 6: Water the Seedlings
Before transplanting the seedlings into the large container, water them well to ensure they are properly hydrated. Healthy, hydrated seedlings will have a higher chance of surviving the transition to the larger container.
Step 7: Plant the Seedlings in the Container
Now, it’s time to transfer the seedlings to the main container. Plant up to six seedlings in the container, spaced about 10-15 cm apart. Once planted, cover the soil with a layer of crushed eggshells. This will help prevent common issues like blossom end rot and add calcium to the soil.
Step 8: Regular Watering and Feeding
Water the plants regularly, ensuring the soil remains moist but not soggy. Apply the kitchen waste fertilizer once a week, mixing it with water. This will provide the plants with continuous nutrition throughout their growing period.
Step 9: Support the Vines with Bamboo Stakes
Melon vines grow long and heavy, so it’s important to support them as they grow. Use bamboo stakes and stainless steel wire to create a structure for the vines to climb. This will not only keep the plants upright but will also save space in your container garden.
Step 10: Prune Lower Leaves and Branches
After 30 days of growth, begin pruning the lower leaves and branches of the melon plant. This will allow the plant to focus its energy on growing healthy fruit instead of unnecessary foliage.
Step 11: Maintain Female Flowers
To encourage fruit production, ensure that the female flowers are on the 8th to 13th leaves. These flowers are where the melons will form, so it’s important to nurture them.
Step 12: Remove Male Flowers
After 35 days, remove any male and female flowers below the 8th leaf. This will help direct the plant’s energy into producing only the best melons.
Step 13: Pollinate the Female Flowers
To ensure your melons produce fruit, pollinate the female flowers by sprinkling male pollen onto them. You can collect male pollen by gently tapping the male flowers and transferring the pollen to the female flowers.
Step 14: Prune the Fruit-Bearing Branch
At 38 days, prune the second tip of the fruit-bearing branch. This will help the plant direct its energy into producing a single, healthy melon per plant.
Step 15: Keep Only One Melon per Plant
At around 42 days, ensure there is only one melon growing per plant. Having multiple melons on the same plant can strain the plant, preventing it from producing large, healthy fruit.
Step 16: Prune the Top of the Main Stem
Once the plant reaches 50 days, prune the top of the main stem at the 26th leaf. This will help the plant focus its energy on the melons rather than continuing to grow excessively.
Step 17: Prepare the Cords for Melon Support
At this stage, it’s important to prepare cords or other support mechanisms to help hold up the growing melons. As the melons start to mature, they will need extra support to avoid falling or breaking.
Step 18: Continue Fertilizing Weekly
As the melons grow, continue applying the kitchen waste fertilizer mixed with water every week. This will ensure the plants receive the nutrients they need to produce high-quality fruit.
Step 19: Use Bananas as Potassium-Rich Fertilizer
On day 60, you can introduce bananas as a potassium-rich fertilizer. Soak bananas in water overnight, then add the water to your melon plants. Potassium is crucial for fruit development, and bananas provide an organic, sustainable way to boost your plants.
Step 20: Keep Fertilizing Until Harvest
Continue applying the kitchen waste fertilizer weekly until day 75, when your melons should be ready for harvest. The plant should now have one healthy, mature melon per plant, thanks to your careful attention and sustainable growing practices.
Final Thoughts
Growing melons in containers using kitchen waste is not only an environmentally friendly way to garden, but it also provides you with delicious, fresh fruit. With the right care, including regular pruning, watering, and fertilization, you can enjoy the fruits of your labor. This sustainable method reduces waste and promotes healthy plant growth, making it a win-win for both your garden and the environment. Enjoy your melon harvest!
6 thoughts on “How to Grow Melon in a Container Using Kitchen Waste”