
Mint is one of the most beloved herbs for home gardeners. Its crisp aroma and refreshing flavor make it perfect for teas, culinary dishes, and natural remedies. Whether you’re a seasoned green thumb or just starting, growing mint at home can be incredibly rewarding—and surprisingly easy. With a clever trick using recycled plastic bottles, you can maintain a thriving mint plant all year round, even in small spaces or indoors. This sustainable, space-saving method provides a self-watering system, reducing your watering chores and helping your mint flourish effortlessly.
Why Use Plastic Bottles to Grow Mint?
You might wonder: Why repurpose plastic bottles for gardening? Here are the key advantages that make this method so popular:
- Water Efficiency: The self-watering design helps retain moisture in the soil, meaning fewer waterings needed and less waste.
- Ideal for Small Spaces: Whether you’re living in an apartment, on a balcony, or in a tiny backyard, this compact system fits perfectly.
- Eco-Friendly: Recycling old bottles reduces plastic waste and transforms it into a useful gardening tool.
- Mobility and Flexibility: You can easily move your mint plant for optimal sunlight exposure or indoor placement.
What Do You Need to Get Started?
Gathering the right supplies ensures a smooth planting process. Here’s what you’ll need:
- A 2-liter plastic bottle (or larger, depending on space available)
- Fresh mint cuttings or seeds
- Nutritious potting soil rich in organic matter
- A sharp knife or scissors
- A drill or a hot nail for making drainage holes
- A watering can or spray bottle for gentle watering
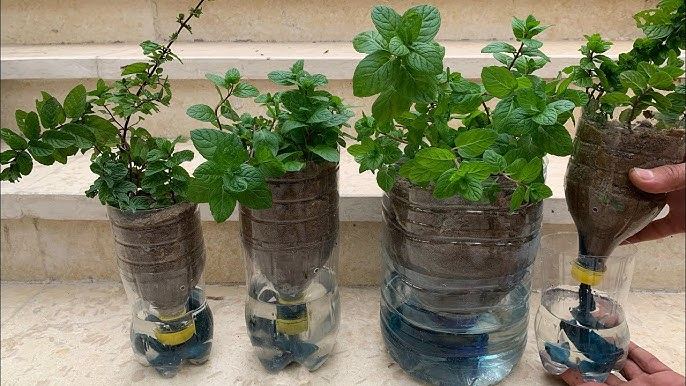
Step-by-Step: Growing Mint in Recycled Plastic Bottles
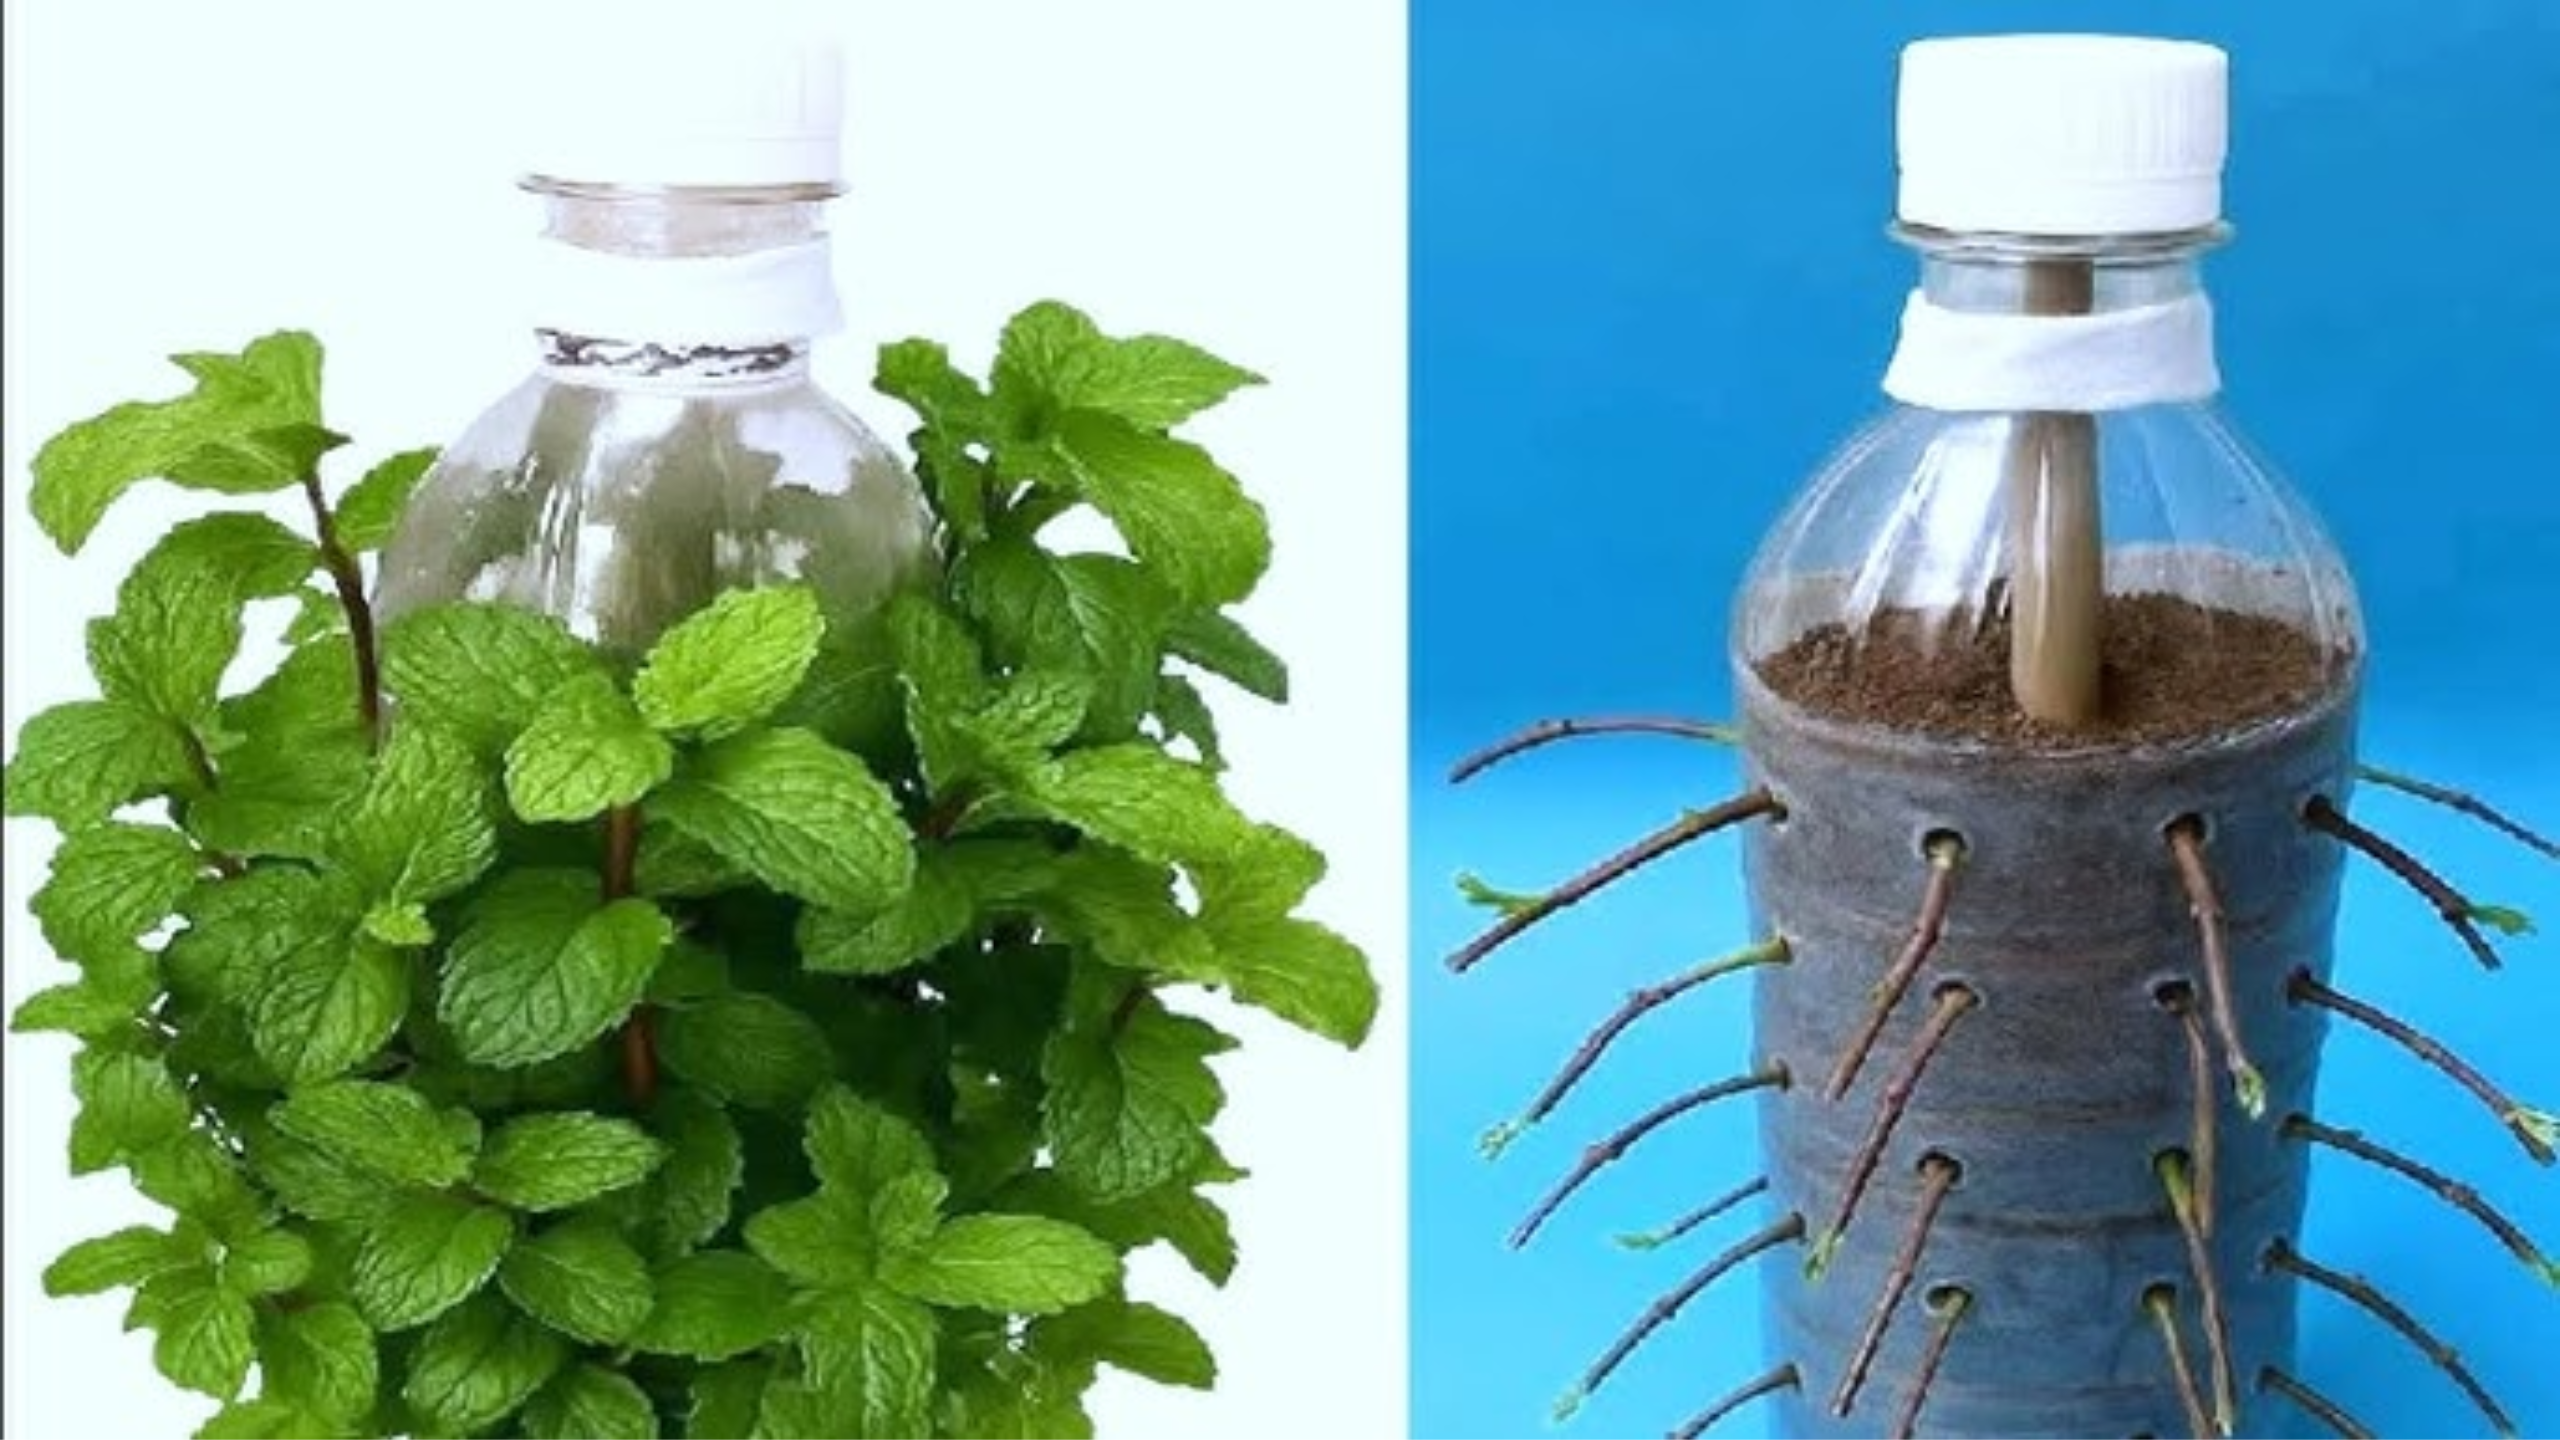
1. Prepare the Plastic Bottle
Begin by cleaning the bottle thoroughly to remove any residues or labels. A good wash with soap and water will do.
Next, cut the bottle in half—the bottom portion will serve as the main planter. Use your knife or scissors carefully.
Create several drainage holes in the bottom to prevent water accumulation, which can lead to root rot. A drill works best; alternatively, a hot nail heated over a flame can puncture the plastic.
For a self-watering setup, make a small hole in the bottle cap and insert a cotton wick through it. This wick will draw water from the base to the soil, maintaining consistent moisture.
2. Prepare the Soil
Mint loves well-draining, nutrient-dense soil. Mix your potting soil with compost or organic fertilizer to boost nutrients. Keep the soil slightly moist—not soggy—before planting.
3. Plant Your Mint
Using cuttings: Remove leaves from the lower part of the stems and place the cuttings in a glass of water for a few days until roots appear.
Using seeds: Sow them about ¼ inch deep into the prepared soil, then cover lightly.
Place your bottle in a location that receives at least 4–6 hours of sunlight daily. If indoors, a windowsill with plenty of natural light works perfectly.
4. Create a Self-Watering System (Optional but Recommended)
Pour water into the bottom half of the bottle. Insert the top half upside down into the water-filled base, ensuring the wick reaches the water. This setup allows the plant to draw moisture as needed, reducing watering frequency and keeping the soil consistently moist.
5. Water and Care for Your Mint
Check the soil regularly. Keep it moist but avoid overwatering. When the top inch feels dry, give it a deep watering.
If growing indoors, mist the leaves lightly to maintain humidity, especially during dry seasons.
6. Fertilize Gently
Every 3–4 weeks, feed your mint with organic options like compost tea or diluted fish emulsion. Mint is a vigorous grower and doesn’t require heavy feeding—overdoing it can actually hamper its flavor.
7. Manage Pests and Diseases
Common pests include aphids and spider mites. Spray affected plants with neem oil or a mild soap solution.
Ensure proper air circulation and avoid overwatering to prevent fungal issues.
Crushed eggshells sprinkled around the base can deter slugs and snails.
8. Regular Harvesting for Continuous Growth
Begin harvesting when your plant has several full leaves. Regular snipping encourages new shoots and leaves.
To keep your mint productive, pinch off flower buds as they appear—this directs energy toward leafy growth rather than flowering.
Final Tips for Success
By recycling plastic bottles, you create an inexpensive, eco-friendly way to enjoy fresh mint year-round. This self-watering method minimizes maintenance and ensures your plant gets the right amount of moisture, even if you tend to forget watering.
Whether you have limited space or want a sustainable garden hack, this trick is perfect. Place your DIY mint planter on a sunny balcony, in your kitchen window, or even in the bathroom—anywhere with good light.
Enjoy the fresh aroma of homegrown mint whenever you need it, and revel in the satisfaction of growing your herbs sustainably and effortlessly. Give it a try today, and watch your mint thrive!
Interested in more DIY herb projects? Check out guides on growing coriander, basil, or fennel in plastic bottles. Gardening can be simple, rewarding, and environmentally friendly!
3 thoughts on “How to Grow Fresh Mint All Year Round Using a Simple Plastic Bottle Trick”