
Are you planning a getaway but concerned about leaving your beloved plants unattended? Fear not! With this straightforward DIY automatic plant watering system, your greenery can thrive while you’re away. This practical solution requires only a few materials you likely already have at home, ensuring your plants stay hydrated without any fuss. Perfect for both indoor and outdoor use, let’s explore how to set up this efficient watering system.
Materials Needed
- Plastic Bottle (2L or larger): Choose a size based on how long you’ll be gone and the water needs of your plants.
- Syringe Needle: This will help control the flow of water from the bottle.
- Hollow Plastic Q-tip: This will regulate air flow into the bottle; make sure it’s a type that is empty inside.
- Glue: To create airtight seals.
- Scissors or Knife: For cutting the plastic Q-tip.
Step-by-Step Instructions
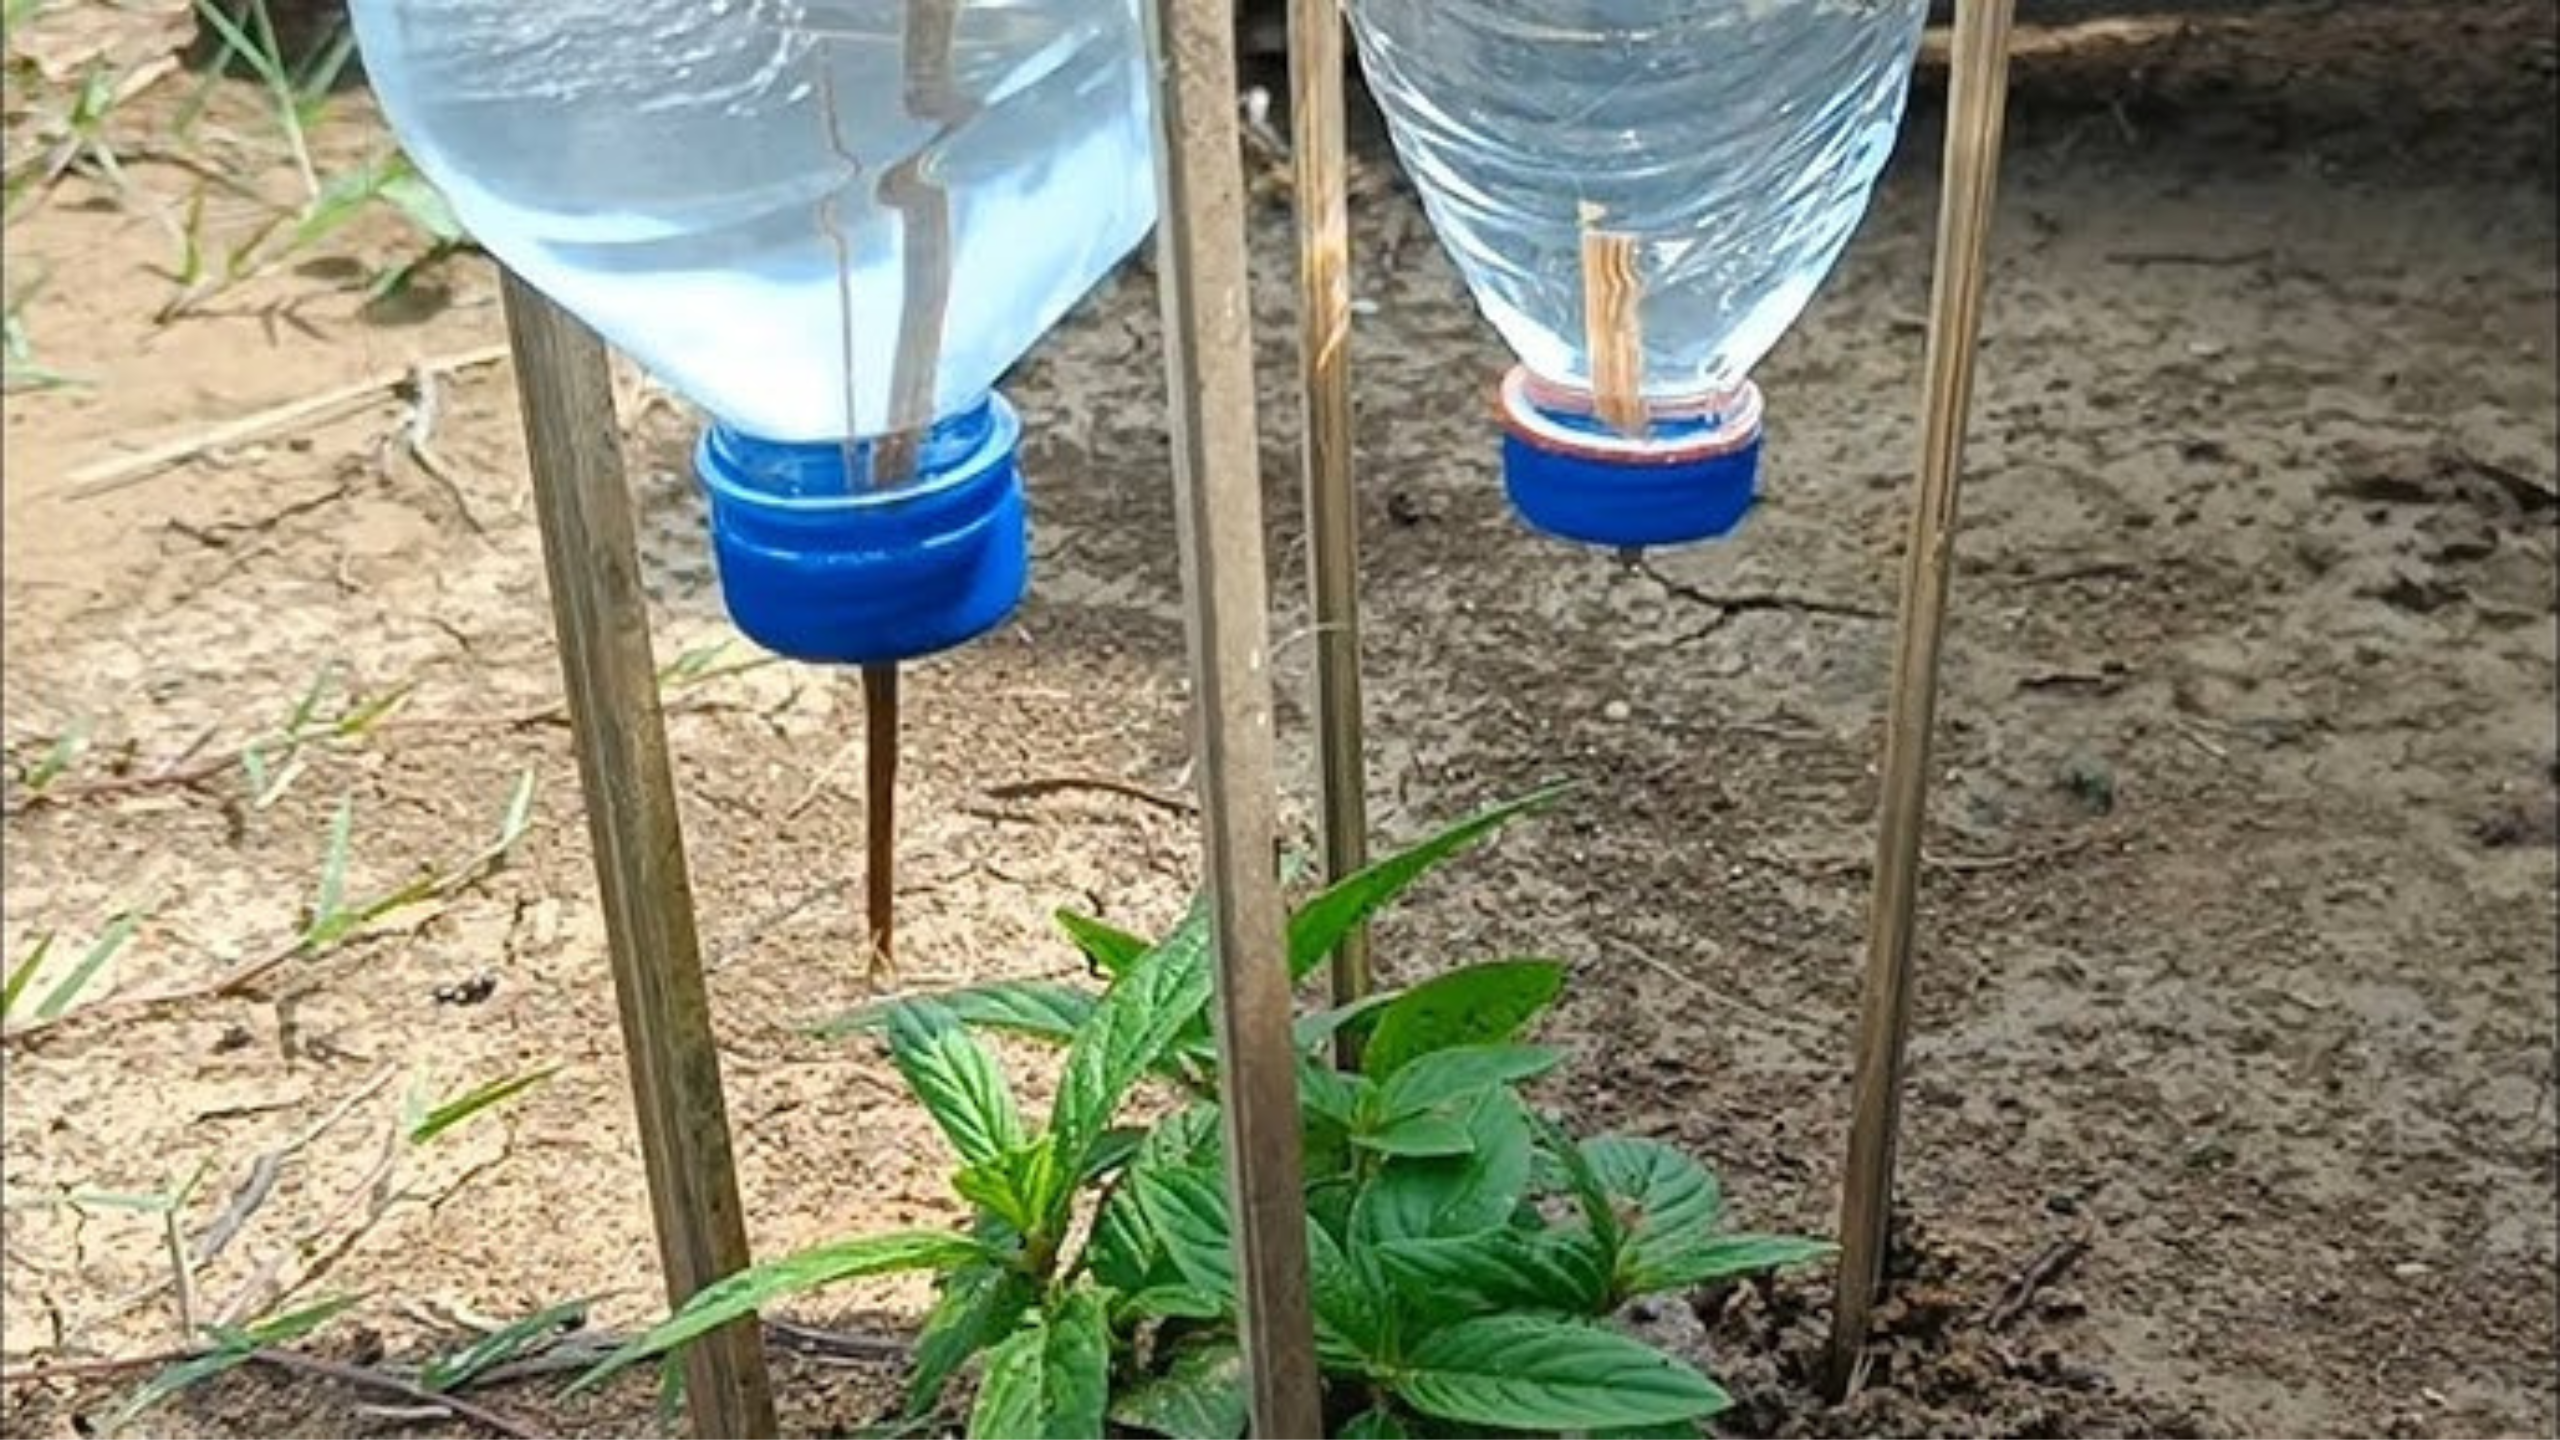
1. Prepare the Bottle Cap:
- Modify the Q-tip: Start by trimming one end of the plastic Q-tip to create an opening. This is essential for allowing air to flow into the bottle.
- Drill a Hole in the Cap: Use a tool to make a small hole in the cap of your plastic bottle, just large enough for the cut end of the Q-tip to fit snugly.
2. Insert and Seal the Q-tip:
- Push the cut end of the Q-tip into the hole you drilled, inserting it about half an inch. Apply glue around the area where the Q-tip meets the cap to ensure an airtight seal. The Q-tip will serve as a tiny air passage, while the cotton end helps control the air flow, allowing just enough in to regulate the water release.
3. Set Up the Water Flow:
- Insert the Syringe Needle: Near the bottom of the bottle, insert the syringe needle, ensuring the sharp end is inside the bottle. This will act as the outlet for the water, allowing it to drip out steadily.
- Fill the Bottle with Water: Once everything is securely in place, fill your bottle with water. The size you select will determine how long your system can keep your plants watered.
Activation and Maintenance
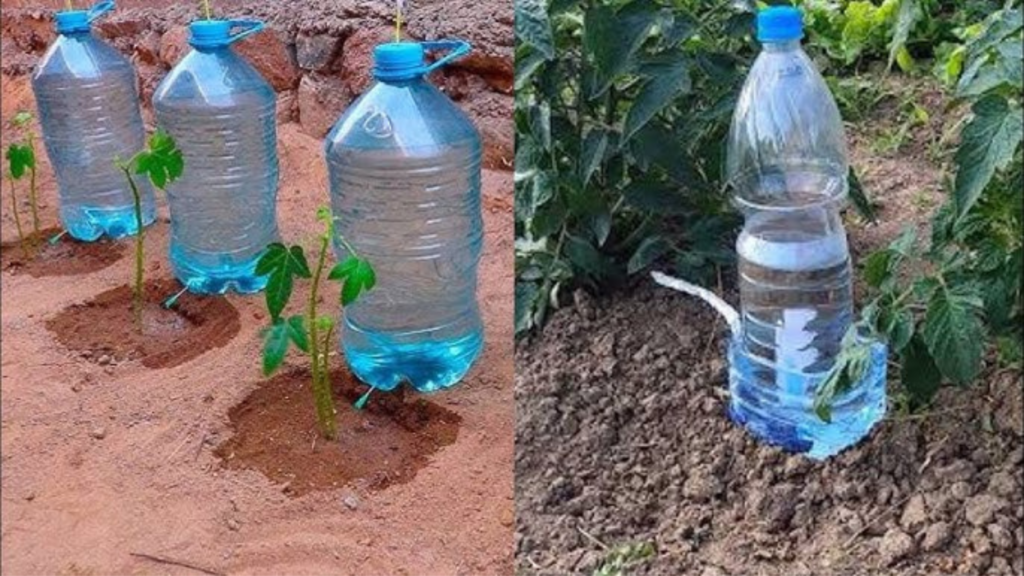
1. Position the Bottle:
- Place the bottle next to your plant, positioning the needle so that it drips directly into the soil. The gravity-fed system will gradually release water as air enters through the Q-tip, creating a vacuum that controls the drip rate.
2. Test the System:
- Before you head out, test the watering system for a day to ensure it operates correctly. Adjust the needle’s position if the water flow is too fast or too slow.
This DIY automatic plant watering system is a lifesaver for plant enthusiasts who travel. It’s not only simple to create but also efficient and budget-friendly. With this setup, you can relax and enjoy your vacation, knowing your plants will be well cared for. Happy travels, and may you return to flourishing, hydrated plants!
Heya! I understand this is kind of off-topic however I had to ask.
Does building a well-established website such as yours require a
large amount of work? I am brand new to running a blog however I do write
in my journal daily. I’d like to start a blog so I will be able to share my
personal experience and feelings online. Please let me know if you have
any kind of recommendations or tips for brand new aspiring bloggers.
Appreciate it!
Hello, Neat post. There is an issue together with your web site in web explorer, may
check this? IE still is the marketplace chief and a large
component to other people will leave out your excellent writing because of this problem.
527954 403544Ive been absent for some time, but now I remember why I used to adore this blog. Thank you, I will try and check back much more often. How regularly you update your internet web site? 806738
https://t.me/officials_pokerdom/3903
https://t.me/s/iGaming_live/4871