
Are you dreaming of having beautiful roses gracing your garden? Propagating roses from cuttings is a cost-effective and satisfying way to expand your flower collection. Whether you’re a seasoned gardener or just starting out, this guide will walk you through each step, making it easy to succeed.
What’s the benefit of propagating roses from cuttings?
By taking cuttings, you can create new rose plants that are genetically identical to the parent. It’s also a perfect way to preserve favorite varieties or experiment with new types without purchasing mature plants. Plus, watching a simple stem grow roots and blossom is truly rewarding!
What You Need
Before you begin, gather these materials:
- A healthy, green rose stem (about 6-8 cm long)
- A sharp knife or pruning shears, properly cleaned
- Rooting hormone (optional but can speed up growth)
- A pot filled with well-draining soil or potting mix
- A container with drainage holes
- Transparent plastic bag or cut plastic bottle for creating a mini greenhouse
- Water for watering
Step-by-Step Process
1. Selecting the Perfect Stem
Start by choosing a healthy, recent bloom rose. Look for a flexible, disease-free stem that hasn’t yet hardened.
Tip: The ideal cutting is about 6-8 cm long, with at least 2-3 leaves at the top. Make your cut just below a leaf node (the point where leaves are attached). Remove any flowers or buds—your goal is to focus the plant’s energy on root development.
2. Preparing the Cutting
If you wish, dip the bottom end of the stem in rooting hormone. This promotes faster root growth, though it’s optional.
Note: Using hormone isn’t mandatory, but it can significantly improve your success rate, especially with tougher varieties.
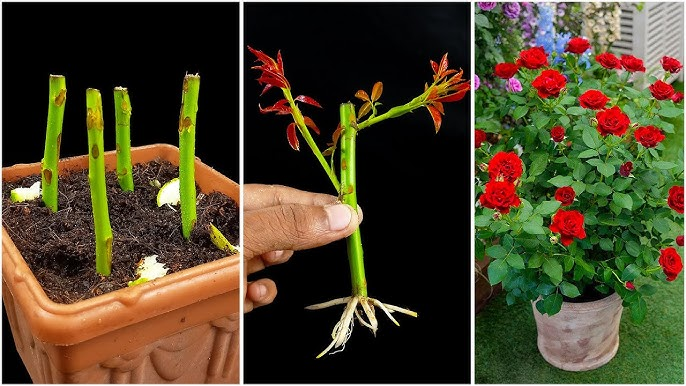
3. Plantting
Fill your pot with damp, well-draining soil. Make a hole with your finger or pencil, then gently insert the cutting halfway into the soil. Firm the soil around it to eliminate air pockets, which helps roots develop uniformly.
4. Creating a Mini Greenhouse
To retain moisture and humidity — crucial for root formation — cover your cutting with a clear plastic bag or a cut plastic bottle placed over the pot. Secure the edges to keep the environment humid.
Tip: Make small holes in the plastic for air circulation, avoiding excessive condensation that might lead to mold.
5. Placement and Care
Place your setup in a bright spot with indirect sunlight. Avoid direct sun exposure, which can scorch the tender cutting.
Water gently whenever the soil feels dry, but ensure it doesn’t become soggy. Consistent moisture encourages healthy root growth without drowning the plant.
6. Waiting for Roots
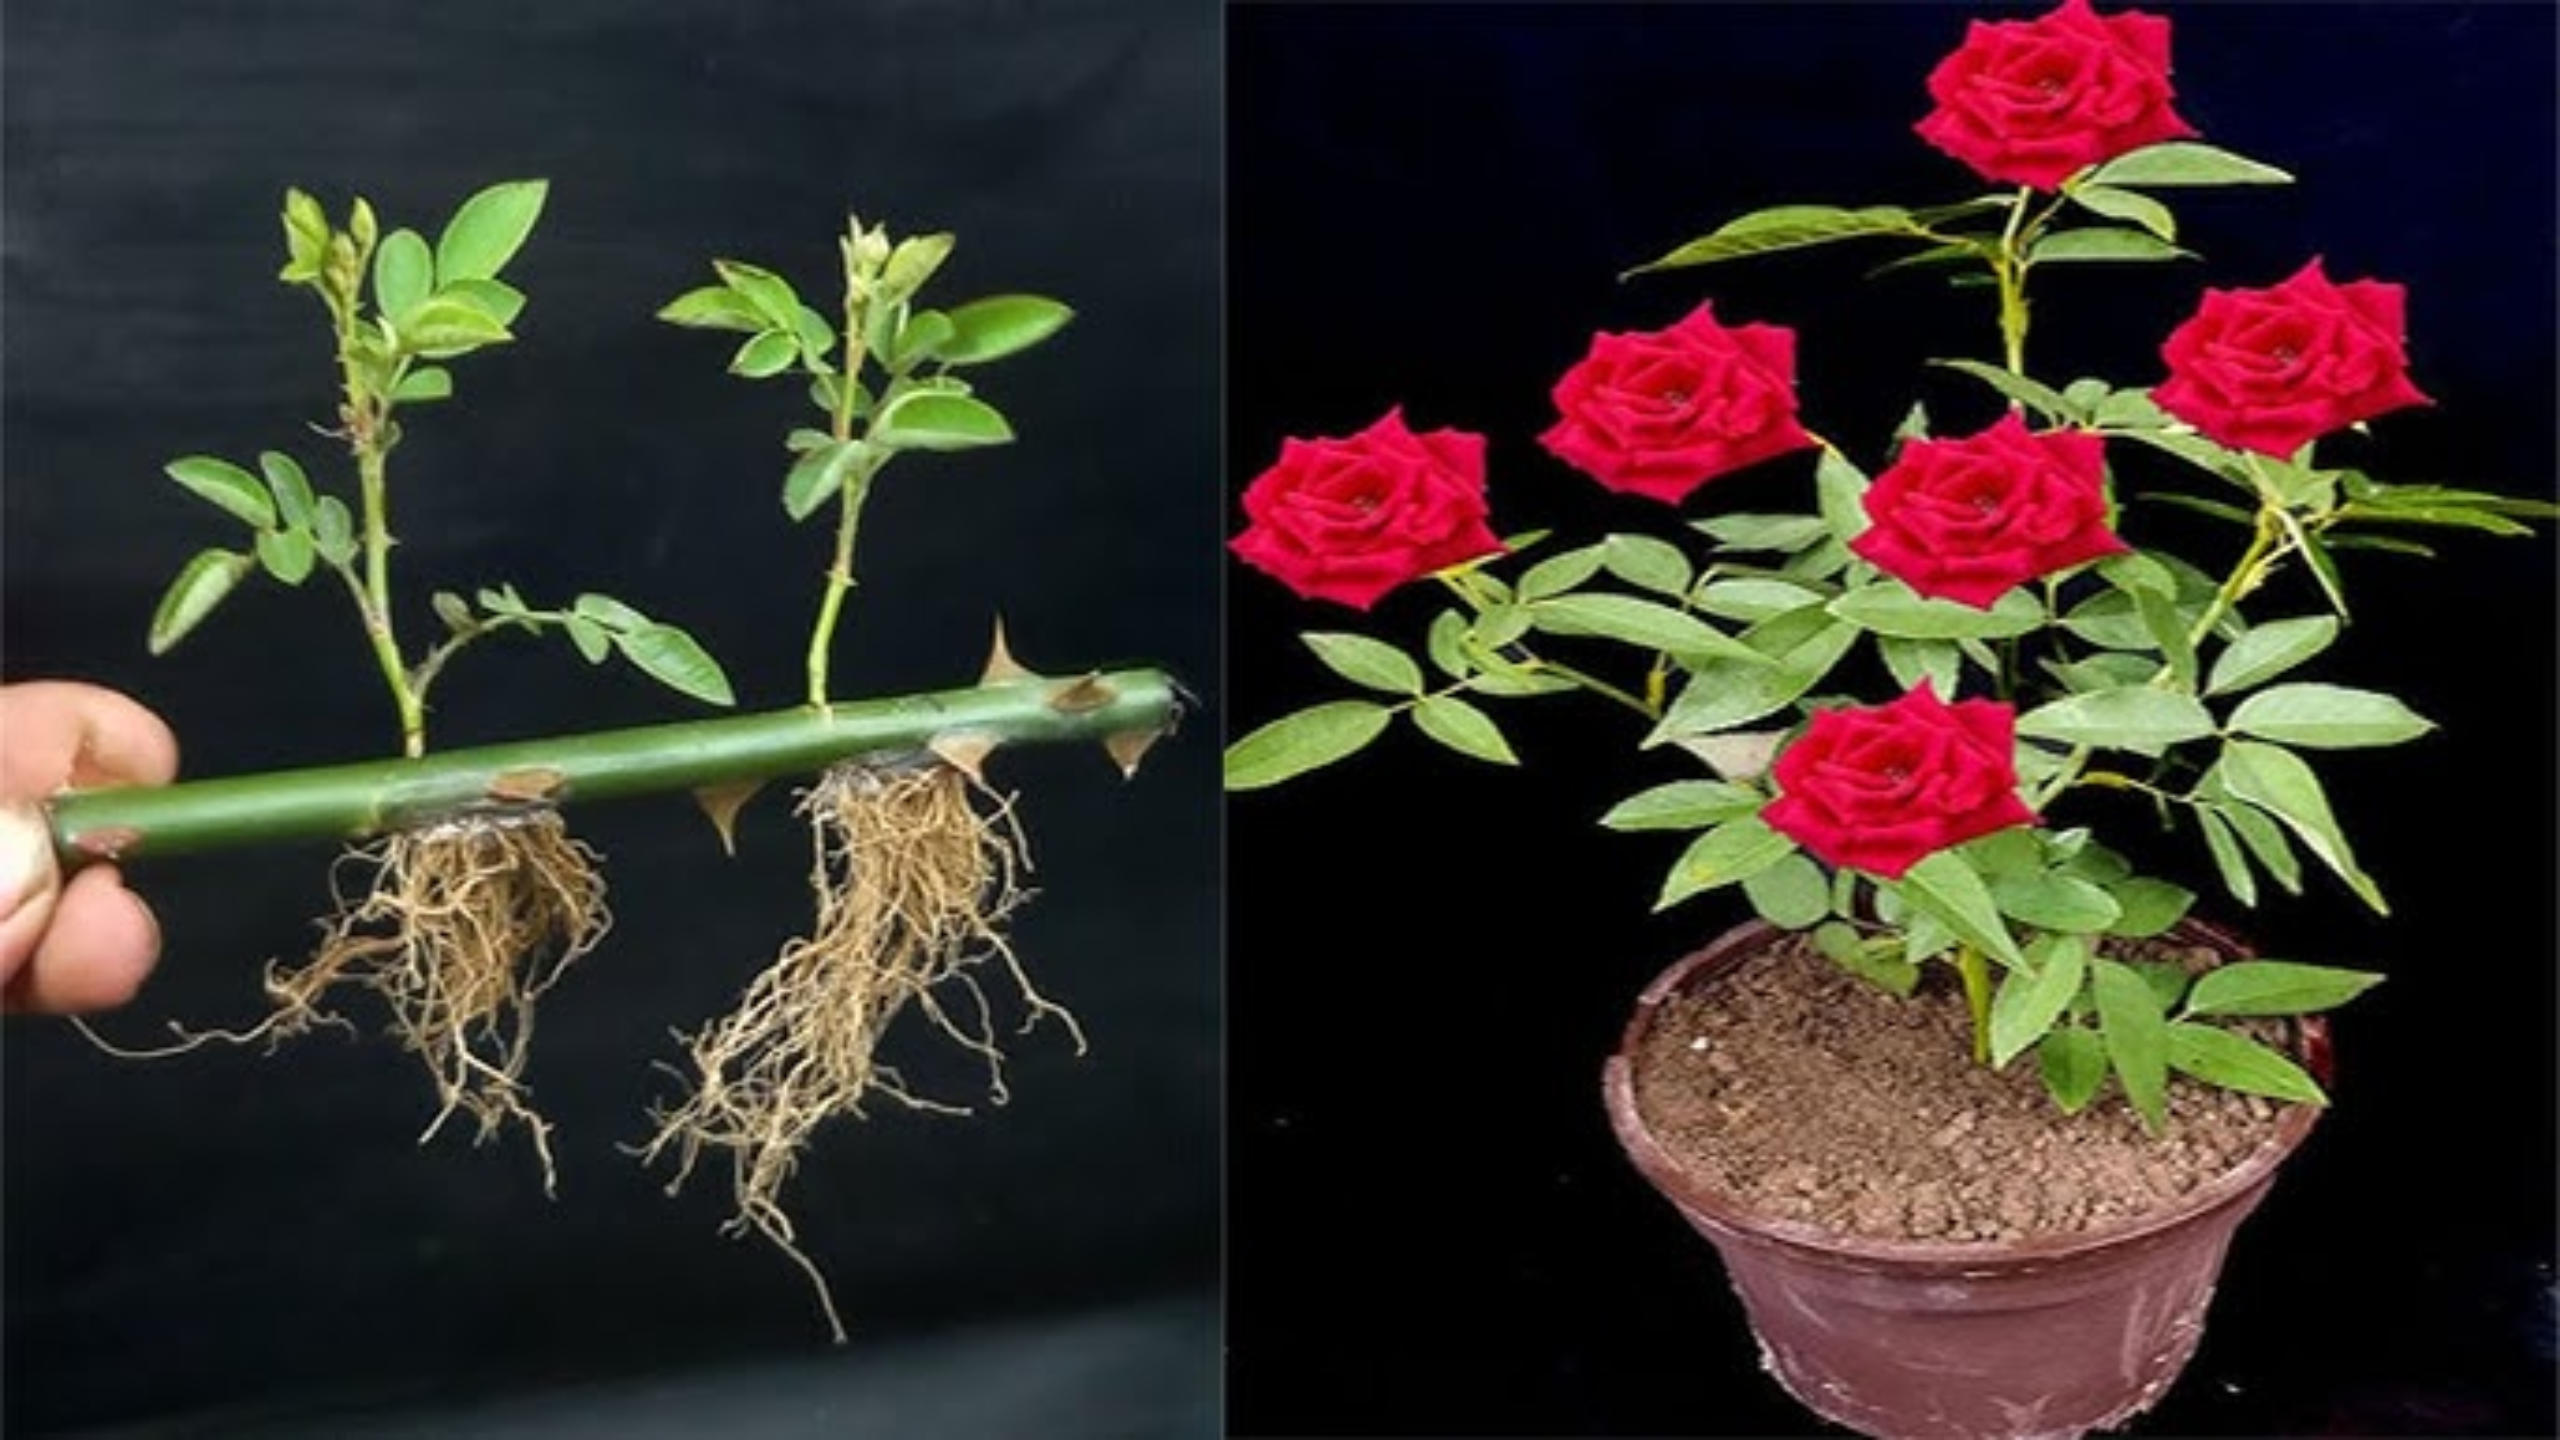
Within about 3-6 weeks, roots should start to form. You can check by gently tugging on the cutting—a slight resistance indicates successful rooting.
Tip: Patience is key! Not all cuttings root at the same time, so keep nurturing your plant during this period.
7. Transplanting
Once your rose cutting has established roots and shows new leaf growth, it’s time to transplant it into a larger pot or directly into your garden.
Gradually introduce your young plant to more sunlight and outdoor conditions over a week or two to prevent shock.
Tips, Troubleshooting, and Common Questions
Q: Can I root roses from all varieties?
A: Most hybrid and old-fashioned roses root well from cuttings. However, some hybrids may be more challenging, so patience and extra care are recommended.
Q: Why do some cuttings fail?
A: Causes include low humidity, too little light, overwatering, or disease. Carefully following the steps and maintaining optimal conditions improve your chances.
Q: Is it better to use hormone?
A: While not mandatory, rooting hormone can give you a boost, especially for beginners or difficult varieties.
Q: How long does it take for a rose to bloom after rooting?
A: Usually, about one or two years depending on the variety, climate, and care.
Final Thoughts
Propagating roses from cuttings is a fulfilling gardening skill that allows you to multiply your favorite blooms and share them with friends. With patience and care, a simple stem can transform into a vibrant, blossoming rose bush.
Now, roll up your sleeves, gather your materials, and start your own rose-growing adventure!
Happy gardening! Whether you’re expanding your garden or trying your hand at propagation for the first time, remember that every plant begins as a tiny cutting. Your efforts will surely bloom into stunning roses that bring color and fragrance to your home.
Auch ein Extrabuffet findet hier bequem Platz.
Bodentiefe Panoramafenster, Marmortanzfläche.
Ihr könnt unser Restaurant – inklusive der einzigartigen Panoramaterrasse im Rooftop-Design – als alleinige
Location oder in Kombination mit weiteren Räumlichkeiten buchen. Wer das
Gesamtpaket unserer Spielbank erleben möchte, ist
bei unseren Gruppenangeboten an der richtigen Adresse!
Alljährlich findet auch das Zechenfest mit Live-Musik statt.
Zollverein ist Ankerpunkt der Europäischen Route der Industriekultur.
Gemeinsam mit der unmittelbar benachbarten Kokerei Zollverein gehören die Standorte 12 und 1/2/8 der Zeche
seit 2001 zum Weltkulturerbe der UNESCO.
Sie ist heute ein Architektur- und Industriedenkmal. Probieren Sie’s aus und genießen Sie
das viel gelobte Ambiente!
Für besondere Anlässe stellen wir Ihnen gerne ein persönliches Menü
zusammen, das Sie bei Abholung auch vor Ort zu Hause genießen können. Casino Zollverein bietet euch guten Espresso oder besonders
guten Cappuccino. Wenn ihr Red Dot Design Museum besucht, ist es
die Empfehlung der Gäste, dieses Restaurant zu besuchen. Durch die Lage an der
Spitze des Festungplateaus, bietet es einen sagenhaften Blick über Koblenz.
Das Casino Bern gehört zu den führenden Adressen in Bern für Gastronomie,
Kultur und Events.
References:
https://online-spielhallen.de/umfassende-izzi-casino-bewertung-ihre-spielumgebung-unter-der-lupe/
Alongside gaming, the resort offers luxury accommodations, dining, shopping, and entertainment options, providing
a comprehensive resort experience. With over 2,000 slot machines, 100 table games, a poker room, hotel, and nightclub, many would argue that it is the best casino in not only New Orleans, but Louisiana.
Today, Reno has around 20 modern casinos that offer numerous slot
machines, blackjack tables, poker games, and more. The Strip is where you will
find all you need to enjoy a true gambling experience,
whether it is video poker, slots, table games or card games that suit your fancy.
In Ohio, several cities boast land-based casinos, each offering unique
experiences and a wide array of gaming options.
Rates for other courses at The Greenbrier are considerably cheaper but still restrictively high for the average player.
Designed by Charles Blair Macdonald and opened way back in 1914,
the Old White is named after the hotel that
used to sit in its place. You should expect to pay $200 to $300 for a round
on a weekday and over $300 to play on a weekend. But 6th tops them all,
offering a fairway packed with glorious oak trees, as
well as several hazardous bunkers. There are several
holes worthy of being highlighted, including
the 1st, 3rd, and 15th. Our number one casino golf course in the Southeast can be found way down in Mississippi,
alongside the Beau Rivage Resort & Casino near Biloxi.
References:
https://blackcoin.co/spinstralia-casino-a-comprehensive-review/
Deposits hit your account instantly, withdrawals process quickly and every payment method is
built around convenience. Whether you’re collecting
spins or filling your cashback jar, the more you
play, the more delicious your wins become. The terms are simple,
the perks are sweet and the value is real. Big Candy Casino knows how to make every player feel like a kid in a candy store.
The game lobby is stacked with themed pokies, smooth table games
and thrilling live rooms, all designed to deliver variety and fun. From the moment you enter, you’ll find rewards as
tempting as the sweets they’re named after.
Regretfully, there is still no telephone support available, which is a significant difference from competitors in the industry who provide voice assistance.
For more in-depth questions, email support is available at [email protected].
The primary means of communication is live chat, although
access necessitates account registration and login.
References:
https://blackcoin.co/find-your-best-casino-online/
casino avec paypal
References:
http://www.advertiseajob.co.uk
online casinos that accept paypal
References:
talentsplendor.com
australian online casinos that accept paypal
References:
http://www.azena.co.nz
paypal casinos for usa players
References:
https://westorebd.com/employer/best-online-casinos-australia-top-aussie-gambling-sites-2025/
Backbiome is an advanced daily wellness supplement formulated to help support spinal comfort, reduce feelings of built-up tension, and promote freer, smoother movement throughout backbiome everyday life.