
Are you tired of constantly watering your plants by hand? Want a simple, affordable way to keep your garden well-hydrated without hassle? The good news is, you can create your own effective drip irrigation system in just a few minutes—and it costs barely anything! With a recycled plastic bottle and a few common tools, you’ll have a reliable watering system that saves you time and effort, all for just about 10 cents.
Let’s walk through the step-by-step process. No fancy equipment or complicated techniques needed—just common materials, a bit of patience, and some creativity.
Materials Needed:
- Empty plastic bottle: 1 or 2 liters works best
- Small nail or pin: For creating tiny holes
- A knife or pair of scissors: For cutting the bottle
- Optional: Waterproof tape or small stones for stability
Step 1: Prepare Your Bottle
Start by thoroughly cleaning your plastic bottle. Remove any labels and residues so that it’s completely clean. A clean bottle ensures no harmful residues leach into your plants and helps your system last longer.
Once cleaned, set it aside and gather your tools. Cleaning also makes it easier when cutting or puncturing the plastic later.
Step 2: Make the Drip Holes
Next, take your small nail or pin and carefully poke 2-3 tiny holes in the bottle’s cap. These holes will control the flow of water, so it’s important they are small enough for a slow, steady drip.
Tip: Test the size of the holes by briefly filling the bottle and checking how fast the water drips out. Adjust by creating even smaller holes if necessary. The goal is a gentle, continuous drip, not a stream.
Step 3: Cut the Bottom of the Bottle
Using your knife or scissors, carefully cut off the bottom of the bottle. This opening is essential for filling your bottle easily and allowing excess air to escape, which helps maintain a consistent drip.
Make sure the cut is clean and smooth. You don’t want jagged edges that could cause injury or make inserting the bottle into the ground difficult.
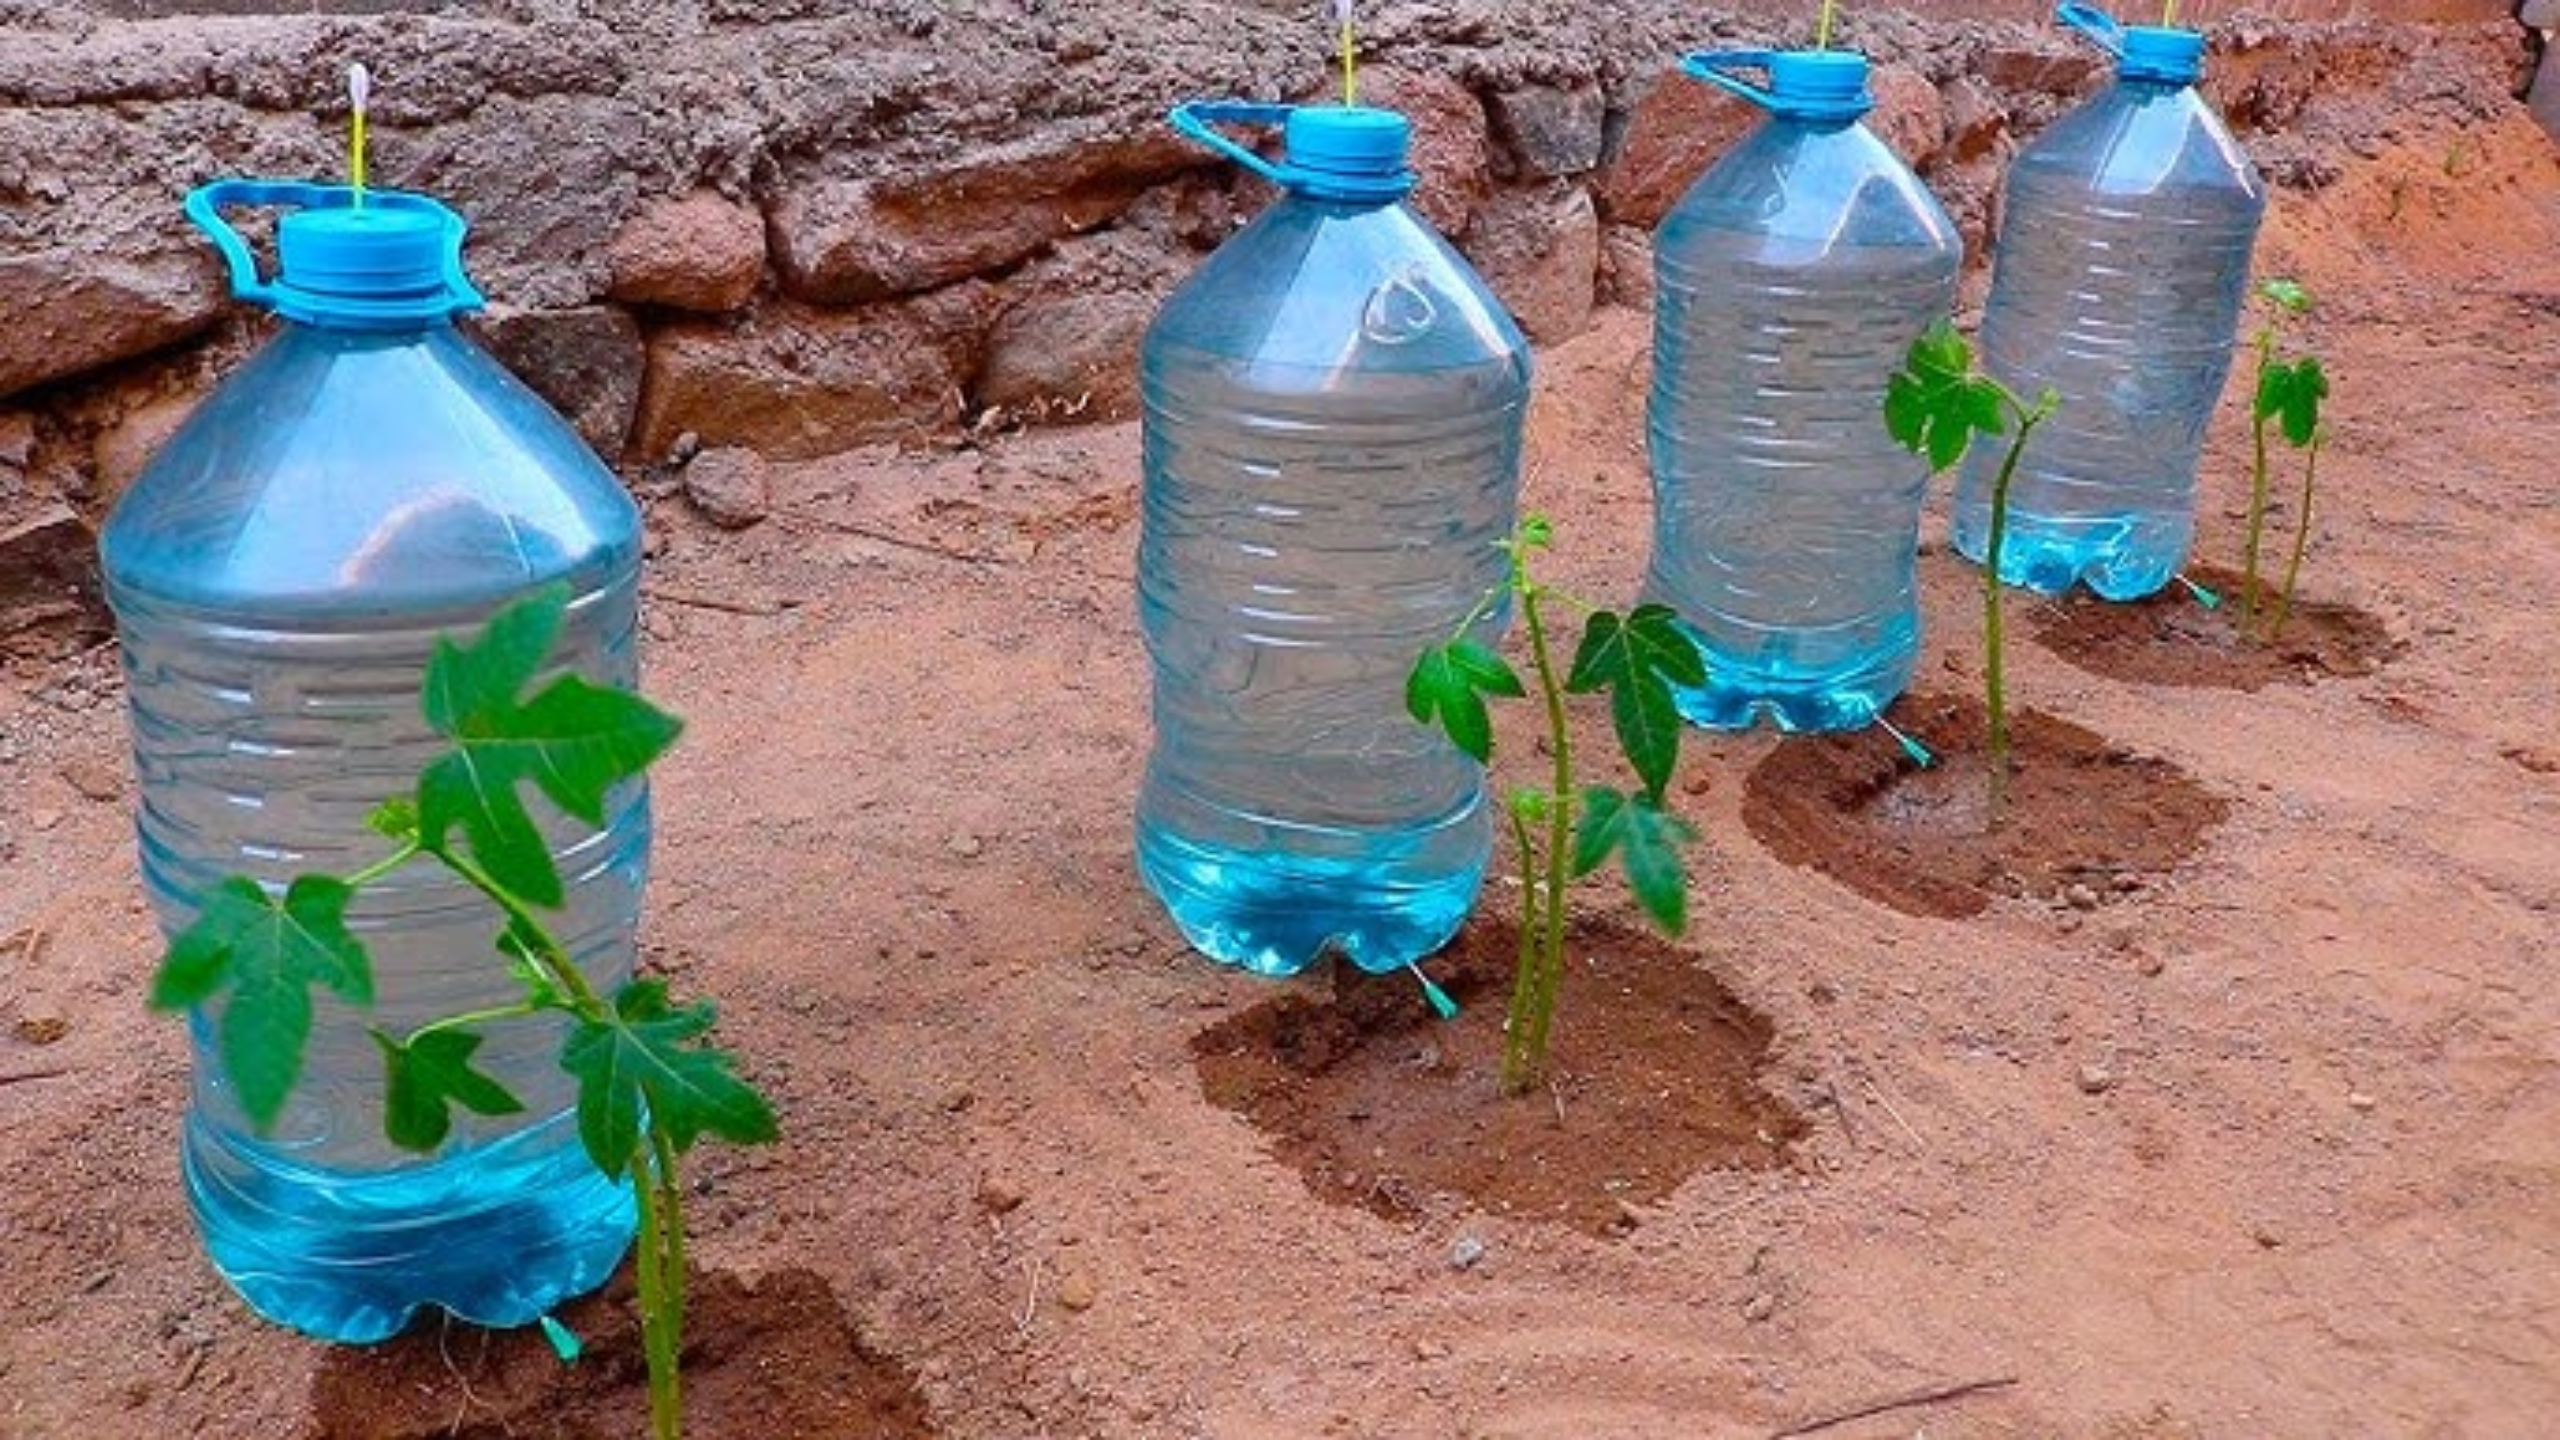
Step 4: Insert the Bottle into the Ground
Dig a small hole near your plant’s roots—about the size of the bottle’s diameter. The hole should be deep enough so that when you place the bottle, the lid is upside-down and close to the roots.
Insert the bottle upside down into the hole, ensuring it stands upright and stable. The opening with the holes in the cap should be just below the soil surface. This position allows gravity to help water flow slowly to the roots.
Pro tip: Use a little soil or small stones around the bottle’s neck to keep it steady.
Step 5: Fill the Bottle with Water
Now, fill your bottle from the open bottom. Given that the bottom is cut off, you can easily pour water directly into it. Once filled, seal the opening if necessary or simply cover with the bottle cap.
The water inside will slowly drip out through the holes you made in the cap, delivering moisture steadily to your plant roots.
Step 6: Adjust as Needed
After a few hours, check to see how the system is working. Is water flowing too fast or too slow? Adjust the size or number of holes in the cap to control the flow.
If the water drips too quickly, make the holes smaller or reduce their number. If it’s too slow, you can create slightly larger holes or add more holes.
Expert Tips for Optimal Use:
- Placement: Keep the bottle close to the plant’s roots, but avoid pressing it directly onto the plant’s foliage or stem to prevent rot or damage.
- Rinsing and refilling: Replenish your water supply regularly, based on your plant’s needs. During hot or dry periods, you might need to refill daily or every couple of days.
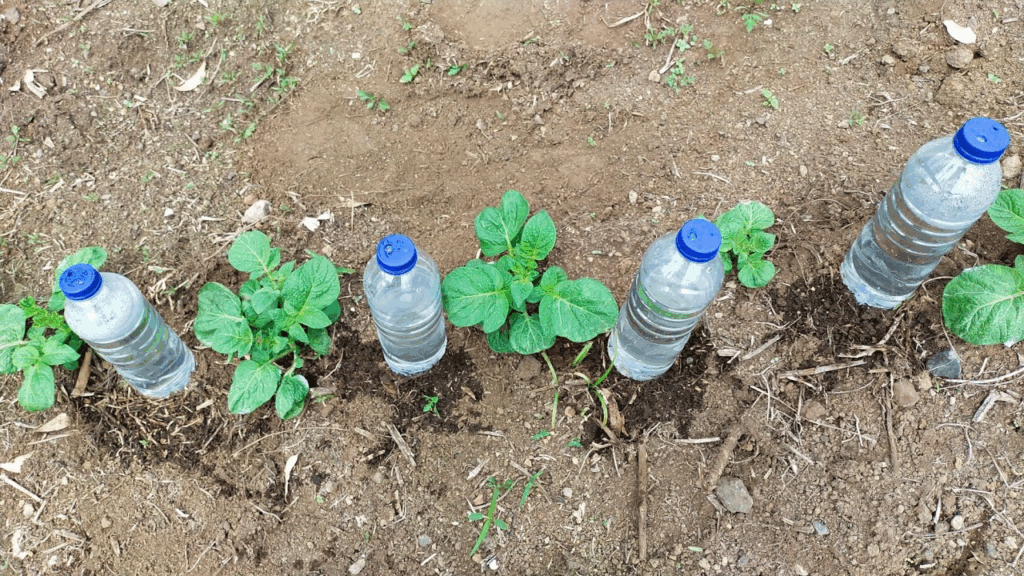
- Multiple bottles: For larger plants or flower beds, use several bottles to ensure all areas get enough water. You can set up a system of multiple bottles connected or placed at strategic points.
Why Choose This DIY Method?
This eco-friendly, cost-effective approach offers numerous benefits:
- Water efficiency: Delivers water directly to plant roots, reducing waste.
- Time saver: Set it up once, and forget about daily watering.
- Affordable: Costs only about 10 cents per bottle—perfect for gardeners on a budget.
- Easy to customize: Adjust the number and size of holes to tweak the flow rate.
Final Thoughts
Creating your own drip irrigation system at home is surprisingly simple and highly effective. It’s a great way to ensure your plants get consistent moisture, especially during hot days or when you’re away. Just a few minutes and a handful of materials can transform your garden care routine, making it easier than ever.
Would you like some ideas on how to further improve or expand this DIY setup? Or tips on how to use it efficiently during different seasons? Feel free to ask—I’m here to help your garden thrive!
0e10z0
Backbiome is an advanced daily wellness supplement formulated to help support spinal comfort, reduce feelings of built-up tension, and promote freer, smoother movement throughout backbiome everyday life.