
Gardening can be an incredibly rewarding activity, offering a sense of accomplishment and bringing natural beauty into your everyday life. Whether you’re just starting out or looking to refine your technique, this simple, step-by-step guide will help you cultivate healthy plants and enjoy the process from start to finish.
Choosing the Right Branch
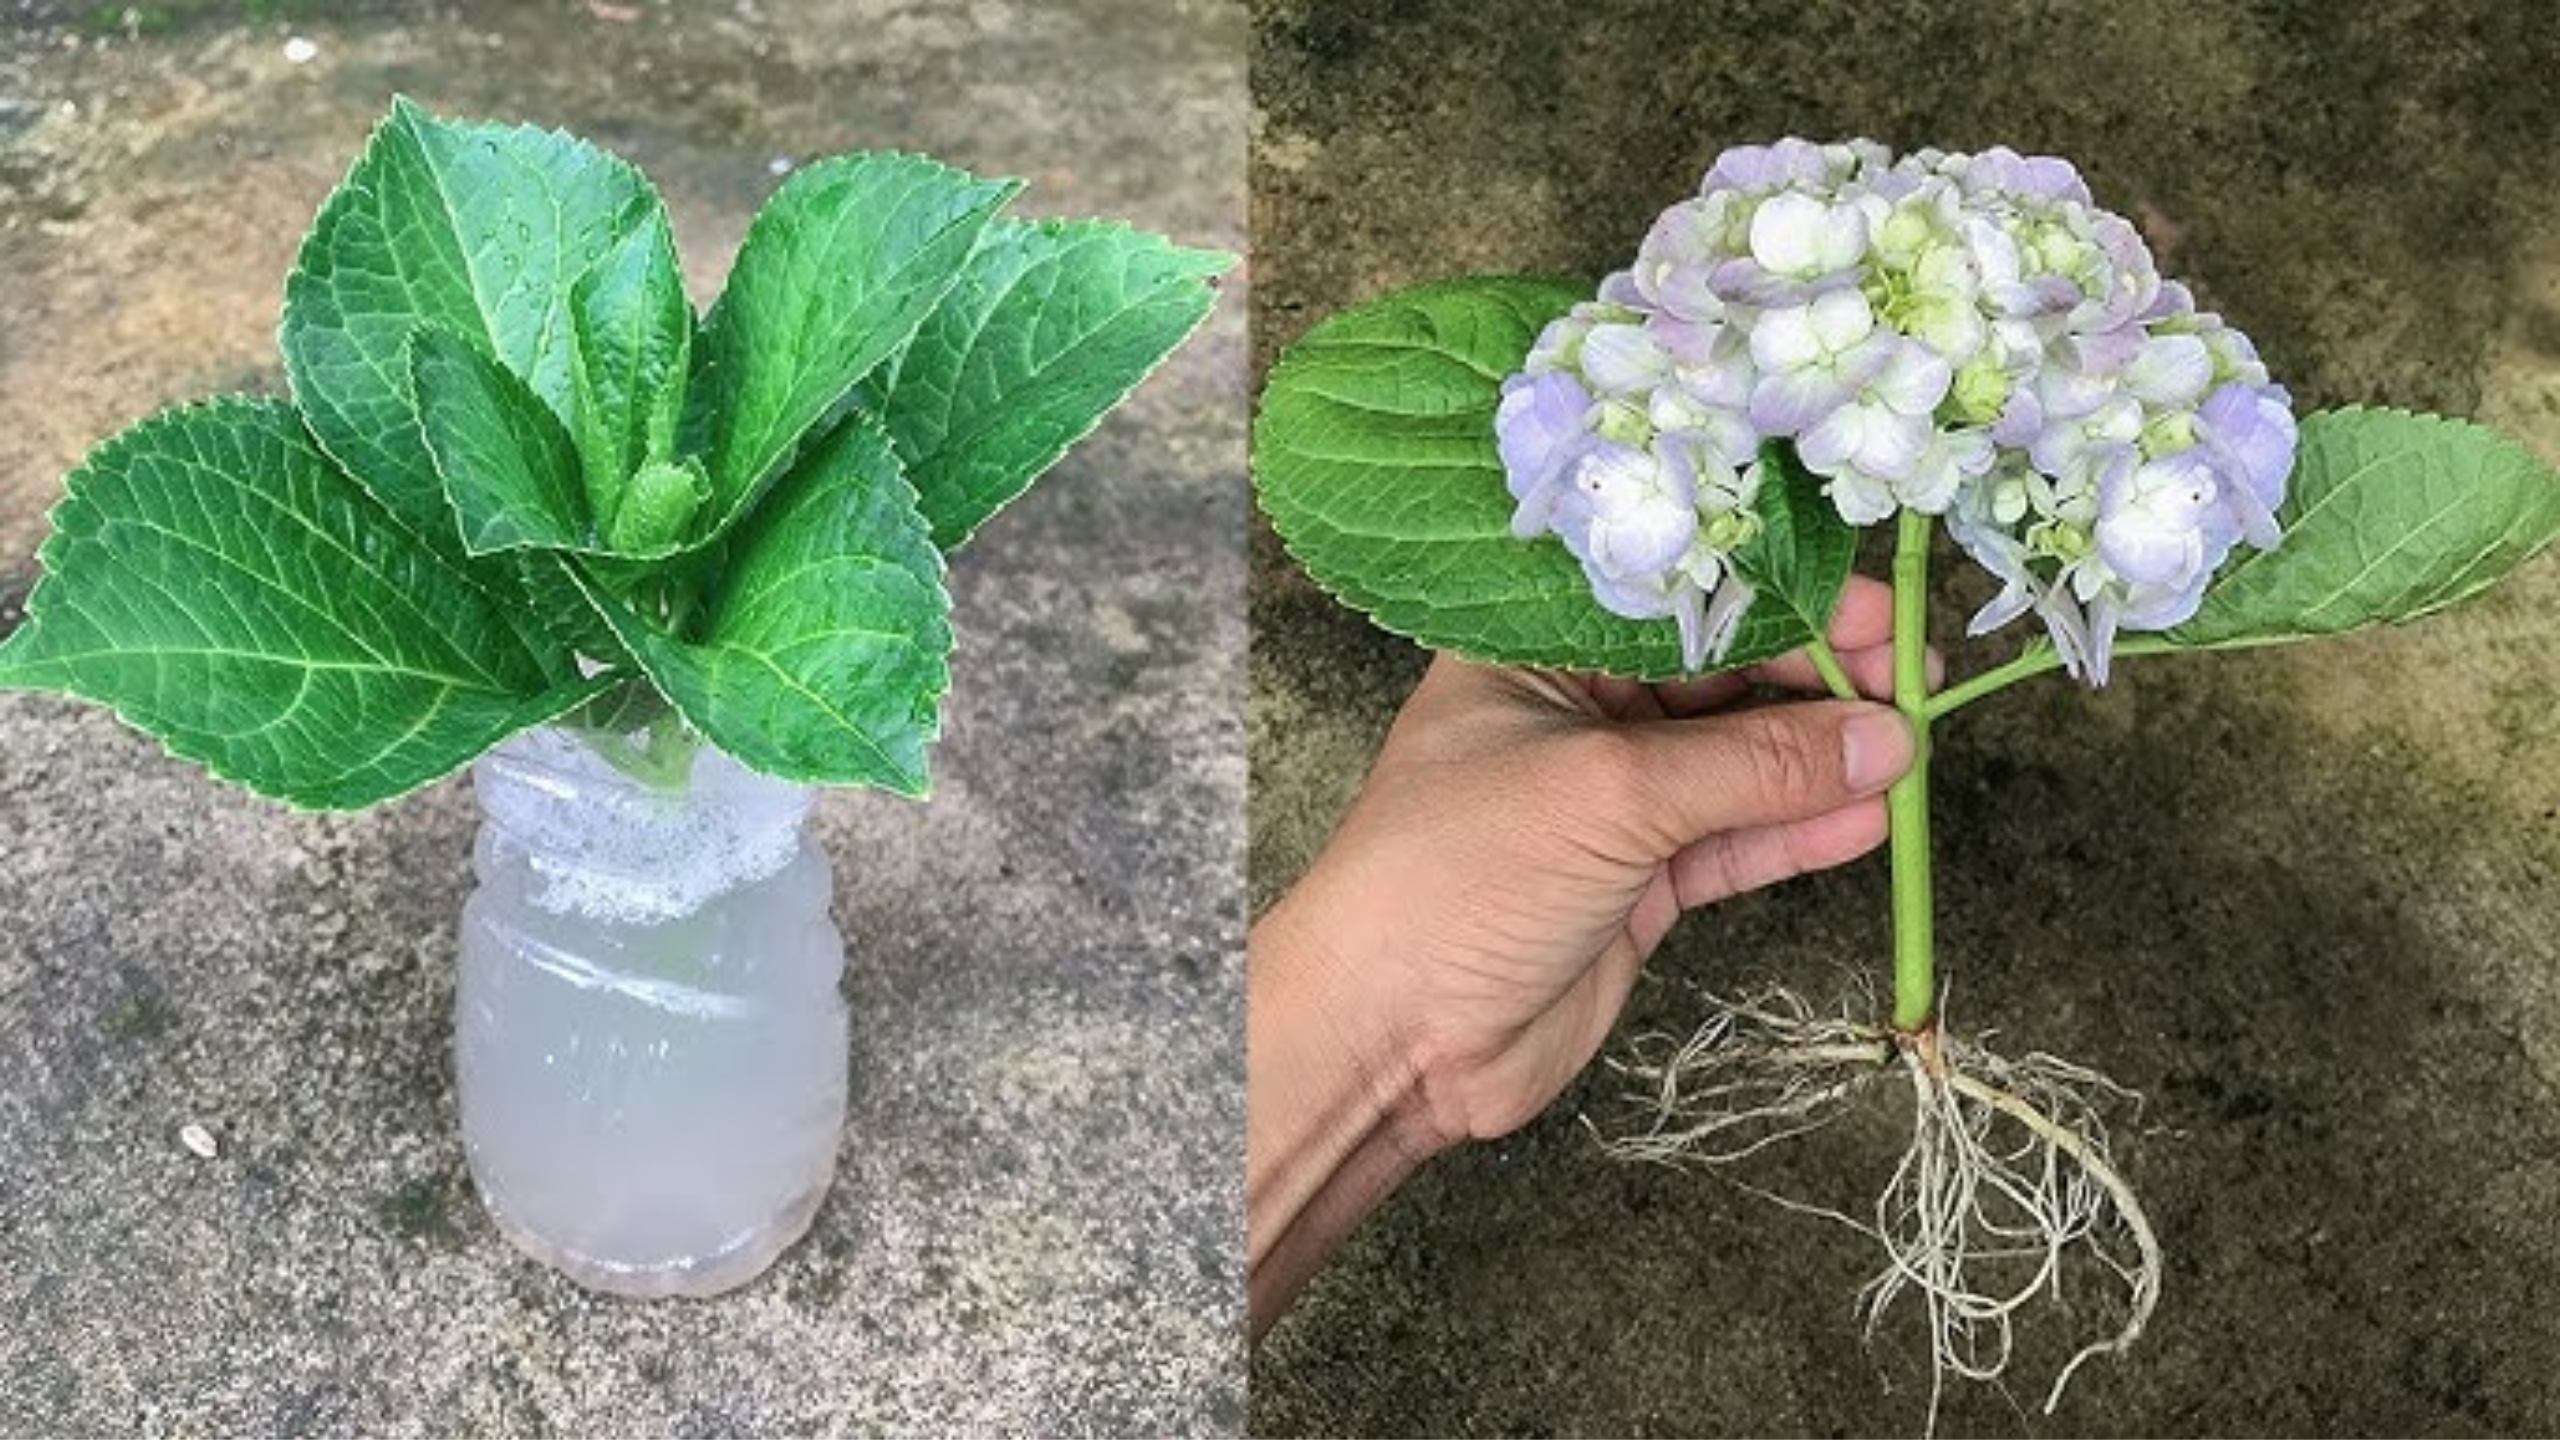
Your journey begins with selecting a healthy, vibrant branch. Look for a non-fruiting stem that shows fresh, vigorous growth. Ideally, the branch should be about 12 to 15 centimeters long, with at least two healthy leaf blades. Avoid sections that appear diseased or withered—healthy, lively branches yield the best results.
Preparing Your Cutting
Once you’ve picked the right branch, it’s time to prepare it for rooting.
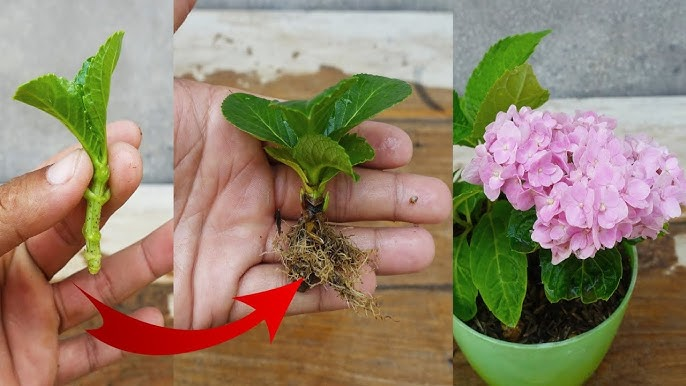
- Cut at an angle: Use clean, sharp scissors or pruning shears to slice the branch at a 45-degree angle. This increases the surface area for root development and helps prevent water runoff.
- Remove lower leaves: Strip away all leaves from the lower half of the cutting, leaving only the top two leaves intact. This minimizes water loss and encourages energy to go toward root growth.
- Optional hormone treatment: To boost rooting success, dip the cut end into a rooting hormone powder or gel. This natural substance stimulates root development and can improve your chances of success.
Planting the Cutting
With your prepared cutting, it’s time to plant it.
- Use a well-draining potting mix, ideally enhanced with perlite or vermiculite. This prevents water from pooling around the roots, reducing the risk of rot.
- Dig a small trench or hole in the soil, gently insert the cutting, and press soil firmly around the base to secure it.
Creating a Humid Environment
To promote root growth, maintain high humidity levels:
- Cover the pot with a clear plastic bag or a plastic wrap, creating a mini-greenhouse effect.
- Ensure the plastic does not touch the leaves—use sticks or stakes if necessary to keep it elevated.
This encapsulation helps retain moisture and warmth, essential for rooting.
Caring for Your Cuttings
Position your pot in a bright, warm spot, but away from direct sunlight to prevent overheating.
- Keep the soil consistently moist but not soggy.
- Check frequently for condensation inside the plastic cover. If excessive moisture accumulates, ventilate periodically by opening a small hole or loosening the plastic.
Temperature and humidity are key factors in successful rooting—patience is your best ally here.
Monitoring Root Development
After about 2 to 4 weeks, you can check for roots:
- Carefully lift the cutting and gently tug. Resistance indicates that roots are developing.
- If you see cracks or resistance, it’s a sign that the roots are strong enough.
Remember, each plant is different, and some may take longer than others to root.
Transplanting Your New Plant
Once your cutting has established a healthy root system:
- Transplant it into a larger pot or directly into your garden.
- Choose a sunny spot in the morning with some shade in the afternoon to prevent stress.
- After transplanting, water thoroughly and give the plant some time to settle.
Be gentle during this process to avoid damaging the fragile roots.
Patience and Persistence
Gardening is a learning journey. Not every cutting will root successfully, but don’t let that discourage you. With patience, care, and a little experimenter’s spirit, you’ll increasingly enjoy nurturing your plants.
Over time, you’ll become more confident, and your garden will flourish with beautiful, healthy plants. Remember, every gardener starts somewhere—your green thumb is just waiting to bloom!
Final Tips:
- Always use clean tools to prevent disease.
- Keep records of what works for you.
- Enjoy every step of the process—gardening is as much about the experience as the final result.
order generic amoxicillin – combamoxi.com buy amoxicillin sale
order diflucan 200mg generic – on this site order diflucan 200mg pills
where to buy lexapro without a prescription – anxiety pro escitalopram pills
cost cenforce – cenforce oral buy cenforce 100mg sale
cialis softabs online – ciltad generic tadalafil liquid review
buy cialis overnight shipping – this tadalafil cialis
where do you buy viagra – buy viagra 50 mg buy viagra online in the uk
More articles like this would remedy the blogosphere richer. https://buyfastonl.com/azithromycin.html
This website exceedingly has all of the low-down and facts I needed there this participant and didn’t know who to ask. efectos secundarios de neurontin
Thanks on putting this up. It’s okay done. https://prohnrg.com/product/get-allopurinol-pills/
More content pieces like this would create the web better. https://ursxdol.com/levitra-vardenafil-online/
I am in fact thrilled to glance at this blog posts which consists of tons of profitable facts, thanks object of providing such data. gГ©nГ©rique du viagra prix
Proof blog you have here.. It’s severely to find great worth script like yours these days. I truly recognize individuals like you! Withstand care!! https://ondactone.com/simvastatin/
I’ll certainly carry back to be familiar with more.
colcrys pill
This is the compassionate of scribble literary works I in fact appreciate. http://iawbs.com/home.php?mod=space&uid=914830
dapagliflozin uk – buy dapagliflozin 10 mg online cheap buy forxiga 10 mg online cheap
orlistat pills – https://asacostat.com/ buy orlistat 120mg for sale
I’ll certainly bring to skim more. https://sportavesti.ru/forums/users/jnjup-2/
Righteous came across this article – https://www.cornbreadhemp.com/pages/how-can-i-verify-the-thc-content-in-cannabis-gummies and it explained all things really clearly. I had a end of questions up CBD gummies and this on one’s beam-ends it down in a condition that truly makes sense. Super advantageous to for all infer from something that’s easy to understand without all the confusing jargon.
You can keep yourself and your stock nearby being cautious when buying medicine online. Some pharmaceutics websites control legally and put forward convenience, solitariness, rate savings and safeguards for purchasing medicines. buy in TerbinaPharmacy https://terbinafines.com/product/arimidex.html arimidex
I’ll certainly bring to be familiar with more. TerbinaPharmacy
With thanks. Loads of knowledge!
https://t.me/s/iGaming_live/4868
Хотите знать, кому можно доверять в мире онлайн-казино? Наш справочник проводит независимую экспертизу: проверяем лицензии, процесс выплат и качество игр. Рейтинги объективны — мы не торгуем позициями. Принципы оценки открыты для всех. Подойдёт как новичкам, так и опытным игрокам. Следим за изменениями и регулярно обновляем информацию. Узнать о рейтингах казино
best online casino games in usa
best online casino real money
jackpot casino nulled themes
betmgm casino login online casino betmgm play betmgm promo $10 for $200
WOW Vegas is a exceptionally rated free-play plank with thousands of slots and strong gambler rewards programs. Proper and unimperilled, it lets users make use of wow vegas casino vibes while collecting Sweepstakes Coins with a view concealed true rewards.
Embark on a journey through captivating casino classics and modern hits. what is crown coins ensures fair play with certified RNG technology. Grab your free spins and hit the jackpot!
Sweet Bonanza turns every spin into a delicious thrill ride. Collect sweet bonanza 1000 matching treats anywhere for payouts, then unleash the free spins round. Sweet rewards await!
Unleash unlimited excitement and earnings. buffalo slot machine online offers stacked wilds, free game frenzy, and jackpot herds. Play wild!
Join Chumba Casino and get instant free chumba casino promo code to play with. Real cash prizes, huge game selection, daily bonuses — everything you love. Sign up today!
Over 5,000 games, original best stake slots 2026 exclusives, and weekly giveaways worth millions. Crypto deposits in seconds, withdrawals even faster. This is how modern gambling should feel.
Join DraftKings casino bonus Casino for epic value. Play $5 to unlock 500 spins on hot games plus up to $1K back if the first day dips. Win like never before!
Zdravy rozum vitezi: stejny ucinek za zlomek ceny
Amoxicilin cena
Upon the millions delightful momentous on fanduel casino Minnesota – the #1 tangible coins casino app in America.
Respite c start your $1000 OPERATE IT AGAIN honorarium and refashion every spin, хэнд and roll into real readies rewards.
Fast payouts, whopping jackpots, and continuous fight – download FanDuel Casino now and start playing like a pro today!
One click and the night belongs to you – https://gntopama.com/mostbet-casino-recenze-2026/ , Spin until even RNG starts taking notes .
Pharmacie conviviale avec des solutions pour tous les Гўges – https://www.pharmacie-odeon-saint-joseph.com/mentions-legales/ , Pharmacie engagГ©e pour une santГ© accessible et responsable .
Mình đã giới thiệu sân cầu 66b triều khúc cho vài người bạn dùng thử. TONY05-21
Backbiome is an advanced daily wellness supplement formulated to help support spinal comfort, reduce feelings of built-up tension, and promote freer, smoother movement throughout backbiome everyday life.